Any kind of light is a must for photography. You just cannot photograph without light. There are various types of light that no doubt you are familiar with:
- Natural light from the sun
- Ambient light (could be natural or manmade)
- Artificial light such as strobes, incandescent or tungsten, fluorescent, flash and LED lights
- Infrared light
This article will give you tips for using two LED lights to achieve moody portraits.
Tip #1 – Modify your light
The best light is always modified. Even sunlight is better with a diffuser. Direct sunlight produces hard shadows and harsh light. Clouds soften and diffuse sunlight (by making it spread over a larger area). On a bright cloudless day, shooting in open shade minimizes the harshness, but still takes advantage of the beautiful natural light. Shooting in shadows, located next to reflective surfaces, also leverages any bounced natural light. These techniques are simply modifiers of natural and available light.
Modifiers are more obvious for artificial light. There is a plethora of choice when it comes to these: soft boxes, diffusers, reflectors, foam cores panels, umbrellas, flags to name a few.
The same is true for LEDs when it comes to the need for modifiers. There are many types of LED lights, including ones that you can adjust their brightness as well as colour temperature. But, just like the above, regardless of brightness intensity of the continuous light, it is essential to modify LEDs to get soft, pleasing, beautiful light -overall a better quality of light.
I’m going to show you a setup using modified LEDs to create moody portraits.
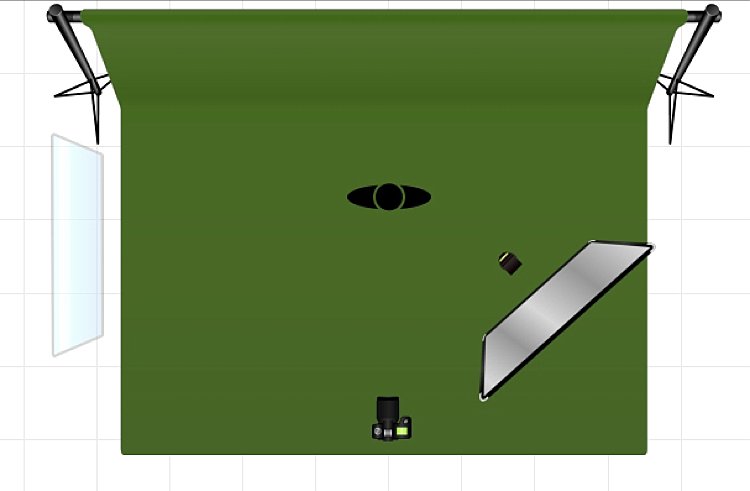
Using a window to camera left and an LED, bounced into a diffusion panel, to the right.
The main light I used here is the Magic Tube, the cheaper alternative to Westcott Ice Light. You can adjust the brightness of the light, and it comes with a tungsten gel if you need it. Apart from looking lightsaber Star Wars cool, the Magic Tube also comes with a charger that allows continuous charging while it is being used. So you can always have access to power by just plugging it in if the battery charge runs out.
You can also use window light and just one LED for this setup. Substitute the main light with your window light, but make sure you are diffusing the light coming from a window with a sheer voile, or fabric to soften it.
To diffuse the main light, I covered it with the Rogue Bender diffuser for the strip light. This is just a piece of rectangular translucent material which simply covers the light.
Tip #2 – Position your lights for contrast
Position the main light at 45 degrees to the subject, up high to emulate light coming from a tall window. Use a diffusion panel or a piece of sheer fabric. The less opaque the fabric, the more diffuse your light will be. To further modify the Magic Tube after I have attached the Rogue Bender diffuser, I also used the diffusion (translucent part) panel of a 5-in-1 reflector and had an assistant hold the panel in front of the main light. Having these two diffusers together reduces the strength of the light, but also greatly softens its quality.
The second light is also an LED, this time a small video light positioned to camera right, at 45 degrees, but at the same height as the subject. However, instead of using a diffuser to modify this light, you can turn it around so the light faces away from the subject, and put a reflector in place to bounce the light on. The subject (filling in the shadows) gets illuminated by the soft bounced light from the reflector.
For a moody look it is essential to have both light and shadow in the portrait. You need to watch where the main light falls, and the shadow it’s creating. You want the shadowed area to still have some detail, instead of being completely black. The bounced light from the reflector takes care of this.
Tip #3 – Use a dark background
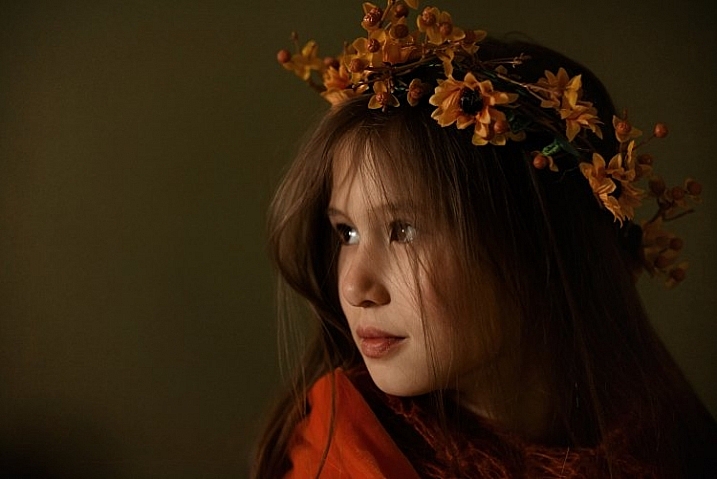
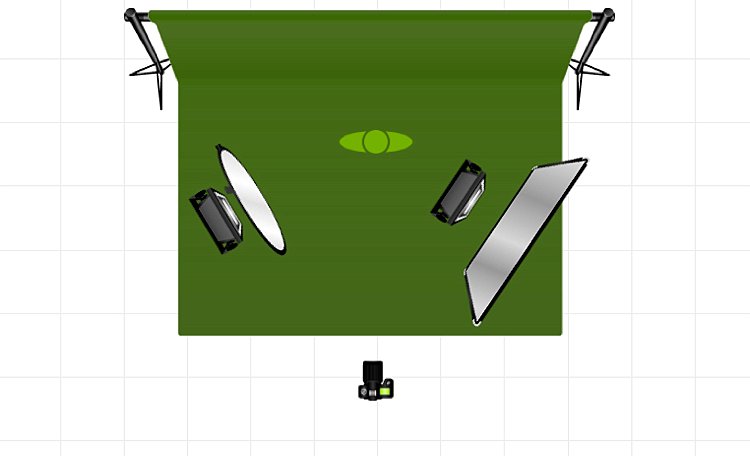
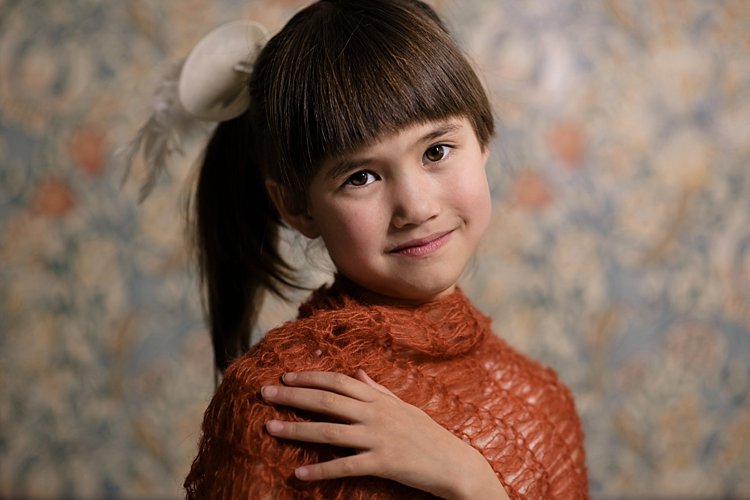
I tried the exact same setup, although the lights were positioned the opposite way, with the main light on camera right. This setup had a lighter background, in this case lightly patterned, and the results were far from moody. I did not want to shoot at a smaller aperture as I wanted to blur the pattern of the wallpaper in the background. I also wanted to emulate sunlight shining through a window illuminating a dark room, and this setup just did not work to achieve that look.
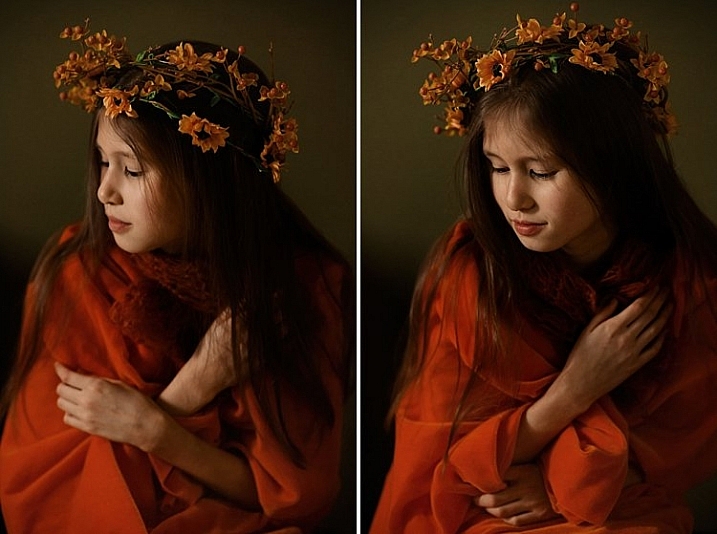
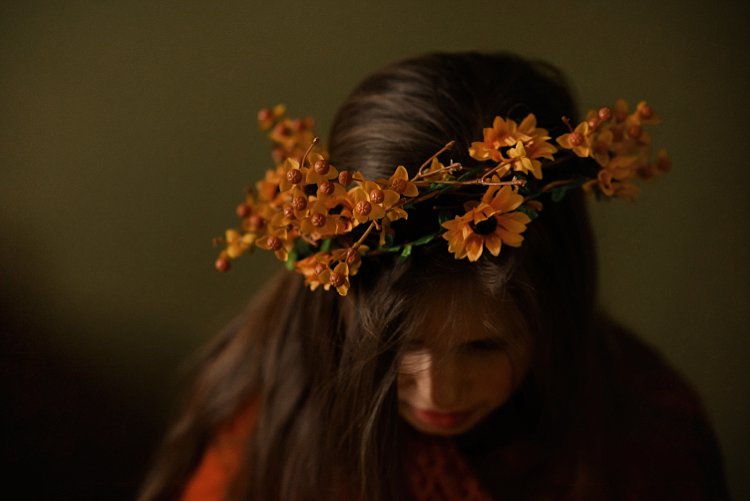
I’m sure if I had gridded the main LED to avoid spill into the light background, while increasing my shutter speed, the background would have gone darker, but I would have lost the soft and atmospheric look I was after. Compare this photo below to the one underneath it, and it’s pretty obvious the darker background is most definitely better at achieving the moody look.
I hope this article gave you new ideas to try. Do share other tips you have to achieve moody portraits!
The post How to Use Two LED Lights to Achieve Moody Portraits by Lily Sawyer appeared first on Digital Photography School.
from Digital Photography School http://digital-photography-school.com/how-to-use-two-led-lights-to-achieve-moody-portraits/
No comments:
Post a Comment