Wednesday 31 May 2017

Manual Mode or Exposure Compensation – Which is Best?

As you may know, cameras often get exposure wrong. The question is, what do you do when you realize that the exposure settings suggested by your camera are not right?

You have two options. One is to switch to Manual mode and set the ISO, aperture, and shutter speed yourself. The other is to use exposure compensation (and Aperture or Shutter Priority mode).

The best solution depends on the situation in which you find yourself, plus the configuration of your camera’s dials. For example, with a Canon EOS digital SLR it’s easy to apply exposure compensation by moving the Quick control dial on the back of the camera. It’s so simple you don’t need to take your eye away from the viewfinder.

Exposure compensation versus manual mode

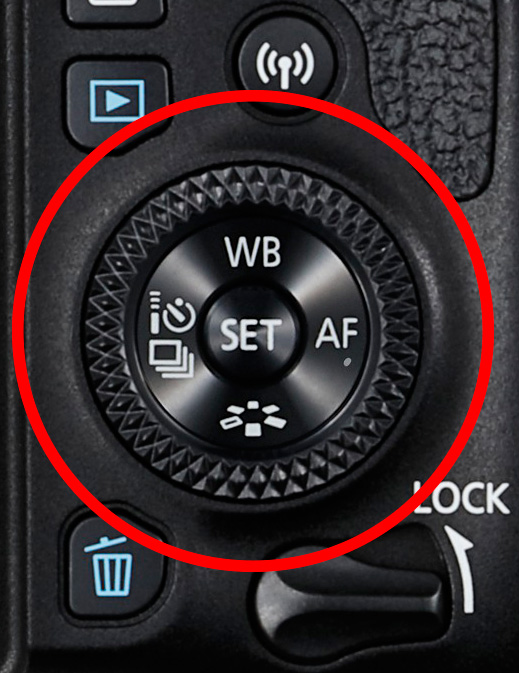
The Quick control dial on the EOS 77D.

On my Fujifilm X-T1, the exposure compensation dial is on top of the camera. It’s harder to get at and nearly impossible to adjust without taking your eye away from the viewfinder. But the aperture ring on the lens makes it easy to go to Manual mode and adjust exposure by changing the aperture. An optional live histogram in the viewfinder helps you see if exposure is accurate before pressing the shutter (an advantage of some mirrorless cameras).

Exposure compensation versus manual mode

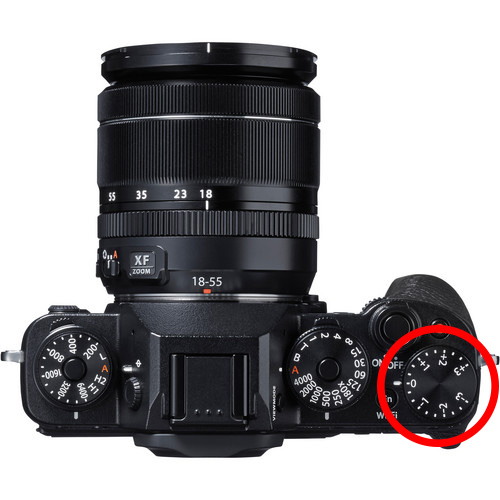
The exposure compensation dial on the Fujifilm X-T1 is much harder to reach.

These are good examples of how hardware can push you in one direction or another. My Canon SLRs pushed me towards exposure compensation, and my Fujifilm X-T1 pushes me towards using Manual mode.

Using Manual mode

Let’s look at Manual mode first. In Manual, you set the ISO, aperture, and shutter speed yourself. There are certain situations when using Manual mode (as opposed to Programmed Auto, Aperture Priority or Shutter Priority with exposure compensation) is beneficial. Let’s look at a few.

1. Shoot in Manual when the light level is constant

If the ambient light level is steady, you don’t need to change the exposure settings once you have decided which ones to use. Automatic exposure modes are influenced by the reflectivity of the subject and the exposure reading can change even if the light levels don’t.

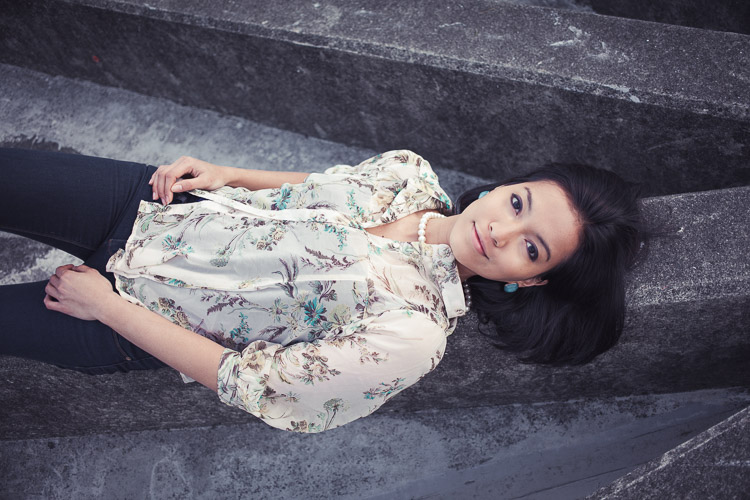
That makes Manual mode ideal for this kind of situation. Once you’ve set the exposure you don’t need to change it. I like to use Manual mode when making portraits in natural light. Once I’ve set the exposure I’m free to concentrate on directing the model.

Exposure compensation versus manual mode

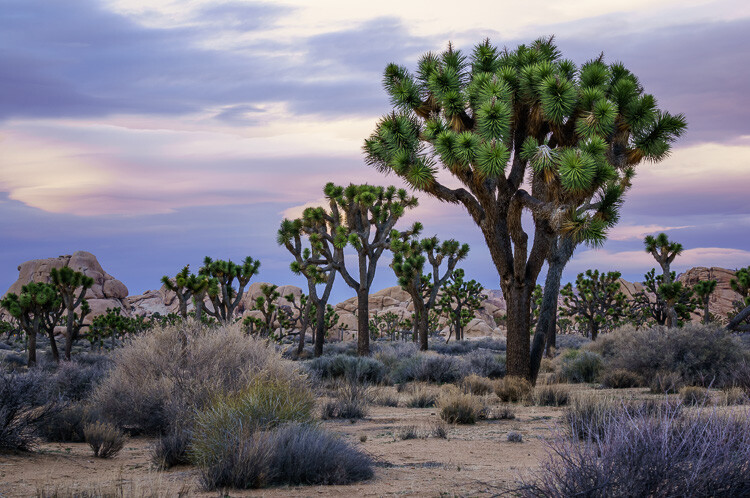
2. Shoot in Manual when you’re photographing landscapes and using a tripod

In this situation, you have plenty of time to assess exposure. Manual mode is ideal because you can set a low ISO (for image quality), a small aperture (for depth of field) and change the shutter speed to suit the light levels. It’s also easy to make adjustments to allow for any polarizing, neutral density or graduated neutral density filters you may be using.

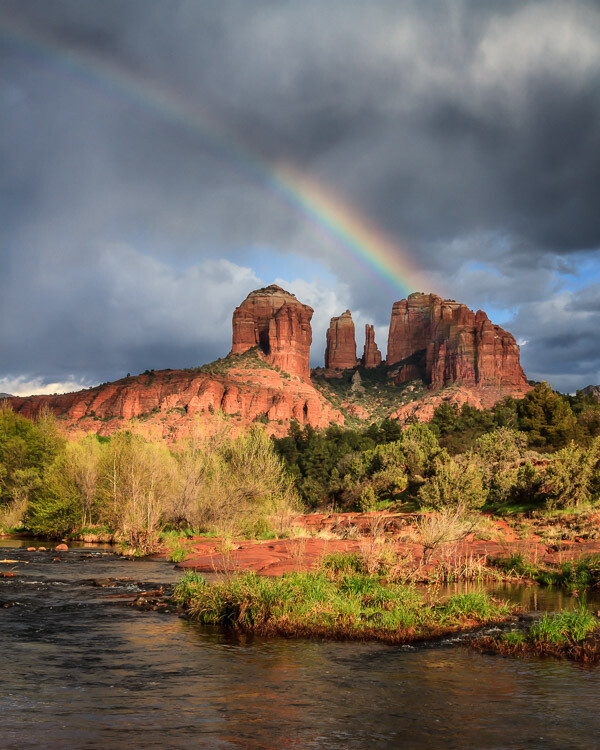
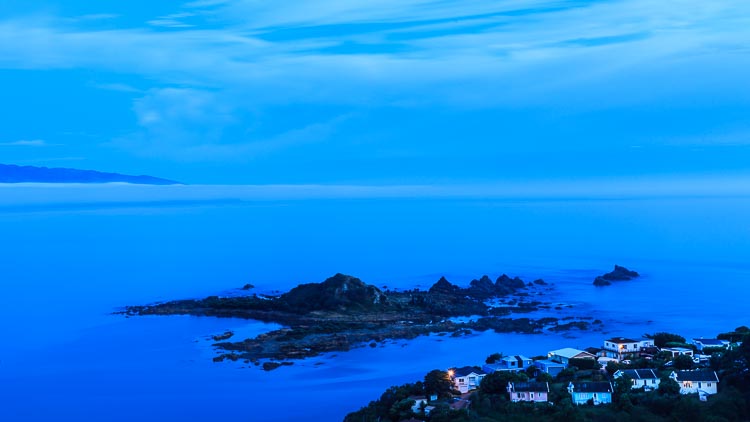
If you’re shooting landscapes at dusk, while the light is fading, Manual mode also works well. After you take a photo, just check the histogram. As it moves to the left, which it will as the light fades, dial in a slower shutter speed to compensate.

Exposure compensation vs. manual mode

3. Use Manual Mode when you’re using manual flash

If you’re using a flash set to manual the output from the flash is the same every time. In that situation, it’s best to adjust the camera settings manually so the exposure is consistent from frame to frame.

To create the portrait below, I worked with both the camera and flash set to manual. Setting your flash to manual only works when the flash to subject distance doesn’t change.

Exposure compensation vs. manual mode

4. Use Manual mode for long exposure photography

If you’re doing long exposure landscape photography and your shutter speed (exposure time) is longer than 30 seconds then you need to use Bulb mode. This is another form of Manual mode. Except that rather than telling the camera what shutter speed you want it to use, you do so by using the camera’s bulb setting and a remote release.

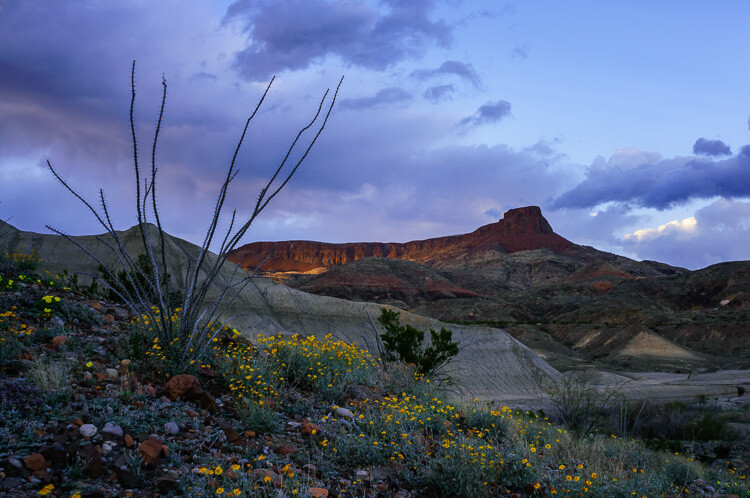
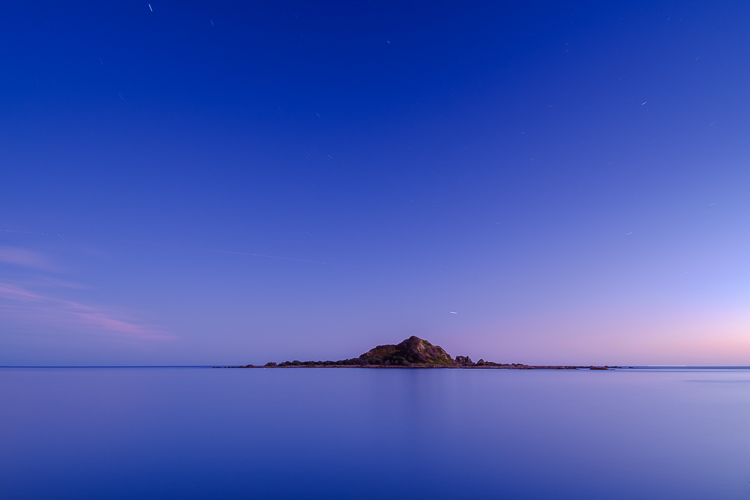
I used Bulb mode to make this landscape photo with a shutter speed (exposure time) of 82 seconds.

Exposure compensation vs. manual mode

Using Exposure Compensation

The alternative to Manual mode is to set your camera to an automatic exposure mode and use exposure compensation to override the camera’s settings.

The three best automatic exposure modes to use are Aperture Priority, Shutter Priority or Programmed auto. Other exposure modes, such as Landscape and Portrait, don’t give you enough control. On some cameras (such as Canon EOS) you can’t adjust exposure compensation when using one of these modes.

These are some of the situations where exposure compensation may be better than Manual mode.

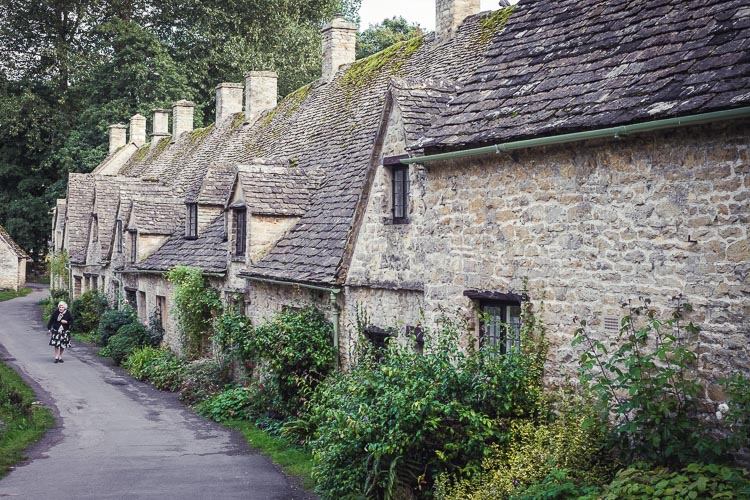
1. Use Exposure Compensation for street and travel photography

If you are taking photos of people in the street the required exposures can vary wildly. One moment you may take a photo of something in the sun, the next you may photograph something in the shade. The sun may also be going in and out between the clouds.

In this situation, you want to concentrate on finding interesting things to photograph and creating a good composition. If you have to stop and think about exposure, then you may miss the shot. Automatic exposure modes help greatly.

Exposure compensation vs. manual mode

2. Use Exposure Compensation when you are using on-camera flash in an automatic mode (TTL)

If you have the on-camera flash set to an automatic mode, then the camera needs to be set to evaluative or matrix metering, the camera’s most advanced metering mode, to take full advantage of that. The camera and flash work together to calculate the correct exposure.

Setting your flash to automatic (TTL or E-TTL) works best when the subject to flash distance is constantly changing. Using automatic means your camera can adjust the output of the flash as it needs to.

3. Use Exposure Compensation when shooting sports or wildlife

This is another situation where the light level is likely to change frequently and you need to concentrate on tracking the action and capturing important moments. You don’t want to be thinking about exposure when trying to capture the peak of the action in sports or photographing fast-moving wildlife. Let your camera do the work, and use exposure compensation if you have to.

Conclusion

Everybody works differently, so the points in this article should be taken as suggestions only. The more experienced you become as a photographer the more you will learn to judge whether you should use Manual mode or Exposure Compensation to take control of your exposure.

It may make it easier to think of it in terms of time. If you have more time to think about your camera settings, then use Manual mode. If you have less thinking time and need to be ready to react quickly to capture the action, then use an automatic exposure mode and Exposure Compensation.

Do you prefer to use Manual mode or an automatic exposure mode with exposure compensation? Please let me know in the comments below,


Want to learn how to get perfect exposure on your digital camera? Then check out my new ebook Mastering Exposure and say goodbye to all your exposure problems!

The post Manual Mode or Exposure Compensation – Which is Best? by Andrew S. Gibson appeared first on Digital Photography School.


from Digital Photography School https://digital-photography-school.com/manual-mode-versus-exposure-compensation/

5 Surprising Habits That Will Make You a Better Photographer

When you’re learning photography, it seems natural to pay the most attention to the gear and techniques you use to create images. You’ve probably received advice about developing great habits like photographing every day, carrying your camera everywhere you go, trying different compositions, learning processing skills, and backing up your photos. These things are important, no doubt! But there is more to becoming a better photographer than that.

Getting the shot often comes down to being there at the right time, so these tips have to do with getting out in the field and staying out in the field. If you cultivate these surprising habits, you’ll surely become a better photographer.

Canon Beach, Oregon, by Anne McKinnell - better photographer

#1 – Research Locations

Before you set off on your photo shoot, doing a little research can go a long way to making better images. First, think about what potential subjects are available. I like to create a Pinterest board and start collecting images I like from the location. Once you get an idea of what is there, how can you create images that are different from what you have seen? Is there a different perspective you want to check out? Or maybe a night shot? Don’t forget to take note of the direction of light in the images you see. Imagine what it would look like at a different time of day.

Once you get an idea of what is there, how can you create images that are different from what you have seen? Is there a different perspective you want to check out? Or maybe a night shot? Don’t forget to take note of the direction of light in the images you’ve seen. Imagine what it would look like at a different time of day.

Joshua Tree National Park, California, by Anne McKinnell - habits better photographer

This is the location where the Joshua Trees are the densest in Joshua Tree National Park, California.

The second part of your research should be looking at maps and figuring out where exactly the best subjects are located and how to get there. Is the location close to the road or will you have to hike there? How long will it take?

#2 – Watch the Weather

Keeping a close eye on the weather forecast will dramatically affect your photos. Remember, bad weather is usually a good thing for photography! Storms bring the potential for seeing dramatic clouds, wet leaves, and even rainbows. You’ll get photos with fewer people in them too.

Red Rock State Park, Sedona, Arizona by Anne McKinnell - habits better photographer

Waiting for a break in the weather resulted in this rainbow at Cathedral Rock, Arizona.

When I was visiting Cathedral Rock in Sedona, Arizona, I noticed that there were a lot of people around and it was difficult to get a photo without a lot of tourists in it. Then it started to rain and everyone left. I waited in my truck for 45 minutes during the downpour. Mine was the only vehicle in the parking lot, and when the rain began to die down, I headed out and was rewarded with a beautiful rainbow. I had the location all to myself.

If a clear sky is in your forecast, instead of photographing your scene with a plain blue sky, you might have the potential for a great night shot.

While you’re at it, don’t forget to check when the sun rises and sets and when the moon rises and sets. If you’re going to be on the beach, tides are also important.

#3 – Carry Less Stuff

Whether you choose to go out with your camera and only one or two lenses or switch your whole system to a lightweight mirrorless system, you’ll undoubtedly find that you can hike farther and get to more remote locations with less weight on your shoulders. The potential for finding unique subjects and unique compositions increases the farther away you get from the beaten track.

Big Bend Ranch State Park, Texas, by Anne McKinnell - habits better photographer

I don’t think I would have made it this far up the hill if I had carried all of my heavy gear.

#4 – Don’t Forget the Comfort Essentials

Despite the last tip about carrying less stuff, it’s equally essential that you carry the right stuff to allow you to stay out there longer. Anything that makes you uncomfortable in the field will probably cause you to leave earlier than otherwise.

Thirst, hunger, being cold or wet, getting bitten by bugs and looming darkness are just a few things that can make you leave a location too soon. A few things on my “always carry” list are food, water, rain jacket, sweater, bug spray, and a headlamp. These items will get you more potential shots than that extra lens.

Organ Pipe Cactus National Monument, Arizona, by Anne McKinnell habit better photographer

I probably wouldn’t have this photo if it were not for my trusty headlamp that I used to make my way back through the cacti in the dark.

#5 – Hike With a GPS

Getting lost is one of my fears when I’m out exploring, so I have started hiking with a handheld GPS. It took me awhile to get used to it because it’s not the fancy kind with built-in maps. All I do is mark a waypoint where I park my truck and then it tracks me as I walk. No cell signal or internet required. I can always figure out the direction to get back to my waypoint, or even follow my tracks to go back using the exact route I took to go out. It’s worth it to carry a couple of extra batteries for it too.

Now that I have the GPS, I am more willing to go off the trail and explore new things. It’s a whole new level of freedom!

Bisti Badlands, New Mexico, by Anne McKinnell - habits better photographer

At Bisti Badlands, New Mexico, it is very easy to get lost with no trails and strange rock formations in every direction. My GPS was a lifesaver.

Conclusion

These tips should help you figure out where to go when to get there and make sure you are comfortable in the field so you can stay as long as you like to get that special shot. Sometimes photography is a waiting game, but if you are comfortable you can be patient and wait for the magic moment to happen.

The post 5 Surprising Habits That Will Make You a Better Photographer by Anne McKinnell appeared first on Digital Photography School.


from Digital Photography School https://digital-photography-school.com/5-habits-make-better-photographer/

U.S. Probing Nikon Cameras for Patent Infringement after Zeiss Complaint

There have been some legal rumblings in the camera industry over the past couple of months. It’s an ongoing patent dispute between Nikon and two other companies involved in camera technologies: Carl Zeiss and ASML. The latest news is that the United States has opened an official patent infringement investigation into Nikon’s products.

Reuters reports that the U.S. International Trade Commission launched its probe last Friday to take a close look at Nikon digital cameras, software, and components. The inquiry comes in response to complaints filed by Carl Zeiss and ASML, which are based in Germany and The Netherlands, respectively.

This legal and business dispute between the three companies began back in April, when Nikon filed lawsuits against Zeiss and ASML, accusing the two companies of using Nikon’s patented lithography technology without permission. The lithography technology is used to manufacture semiconductors that are found in a wide range of electronic devices.

In response, both Zeiss and ASML countersued Nikon, accusing Nikon of infringing on multiple patents, including those related to the technology inside Nikon digital cameras. Both companies also denied violating Nikon’s patents, and said they had no choice but to countersue in response to Nikon’s legal action.

Nikon, Zeiss, and ASML say they’ve held private negotiations over the years to come to an agreement over the patented technologies, but failed to do so. A retired judge in the U.S. was also brought in to help mediate in late 2016, Reuters reports, but the companies failed to reach a settlement.

Zeiss and ASML have previously paid Nikon $58 million and $87 million in 2004, respectively, according to Nikon.

The Japanese publication SankeiBiz writes that if Nikon is found by the U.S. ITC to have violated patents in its digital cameras, there’s a chance that the government could put a halt on sales of those cameras in the U.S. It seems more likely, however, that this dispute would be settled out of court before reaching that point.

And although the U.S. investigation into Nikon cameras sounds ominous, the company says it’s standard practice in response to many infringement complaints that are filed. Nikon also accuses Zeiss and ASML of purchasing 3rd party patents for the sole purpose of retaliating legally against Nikon.

“The United States International Trade Commission institutes an investigation in response to almost every complaint that is filed,” a Nikon spokesperson tells PetaPixel. “Thus, the decision to institute based upon ASML and Zeiss’s complaint is an expected and routine procedural event.”

“The ASML and Zeiss complaint came days after Nikon sued them for infringing patents on lithography technology that Nikon developed and uses,” the company says. “By contrast, ASML and Zeiss assert only patents they have purchased from third parties.”

“We firmly believe that they purchased the patents as a retaliatory litigation tactic and without any genuine intention to put those patents to commercial use. We look forward to demonstrating to the ITC that we do not infringe ASML’s or Zeiss’s intellectual property.”


from PetaPixel https://petapixel.com/2017/05/31/u-s-probing-nikon-cameras-patent-infringement-zeiss-complaint/

How Much Do Oliphant Backdrops Cost? Answer: Over $1,000

Here’s the World’s First Multi-Aperture Pinhole Lens for DSLRs

Pinhole photography is still alive and well in the digital age, and this new pinhole lens from Thingyfy is the first to offer a variable aperture. Available through their Kickstarter campaign at about $50, the lens is a relatively cheap way to experiment with camera obscura.

Pinhole is photography at its most basic. Though obviously long superseded by glass lenses, shooting with a pinhole lens can be a fun way to learn about light and to create artistic images. With their Kickstarter campaign, Thingyfy has introduced a new pinhole lens with a modern twist.

The 50mm lens offers 8 different pinhole sizes, from 0.1mm to 0.8mm. Made from anodised aluminium alloy and featuring a mechanical aperture ring and 58mm front filter thread, the Pinhole Pro should feel closer to using a modern lens than other options on the market.

According to Thingyfy, the 0.8mm opening allows enough light in to use Live Preview in low-light situations, which is especially useful for cinemetographers, or for composing before switching to a smaller opening in order to achieve a sharper image.

Included below are some photographs and an example short film shot by cinematographer Searing Lu with the Pinhole Pro on a Nikon D750:

The Kickstarter campaign has just 4 days left to run, and has raised over $91,000 from 1,270 backers — absolutely smashing the target of ~$14,858.

At about $50, the Pinhole Pro is thankfully priced closer to the Potato Pinhole than the $1,500 Zero Optik. The lens is made with a wide array of mount options: Canon EOS/EF, Nikon F, Sony A, Sony E, Fuji X, Micro 4/3 (MFT), and Pentax K. The Sony E mount is a little more expensive, at CA$119.

The lenses are estimated to ship to backers within the next month, which is a quick turnaround if you pledge before the campaign ends. Thingyfy says that the lenses will retail at $179, so the Kickstarter campaign offers a substantial discount.

(via Kickstarter via No Film School)


from PetaPixel https://petapixel.com/2017/05/31/heres-worlds-first-multi-aperture-pinhole-lens-dslrs/

Giants: B&W Portraits That Capture the Beauty of Humpback Whales

How to Retouch Environments Using Photoshop

Retouching isn’t just for portrait photography — it can make a huge difference when you want to clean up distractions from an image. This video from Phlearn will teach you in 30 minutes how to utilise various Photoshop tools to remove objects and blemishes from your environmental photos.

In the video, Aaron Nace demonstrates how to use the Brush Tool, Spot Healing Brush, Clone Stamp, and Pen Tool for retouching. The example is an indoor shot of an office, which you can download yourself (after creating an account with Phlearn) to work on in parallel with the video.

The tutorial really shows the power of even the most basic tools in Photoshop like the Brush Tool, which is used to paint over and flawlessly remove a wall heater in the image. It also provides a good lesson in cloning objects from an image and warping them in-place to replace unwanted elements.

(via Phlearn via Fstoppers)


from PetaPixel https://petapixel.com/2017/05/31/retouch-environments-using-photoshop/

Kathy Griffin Slammed for Photo Shoot Showing Decapitated Donald Trump

How to Accurately Color Match in Photoshop

Adjusting colors of specific elements in a photograph can be used to bring harmony to an image or to add creative flair. Here’s a 5-minute video that shows how to match colors in Photoshop.

Russell Brown’s example photograph features a red chair sitting in front of a water scene, wearing orange flippers. This, naturally, is the perfect scene to alter — the orange flippers must be color matched to the red chair.

Rather than using color balance, hue/saturation or levels, Brown uses grayscale values in order to match the colors.

Brown has done some leg work to set the image up for alteration by moving the flippers to their own layer. Next, he takes a small selection of the color that he wants to alter – in this case, the orange of the flippers.

By duplicating this swatch and placing it on top of the fabric of the chair, Brown is able to use it as a tone reference. He uses the magic wand tool to select all of the orange of the flippers. Switching to the red channel, he brings up the Levels panel and adjusts the midtones until the swatch matches the chair’s fabric. He repeats the process for the green and blue channels.

Switching back to the RGB channel, the result is red flippers, perfectly matched to the tone of the chair.

The beauty of this technique is in its simplicity and in its accuracy. As Brown says, it’s something to store away in the back pocket for that one time you need to color match some flippers to a chair.

The video at the top explains this technique in full. Brown, a senior creative director at Adobe Systems, has plenty of other tips on his Vimeo account, found here.


from PetaPixel https://petapixel.com/2017/05/31/accurately-color-match-photoshop/

Nikon Unveils 3 New Lenses: A 28mm f/1.4, 10-20mm, and 8-15mm

Halide is a New iOS Camera App Made by an Ex-Apple and Ex-Twitter Duo

Halide is a new ‘premium camera for your phone’ that provides advanced control over camera settings along with a gesture-based interface that aims to become muscle memory, like the dials of a camera.

The app’s creators – ex-Apple designer Sebastiaan de With and ex-Twitter engineer Ben Sandofsky – aim to best Apple’s own app with a focus on advanced users, whereas the inbuilt Camera app acts as more of a ‘point and shoot’ option. While Apple’s recent how-to guides give some way to improve the photography of the average user, Halide goes beyond the possibilities of Apple’s own app by offering professional tools such as focus peaking, a detailed histogram, adaptive level grid, and RAW support.

Halide begins in a ‘smart automatic’ mode, but with a tap can be switched to full manual mode, giving the user control over ISO, shutter speed, white balance, and focus.

The duo put huge effort in to the design of the application, even commissioning a custom typeface for the user interface, developed by Jelmar Geertsma and called Halide Router. The app uses both visual and haptic feedback, giving it a tactile quality that is unmatched in the many other camera apps available in 2017. Speaking about the work put in to the app’s design, Sebastiaan explained:

Nothing matched the pleasure of using a well-built camera. Halide aims to fix that.

The app is available at the time of writing for a discounted price of $2.99, rising to $4.99 in a week’s time. It can be found in Apple’s App Store – no Android release for the moment, unfortunately.

(via Halide via TechCrunch)


from PetaPixel https://petapixel.com/2017/05/31/halide-new-ios-camera-app-made-ex-apple-ex-twitter-duo/