The Google Nik collection has been considered one of the top photographic effect plugin suites for a few years now, and it just got better in a big way – as of March 24th, 2016, it’s available free of charge.
This move has been applauded by many, yet accompanied by caution with by some, since a few analysts see this as the beginning of the end for the software suite. This is all speculation of course, and regardless of what the future holds for the Nik collection, it is a highly useful set of tools that can benefit any photographer, of any skill level.
Color Efex Pro
The highlight of this set has always been the all-around workhorse, Color Efex Pro. The current version, Color Efex Pro 4, is a complete package in itself, featuring a variety of effects of the highest quality. Although you can sort the list of effects by photo type (landscape, portrait, etc.), there is a lot to explore.
Let’s go through five of the most useful and effective tools available in this package, and see how they can boost the appearance and effectiveness of your images.
Foreword
As with all of the tools within this suite, the filters described below include a Control Points feature within the panel of individual filter controls. This feature is invaluable, and allows you to add positive or negative points anywhere in the image, adding or reducing the effect of the filter in targeted areas. Each point can be individually controlled to modify range of effect and opacity. Combining these points with the filters gives you almost unlimited control of how the filters will effect your final photograph. I encourage you to play around with the control points, and you’ll quickly see how they can help you turn your image into the picture you initially envisioned.
1 – Bi-Color Filters
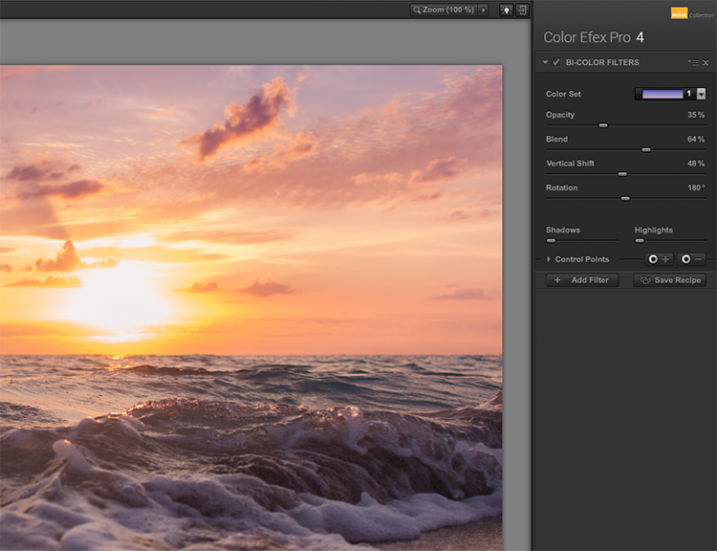
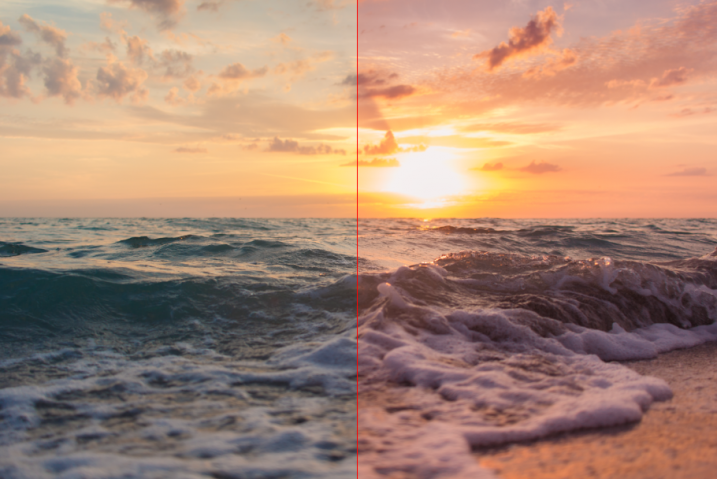
This filter is meant to simulate standard bi-color filters that would normally be affixed to your camera lens. Two preselected colors are blended together along a plane and mixed with your original image, creating a very customizable look that can completely change the tone of the photograph.
Although another bi-color filter is available that allows you to choose the two colors to be blended, the original filter has already selected many color combinations divided into five shade groups, such as browns, cool/warm, violet/pinks, and so on.
Once you have selected a color set, you can further modify the appearance of the filter by adjusting several sliders, including Opacity which allows you to increase or decrease the intensity of the overall effect, and Blend slider, which softens or sharpens the line between the two colors. The entire effect can be rotated around the image using the Rotation slider.
Once you have mastered the controls for adjusting the bi-color filter effect, you can then move on to the User Defined Bi-Color Filter, which has similar controls, and allows you pick any two colors to blend with your image.
2 – Contrast Color Range
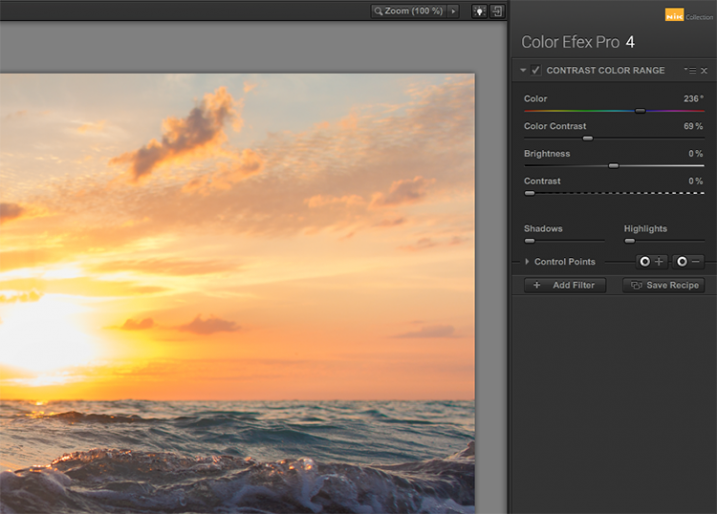
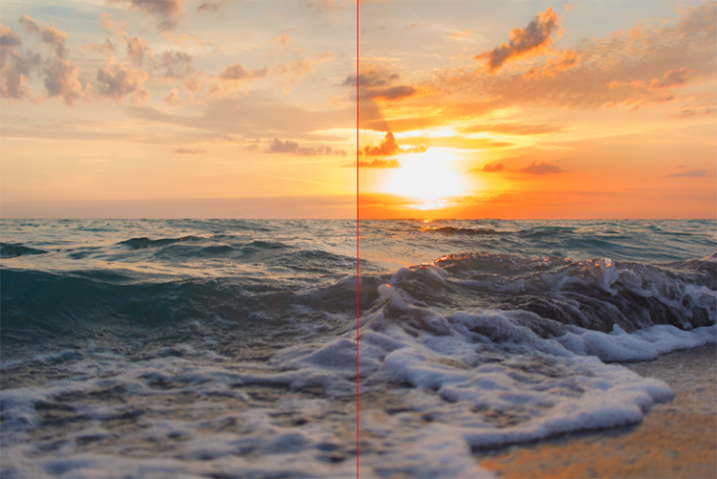
The Contrast Color Range filter allows you to selectively modify contrast within certain colors of a photo. Selecting a color will cause that color range to become lighter or less saturated, and colors opposite of it to become darker or more saturated. For example, selecting a blue or purple color range in an image featuring a sunset (with a lot of orange within the photo) will intensify the red and orange colors, making the sunset much more dramatic.
The two main tools to understand here are the Color, and Color Contrast sliders. The Color slider will select the color range, while the Color Contrast slider will adjust the intensity of the effect by increasing or decreasing the contrast between the color selected and its reciprocal.
Below these are controls for Brightness and Contrast, which behave similarly to their counterparts in Photoshop or Lightroom.
3 – Detail Extractor
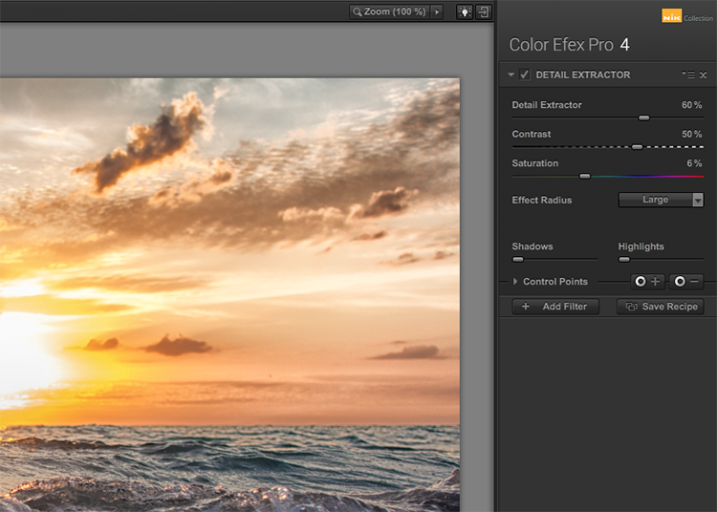
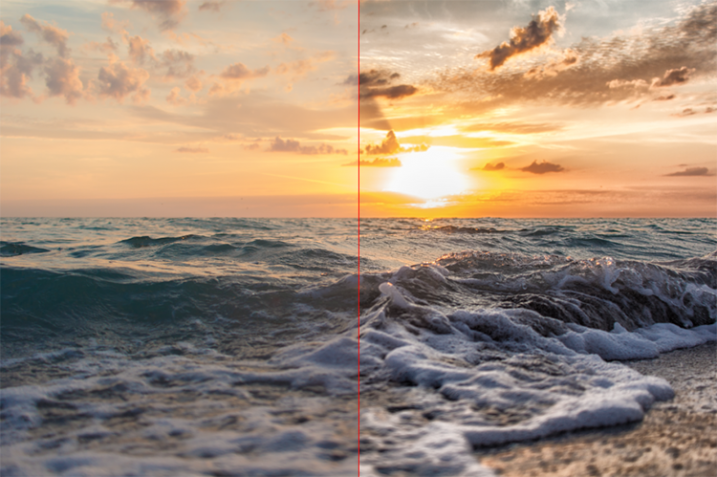
While most users might argue in favor of using the excellent Pro Contrast filter (discussed below) over the Detail Extractor, I’d argue that it depends on what look you’re going for. For a smoother, less enhanced result, Pro Contrast would definitely be the way to go, but to add insane levels of drama to your image, the Detail Extractor is just what the doctor ordered.
This tool adds that drama by disrupting the balance of shadow and light within the photo, to pull much more detail, giving you a dark and gritty stylized result that can really grab the viewer’s eye.
The main control used to create the effect here, is the Detail Extractor slider. Moving it to the right increases the amount of details highlighted. In addition to Contrast and Saturation adjustments, there is also an Effect Radius adjustment available, which allows you to target whether fine or large elements within the image are modified.
4 – Pro Contrast
Without a doubt, the Pro Contrast module in Color Efex 4 is my favorite filter by far. Admittedly, half of my interactions with the Nik Filters involve me making all of my adjustments in Lightroom, and using Color Efex 4’s phenomenal Pro Contrast to add the bit of drama and flair I’m looking for, without going over the top and getting an overcooked result.
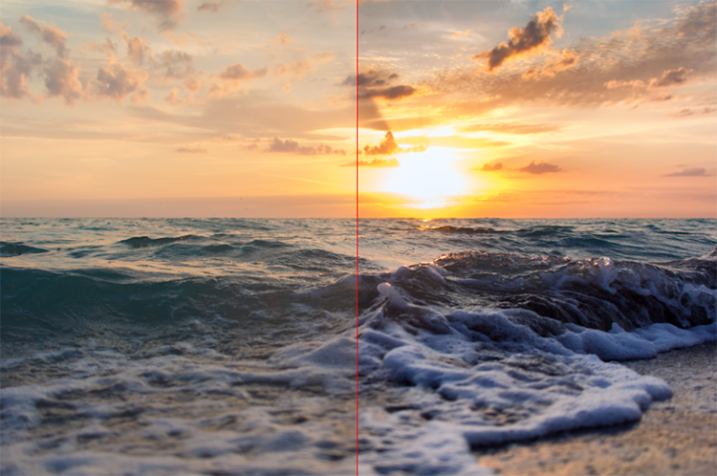
The tool analyzes the image to determine how the contrast adjustment will affect the loss in detail inevitable in this type of correction, and minimizes it. The filter can turn a flat, lifeless, image into a colorful and vibrant photo with almost perfect levels of contrast.
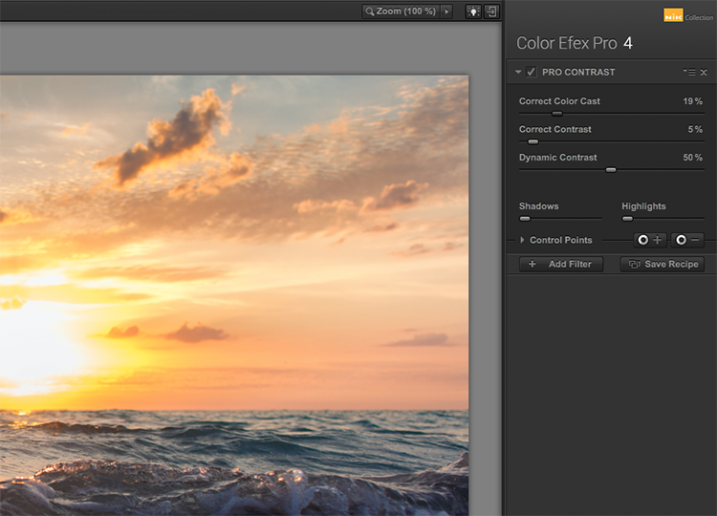
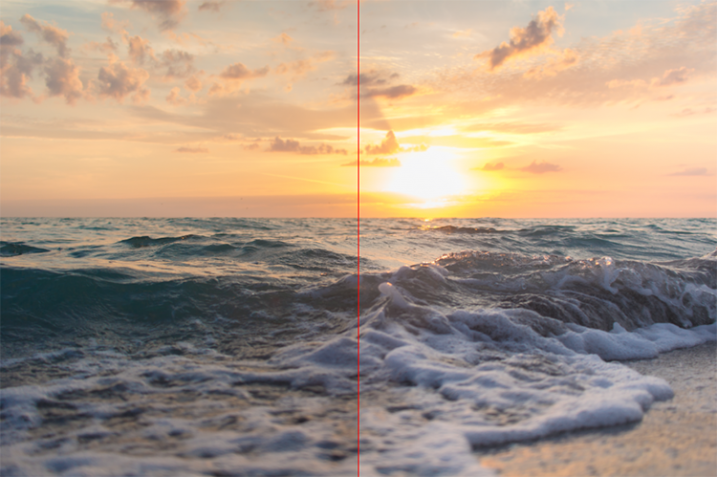
Pro Contrast features three sliders, each one of them important to the final result. Correct Color Cast analyzes the photo, and produces an algorithm to remove any inherent color cast it finds. Moving the slider to the right will reduce this cast and smooth out the tonal scheme of the image. In the ocean sunset image shown here, applying Correct Color Cast removes the orange hue cast upon the waves in the foreground, and returns them to their proper blue.
Correct Contrast applies a general contrast adjustment based on the tonality of the image, as analyzed by the software. Finally, Dynamic Contrast introduces the real magic; areas of the photo that are flat are boosted in contrast, while areas already featuring high contrast are not. This allows for a rich, beautiful enhancement, without muddy tonal structures and details that might normally be lost.
5 – Reflector Efex
We all understand the need for a reflector when creating portraits; whether it be a natural-light or studio situation, certain areas of our subject (usually a person’s face) are befallen with shadows due to the interaction of the subject with the light being used. Reflectors allow us to bounce light onto our subject, and target it to fill in these areas of shadow, producing an even layer of light.
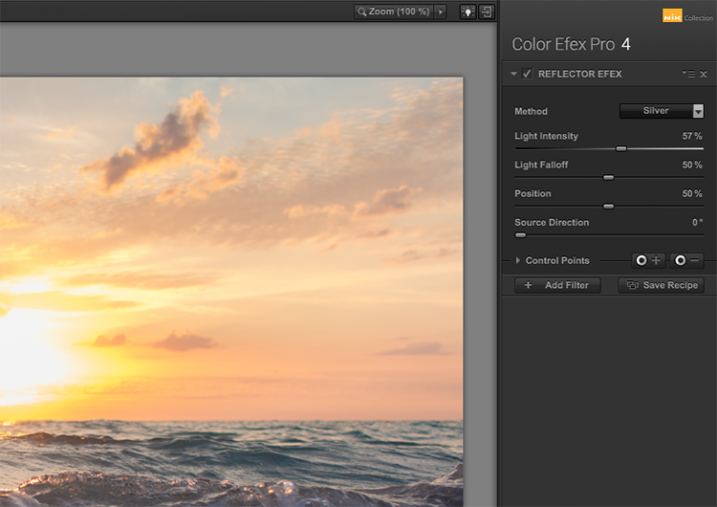
The Reflector Efex filter takes that concept and turns it up to 11, by simulating a silver or gold reflector’s use within your image, and allowing you to modify it in a number of ways to illuminate the photo exactly as you envision it.
First, you select a Method, which is effectively picking which color of reflector to use; gold, soft gold, or silver. You’ll then use the Intensity slider to select how much light will be bounced onto the image. This is equivalent to adjusting power output of a studio light, or the harshness of sunlight in an outdoor situation.
The Light Falloff and Position sliders allow you to adjust how softly or sharply the effect of the bounced light trails off, as well as the position of this falloff. Finally, the Source Direction adjustment lets you change the position of the reflector; if you need light directed to your subject’s left side, you would position the Source Direction between 270° and 360°, which is the bottom, to bottom right corner of the frame.
Conclusion
We don’t know what the future holds for the Nik collection, as a price reduction to zero doesn’t bode well for continued enhancements or updates of any kind. But, for users of the software this may not matter, as it is already an integral part of many photographer’s toolkits, amateurs and professionals alike. The entire collection is of incredible value. But, Color Efect Pro 4 in particular, features these, and many more tools that can be incorporated into your everyday photographic workflow from Lightroom or Photoshop, and give your images a competitive edge!
What about you? Do you already use Google’s Nik Collection? If not, will you try it now after it has been changed to a free product? Are there other filters within the collection you find just as useful for your own workflow? Sound off below please, ladies and gents!
The post The 5 Best Google Nik Color Efex Pro 4 Filters and How They Can Amplify Your Images by Tim Gilbreath appeared first on Digital Photography School.
from Digital Photography School http://digital-photography-school.com/5-best-google-nik-color-efex-pro-4-filters-can-amplify-images/

No comments:
Post a Comment