By now, if you have not downloaded Google’s Nik Collection, at the very least you have heard that this once $500 software, was made free for download in March 2016. The Nik Collection, as it has been known for over a decade, is a set of photographic filter plug-ins, and image enhancement tools, that delivers another look and feel to your photo.
The Nik Collection is comprised of Analog Efex Pro, Color Efex Pro, Dfine, HDR Efex Pro, Sharpener Pro, Silver Efex Pro and Viveza. As you see, the suite is quite extensive, thus this overview will just touch on its potential uses, and hopefully encourage you to further explore the collection more in-depth.
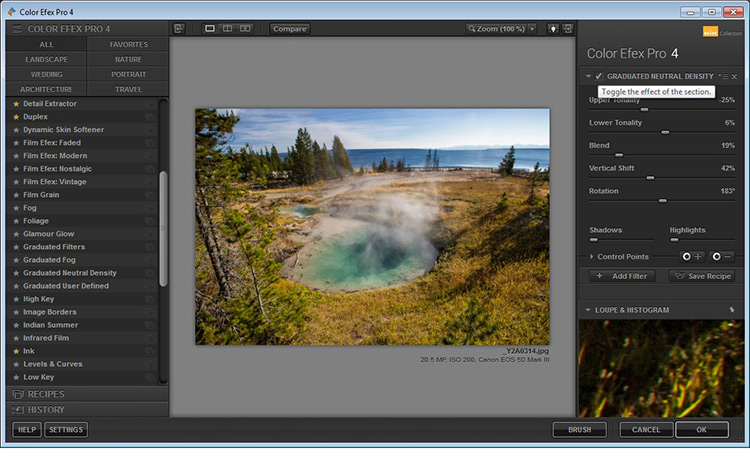
The layout in each set is very similar, which translates to ease of use once you get the hang of it. Preset filters are listed down the left side panel of the dashboard. If you click any of them, the chosen filter is immediately applied to your preview, and you then have sub-options for that filter listed on the right panel, which gives you further control over its application.
An awesome feature that the Nik Collection utilizes is called Control Points, which is available in each plug-in. A control point, as the name implies, is a way to control the application of a filter to selected areas of your choice. Take note of this, as it will be referenced and elaborated on below, as the various plug-ins are discussed.
Analog Efex Pro
If you love the images produced by older cameras, or want to add a vintage look to your photo, Analog Efex Pro may be the set that appeals to you. It strives to pay homage to techniques used by photographers many years ago, and will help transport your image back in time.
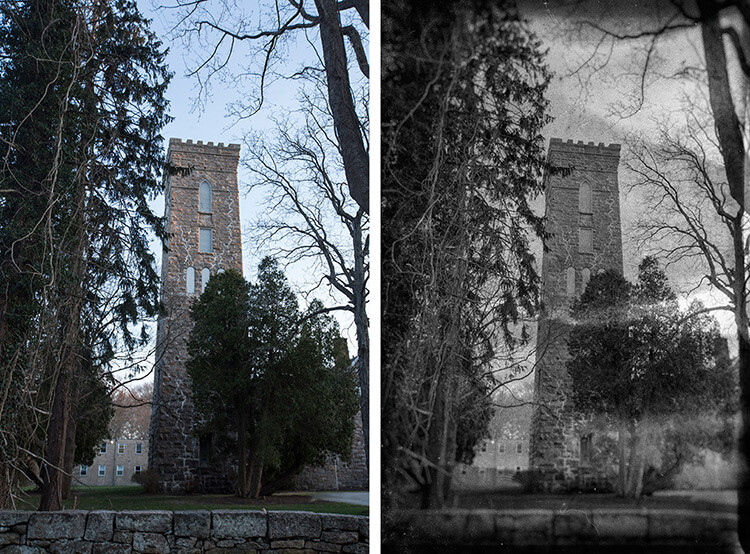
Original Image Analog Efex Pro: Wet Plate preset applied
In the sample image above, the finish is one of the “Wet Plate” preset options available in Analog Efex Pro 2, inspired by an alternative processing technique of yesteryear. Along with Wet Plate, some of the preset filters in the left panel include Classic Camera, Vintage Camera, Toy Camera and the popular Double-Exposure – all of which require little effort to give your image a unique style.
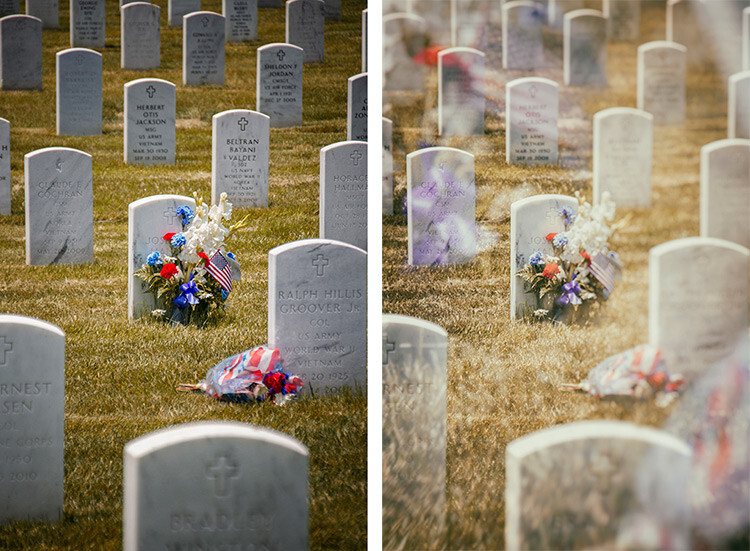
Original Image edit Analog Efex Pro: Double-Exposure preset applied
With a few clicks, the application of this technique attempts to mimic processing techniques established in the darkroom, or in-camera double exposures. Each filter can further be fine-tuned to your desire, using the sliders and curve-adjustments included in the right panel; you can even add Dirt and Scratches to create a sense of age and give your digital photo a film-like feel.
Color Efex Pro
Color Efex Pro is a collection of visual presets that allows you to enhance, or get more creative with your photo. There are 55 filters in this set, but with the ability to stack filters, the possibilities are endless. Customized combinations can also be saved as a preset, so you can easily apply the same processing to other images with a single click.
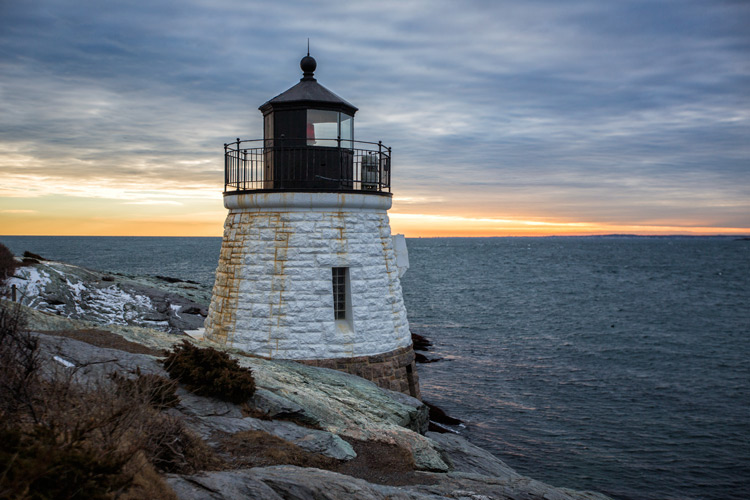
Original Image
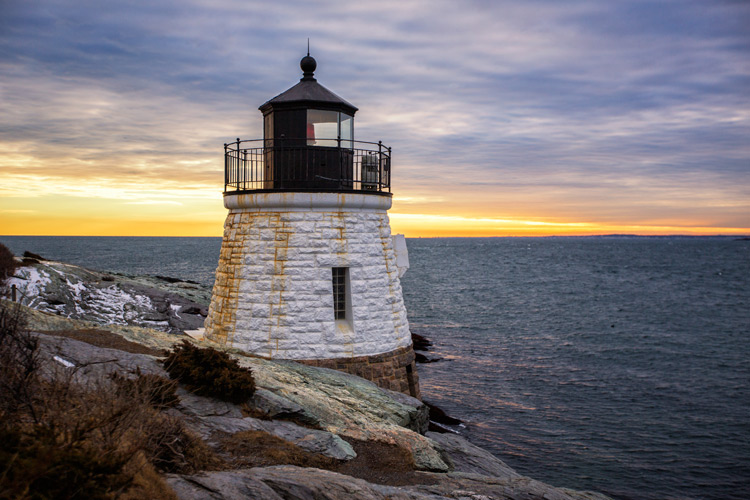
Color Efex Pro 4: Skylight preset applied
In the Lighthouse example shown above, the Skylight preset filter was used, which simulates a glass warming filter. It removes some of the blue color casts, and intelligently warms the colors in the photo for a more pleasing effect. You can use your right sub-options to make this as intense as you want, but in some cases less is more.
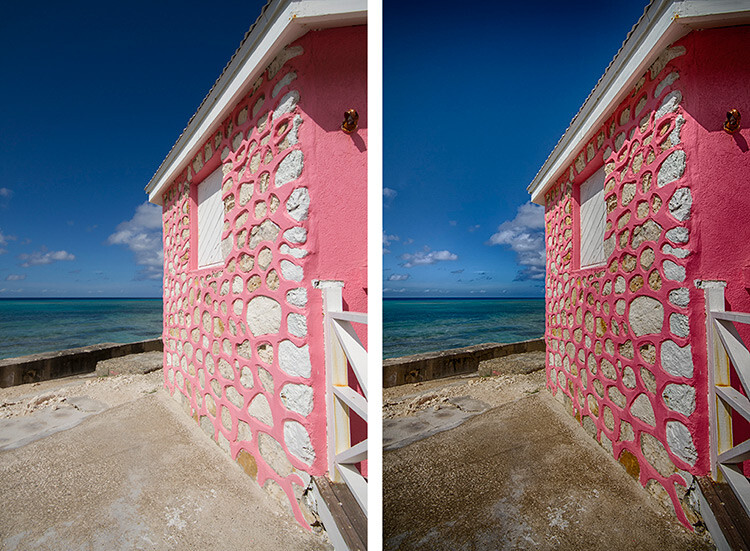
Original Image Color Efex Pro 4: Tonal Contrast preset applied
In the photo above, the Tonal Contrast preset was applied. This preset adjusts contrast and light levels on a small scale, as well as brings out some texture in the image. The sliders enable you to affect how dynamic the final result turns out.
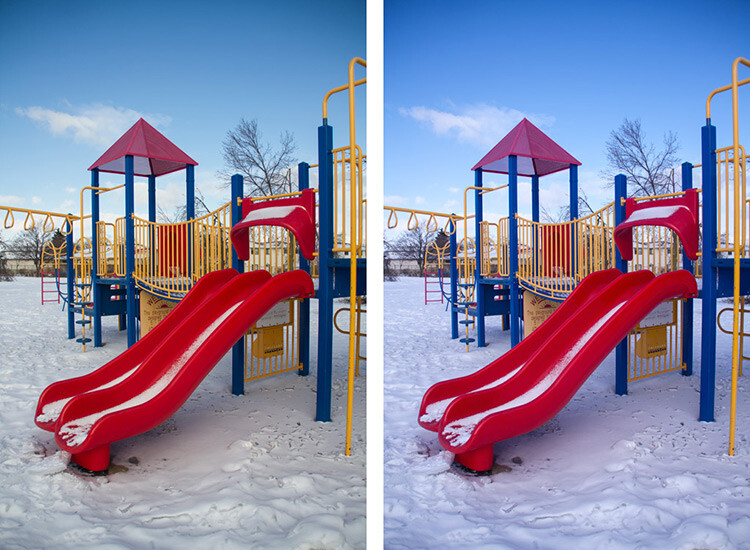
Original Image Color Efex Pro 4: White Neutralizer preset applied
Sometimes you need your whites to pop, for example the snow in the photo above. The White Neutralizer filter removes color casts from light objects and can be used to create bright, crisp whites without affecting the other colors of the photo. It is very useful for brides’ dresses and large expanses of white, such as snow or walls.
A very cool feature of Color Efex Pro is the ability to layer multiple filters on an image.
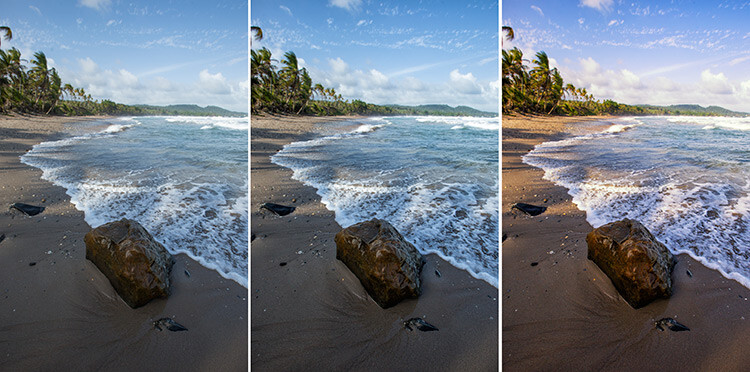
Original Image Color Efex Pro 4: Tonal Contrast Color Efex Pro 4: Sunlight filter
In the example shown, the Tonal Contrast preset was applied to the original image, then layered with the Sunlight filter. Layering equates to endless possibilities for your final edit.
Dfine
Dfine is Nik’s answer to noise reduction. Image noise characteristics deviate with exposure length, ISO settings and even temperature based on your camera. Dfine selects areas of your image and generates a “noise profile”. This allows the quick reduction of noise in your photos while retaining the edges, and in one click applies the calculated noise reduction to the image.
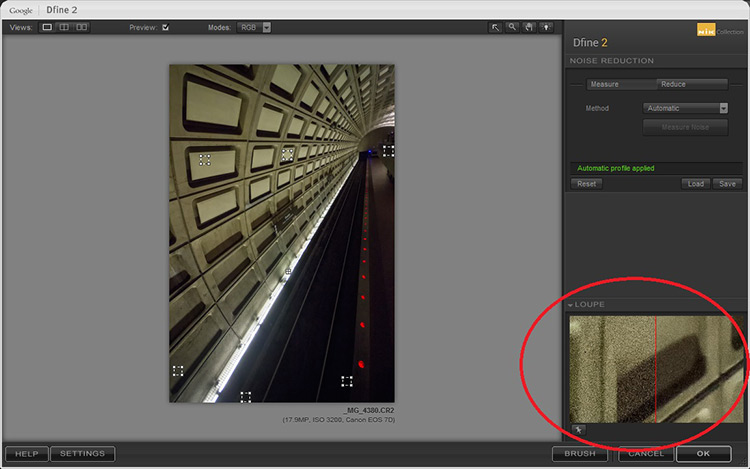
In the image above, the little squares denote what the software determined were areas requiring noise measurement. The loupe view (circled in red), shows the applied noise reduction on the right side – this view is at 100%.
On the right panel, the “Reduce” sub-option gives you two main methods to take away noise – either via the contrast or color. Both these adjustments affect the image differently, so play around with them and see which one works for your image.
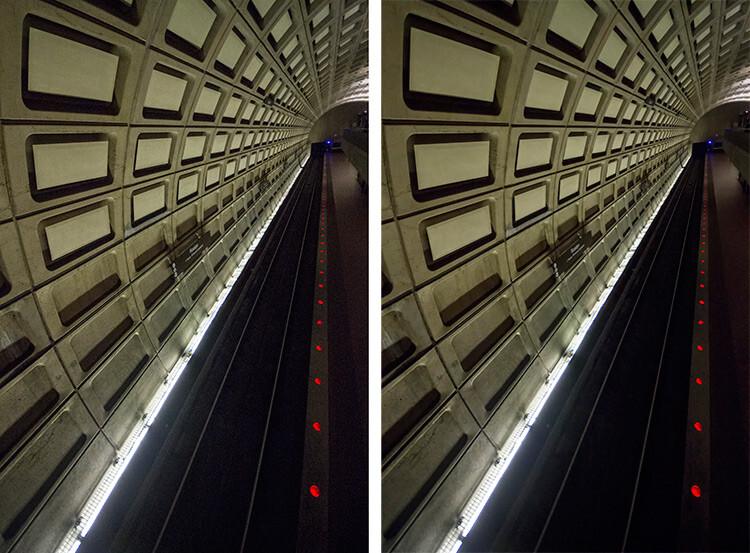
Original Image Dfine 2: Auto Noise Reduction applied
Also included are some useful global adjustments for further refinement, such as the removal of JPEG compression artefacts and debanding.
Control Points in Dfine allows you to selectively apply noise reduction, which gives you the power to increase or decrease the noise reduction intensity in different areas of your image. So, even though Define auto-calculates the noise reduction needed, you can still maintain control over your noise processing.
HDR Efex Pro
High Dynamic Range (HDR) Imaging is a processing technique that has had mixed responses over the years. It was a trendy technique a few years ago, but has since matured into being used as a tool that extracts all the details of a scene available to the naked eye. HDR can be either overdone, or used subtlety, by exploring the differences between the darkest shadows and the brightest parts of the photo.
HDR Efex Pro is Nik’s contribution to this type of processing; where several images captured at different exposures, are translated into a single image that reflects a more dynamic range than your camera output is capable of creating (although camera advancement is starting to address this).
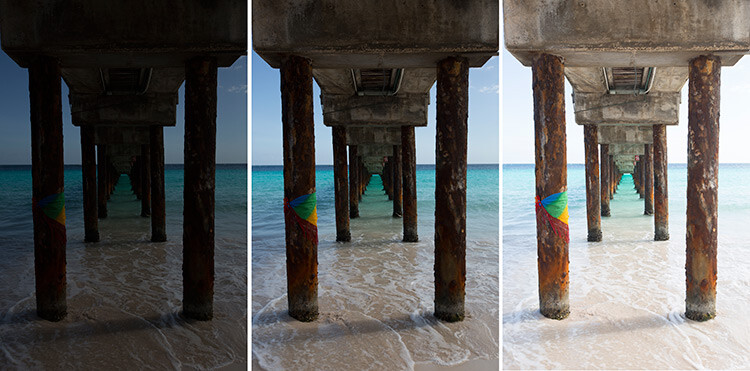
Original Images for HDR edit
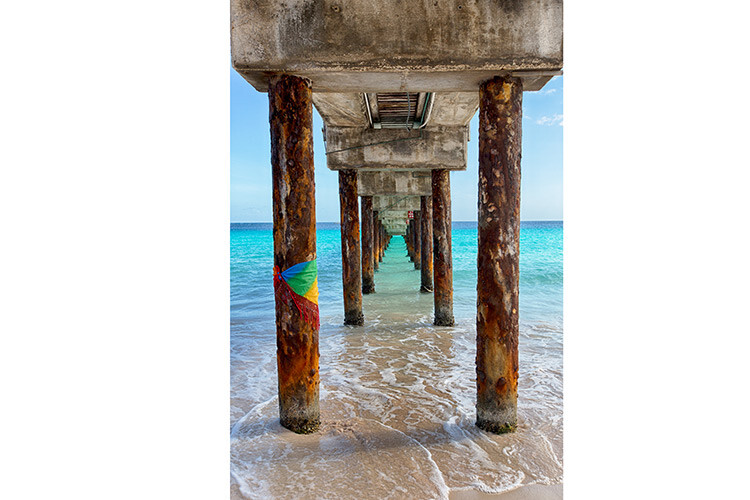
Images combined using HDR Efex Pro 2
In the example above, three exposures are combined to bring back the lost highlights and shadows with tonality adjustments. This image can be pushed to look more realistic or even in the opposite direction.
Above its predecessors (such as Photomatix), HDR Efex Pro 2 has promised a simpler process and increased control and fine-tuning over the final image, along with an improved tone-mapping engine that claims to render color better. All tools are subjective, but no harm in trying this HDR tool out, even if just to verify some of Nik’s claims that they have improved Ghosting and Chromatic Aberration reductions.
Silver Efex Pro
Silver Efex Pro focuses on black and white processing. There are many programs quite capable of creating great black and white images, but various built-in tools like Dynamic Brightness, Soft Contrast, Amplify Whites, Amplify Blacks, and the advanced Grain Engine creates excellent diversity.
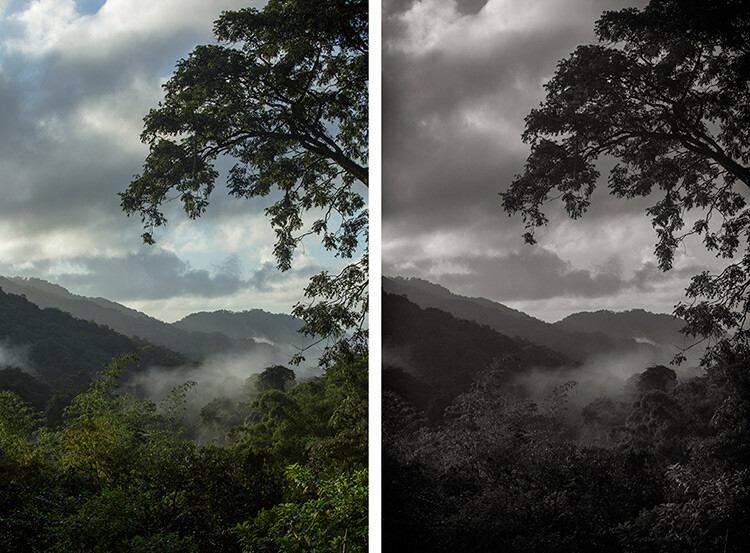
Original Image Silver Efex Pro 2: Dark Sepia preset applied
Silver Efex Pro comes with quite a variety of presets, and of course you can also create your own. The easiest way to do this is use an existing preset, customize it by making your adjustments, then save it so you can apply it to other images later on. Saving a preset is especially useful if you are doing an image set, and want the photos to have the same look and finish.
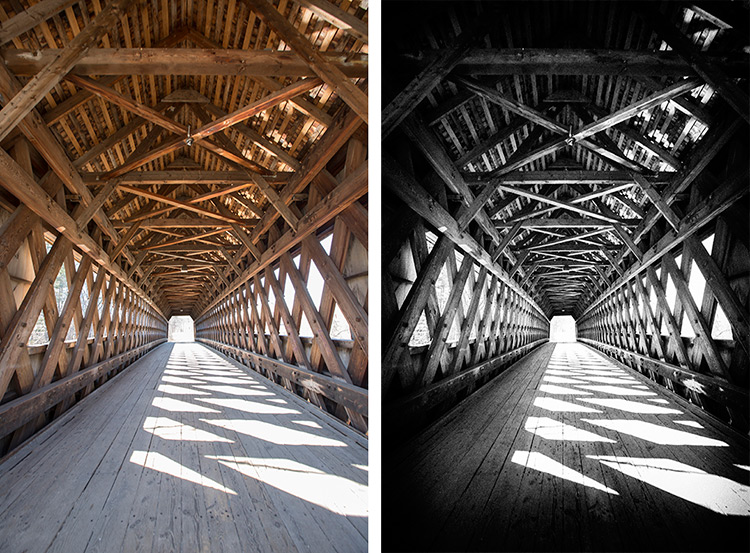
Original Image Silver Efex Pro 2: High Structure preset applied
The structure in this software adds depth to the photo by adding some sharpening. If you are into black and white photography, this is definitely a set you want to play around with.
Viveza
Viveza is an easy way to apply enhancements selectively without creating masks. Yes, you can still do global or image-wide adjustments, but it is very useful to be able to later refine only selected areas. Imagine the possibilities of applying structure, color, exposure changes, or doing shadow recovery to only areas you choose, knowing that the software is going to blend in your changes seamlessly.
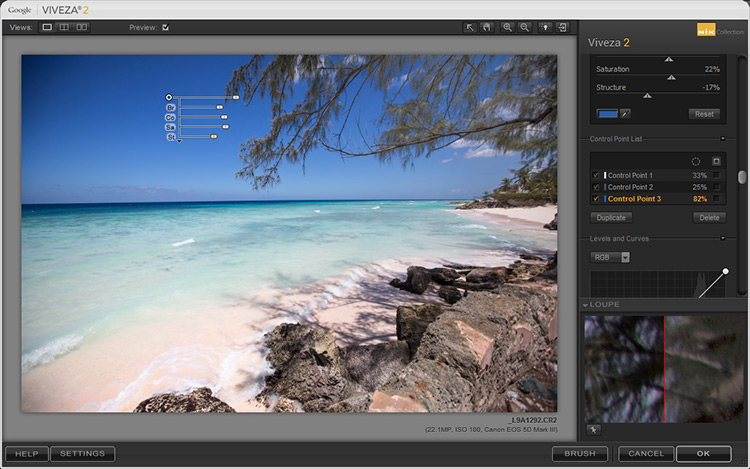
You can use Control Points on any part of the image you want to change. As with the other software in the Nik Collection, the top control (on your control point) allows you to change the radius/size of your adjustment area.
The Control Point shown in this image is on the blue sky. Based on the look you want, the radius of this area can be increased or decreased in size.
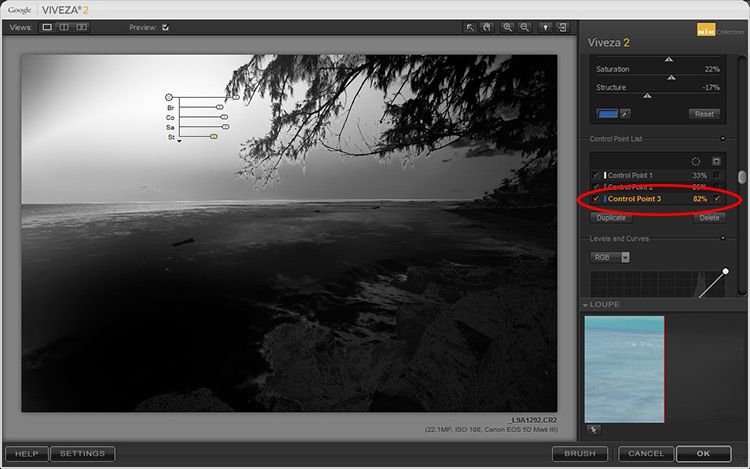
If you check the box next to the Control Point on the right (sub-options), all the affected areas will be shown in white, so you can decide if you want to adjust your work area.
In this example, the Control Point affects the blue in both the sky and sea, so any adjustments will apply to everything blue in the selected radius (highlighted in white on the image).
Selections, masks or adjustment layers may be your tool of choice to get precisely defined areas, but Viveza’s localized adjustments blend in with the surrounding areas quite well, and in some cases look more natural.
Sharpener Pro
While not everything in your image needs to be razor sharp, the best way to end up with a crisp finish and distinct edges, would be to start out with a properly focused image. Post-capture sharpening increases the contrast between adjacent pixels and significant edges within an image, which attracts your eye. Sharpening is thus used to enhance a focused image, as opposed to rescue elements of photograph that was captured out of focus.
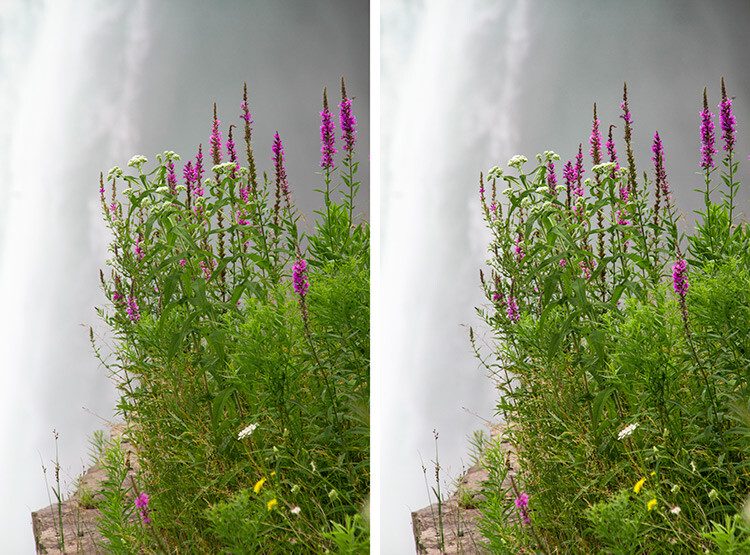
Original Image Sharpener Pro 3: applied to show edges
In the sample image above, the sharpening is exaggerated to show the contrast effect that the software applies.
Sharpener Pro takes away some of the guesswork and gives you control over your sharpening, which is typically the last step in image processing. Control Points gives you the ability to selectively sharpen aspects of your image and allows the changes to blend in easily.
Conclusion
A great feature of each set in the Nik Collection is that it applies the effect on a duplicate layer. This is especially helpful if you want to dial back the effect and blend it with your original image, by simply changing the opacity of the layer.
Each plug-in has great potential, so do not be fearful to explore, test your creativity with preset combinations, and experiment with Control Points. It is a user-friendly collection and while this is a plus, it can also make it easy to overdo it.
Do share your thoughts and some of your images processed with Google’s Nik Collection of filters. How have they worked for you? Which is your favorite?
The post An Overview of Google’s Nik Collection Filters for Post-Processing by Nisha Ramroop appeared first on Digital Photography School.
from Digital Photography School http://digital-photography-school.com/an-overview-of-googles-nik-collection-filters-for-post-processing/
No comments:
Post a Comment