New travel photographers are always asking me what equipment they should invest in when first starting out. Before I get into what I believe are the basic essentials that beginners should start with, there are a few things that you’ll want to take on board first.
- A more expensive your camera doesn’t automatically make your photos better. The camera is just a tool, and the main factors are things like composition, lighting, and technical aspects, like focus.
- Start with the basics and build up from there. The last thing any travel photographer wants to do is drag a ton of camera equipment around.
- Get adequate insurance to cover your camera and accessories. Accidents and thefts do happen when you travel with cameras.
Now to the list. Obviously, this all depends on your budget, but here’s the basic list of equipment that I think novice travel photographers will need.
Camera
Needless to say that your basic requirement is a camera. There are so many different choices available for every budget, so the only way to really know which is right for you is to do your research. Professional travel photographers use high-end DSLR Nikon or Canon cameras which range from around $1,500 to $5,000 USD. But there are plenty of very capable cameras under $1,000. One of the best ways to make a decision before you purchase is to rent the camera for a day. Go out and take some photos with it and you’ll get an idea of what it’s like.
One option that has been on the rise in recent years in travel photography is mirrorless cameras. These are much smaller and generally cheaper than high-end DSLR cameras but still capable of producing high-quality photographs. More and more travel photographers are now carrying these either as a spare or an alternative to their main DLSR camera.
When you are ready to purchase, shop around and don’t forget that you could also buy serviced second-hand cameras which will be in perfect working condition, but at a lower price.
- Browse DSLR cameras under $1000 on B&H Photo
- DSLRs on B&H over $1000
- Check out DSLRs on Amazon under $1000
- DSLRs on Amazon over $1000
- You could also consider a mirrorless system of travel, check out these dPS articles on mirrorless cameras.
My camera of choice is a Canon 5D MK III. It comes with a hefty price tag, but it is an exceptional camera that won’t let you down and stands up very well at high ISO settings. I usually carry an extra body with me which I leave in my hotel room in the event that anything happens to my main camera. Or sometimes I have my other body fitted with my telephoto lens if I think I will be using it a lot that day to save me having to change lenses.
Lenses
Usually, cameras are available as a package with a lens or just the body, meaning you will have to purchase the lens separately. Whichever you decide will usually come down to your budget as there will be different lens options offered with each camera.
As a starting point, you will need what I would call a “work horse” lens. It’s the one that the majority of your images will be taken with and will need to offer a good focal length range. Something along the lines of the 24 -70mm lens is a good range to start. This will allow you to capture everything from landscapes to portraits. In fact, you could actually get away with just this one lens the majority of the time.
If your budget then allows, you could add a telephoto lens to compliment your wide angle. Something like a 70-200mm lens means you are covered for pretty much everything you will need day to day. Over time you can build up your lens collection further by adding macro or prime lenses. But to start, just a wide angle zoom ,and if your budget allows a telephoto, will be sufficient.
My basic list of lenses that I carry on every trip are:
- Canon 24-70mm f/2.8 II USM zoom lens
- Canon EF 70-200mm f/2.8L IS II USM lens
- Canon EF 50mm f/1.2L USM lens
- Canon EF 100mm f/2.8L Macro IS USM
Tripod
Most travel photographers will say that a tripod is probably their favourite accessory. Quite simply without a tripod, you will not be able to take photos which require slow shutter speeds as you will not be able to hold the camera steady enough by hand. But a tripod is so much more useful than just for photographing low light conditions. Using a tripod often means you spend a bit more time thinking and composing the image rather than just snapping away.
Which tripod you choose will come down to personal choice, budget, and how much weight you can carry from day to day. Carbon fiber tripods are usually what travel photographers use as they are stable and lightweight. I use the Manfrotto 055CXPRO3 which is a sturdy carbon fiber tripod which is lightweight to carry. I also use a Manfrotto 327RC2 light duty grip ball head to connect my camera to the tripod.
But like any camera accessory, there are lots of tripods ranging from inexpensive all the way into a few hundred dollars. Often I see people with the latest expensive camera equipment but a very inexpensive tripod. Besides the fact that low-end tripods can actually have an adverse effect on your photos through vibrations, do you really want to rely on something cheap and flimsy to hold up your expensive camera? Choose the best tripod that you can afford because it will last you a long time and will be well worth the initial investment long term.
An alternative option to traditional tripods is a monopod. You will often see sports photographers or photographers which large telephoto lenses use these as an aid to support the weight of the camera and lens. Obviously, the downside of a monopod is that it isn’t supported by three legs so your photos with slow shutter speeds might suffer from camera shake.
Camera Bag
A good camera bag is one of the most important things you will buy. Not only will the bag keep your equipment safe while in transit but also when you are at your destination photographing. There is no shortage of camera bags these days and they vary in terms of size, usage, and cost. As you become more experienced it is likely that you will have different bags for different scenarios. For example, if I’m hiking or out in the wilderness I carry my LowePro Pro Trekker 450 as it is a comfortable bag for long walks and has plenty of room for equipment as well as space for things like a water reservoir or to strap my tripod onto.
But this bag would be too big in a city where for example, I want to photograph in busy places such as markets. So in those situations, I would either take my Lowepro day bag pack (an older version of the Fastpack BP 150 AW II) or my shoulder bag (Lowepro Passport Sling series). Occasionally if I have a day off I might just carry my Toploader Pro70 AW II which just carries one camera and lens. So it’s easy to carry and not too imposing.
Lowepro is one of the market leaders and they alone have pretty much every type of camera bag you will ever need covered. The main thing to consider is what you will be using the bag for and what is the most comfortable style for you to carry.
Other Essentials
Once you have your camera, lens, and tripod the only other things you need are camera batteries, memory cards, and a lens cleaning kit. When you buy a camera it will come with a rechargeable battery but it might be wise to invest in at least one more. The last thing you would want is to be away somewhere when your battery fails and you can’t charge it. A spare will always come in handy.
The other essential that you will need is a decent size memory card. The cost will again be a factor here, but keep in mind that RAW files take up much more space so if you are planning on shooting in that format you will need extra memory card space. It isn’t unheard of to fill a 32GB memory card in just a few days when travelling, so always carry a few spares.
The last of what I consider to be essential is some sort of lens cleaning kit. That might just be a brush and a lens cloth but there is no doubt that you will need to wipe dust, debris, and dirt off your lens glass a few times on a trip. I would also recommend that you fit a UV filter to your lenses as this will help ensure that the lens doesn’t get scratched. It will be far cheaper to replace a UV filter than to repair a scratched lens glass.
Accessories
The above list covers the basics of what any travel photographer will need but of course, there are other things that you can add over time that will become incredibly useful in some situations.
- Polarizing filter – helps get rid of unwanted reflections while boosting blues and greens.
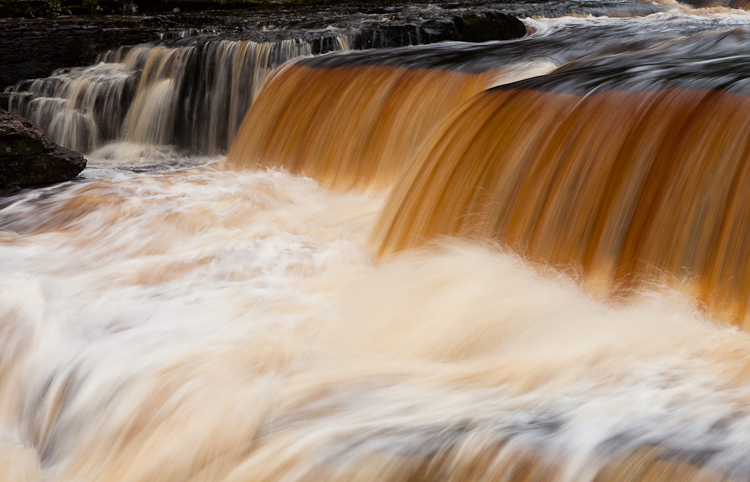
- Neutral Density filters (ND) – helps to limit the amount of light entering the camera, which allows for effects such as smooth looking water to be created.
- Graduated Filters – similar to ND filters, graduated filters are useful in situations where you have a disparity in the brightness between the background and foreground and want to even that out.
- Hard drive – if you have limited memory card space, a hard drive is useful to transfer your photos over to. But a hard drive is also useful as a backup in case something happens to your memory cards.
My list of accessories are as follows:
- Canon Speedlite 580EX II.
- All of my lenses are fitted with a Hoya Pro 1 Digital UV filter. This helps protect the lens glass especially in very harsh conditions such as the desert.
- A set of Cokin z-pro series ND and graduated ND filters.
- 16GB and 32GB ScanDisk compact flash memory cards. I take approximately enough to use one each day.
- Hoya Pro 1 polarizing filter.
- 3 x WD 250GB passport external hard drives.
Conclusion
Buying your first camera and all the accessories that you need can be a daunting prospect. The key is to do your research and only buy the absolute essentials. Over time you can always add more specialized equipment. The above list is my basic recommendation for a travel photographer and should have everything you need.
Anything I have missed? Let us know your thoughts below.
The post Must Have Gear for Travel Photography Newbies by Kav Dadfar appeared first on Digital Photography School.
from Digital Photography School http://digital-photography-school.com/gear-travel-photography-newbies/
No comments:
Post a Comment