You may be very aware that photography equipment is not cheap. If you’re not, you’re in for a rude awakening! Camera bodies can cost thousands of dollars and it’s not uncommon for a lens to be even more expensive than a body! Sometimes it’s very tempting to baby your equipment; treat it with extra caution and wrap it up in cotton wool so as no harm will come to it. But with the right care and maintenance, your equipment will last and continue to perform for many years, no matter what, and without the babying!
Being a professional photographer myself, my equipment is often subject to some not-so-camera-friendly circumstances. Rain, snow, dust, and even champagne (!) are not uncommon encounters for my equipment. Even though I generally take the right precautions (for example, I use rain covers on for my cameras and lenses if it’s raining) there are times when the conditions are just unavoidable and my equipment gets a little dirty. It’s going to happen. But because I care for my equipment (even though it may look like I don’t!), it keeps on performing and hasn’t let me down. So I thought that I would share some of my tips to help you do care and maintenance on your gear, too.
Supplies needed
The good news about caring for your equipment is that it’s relatively cheap to buy what you need. With so few things in photography being cheap, this comes as a nice relief! Here is a list of what I use to care for my gear.
From a camera store (camera specific tools)
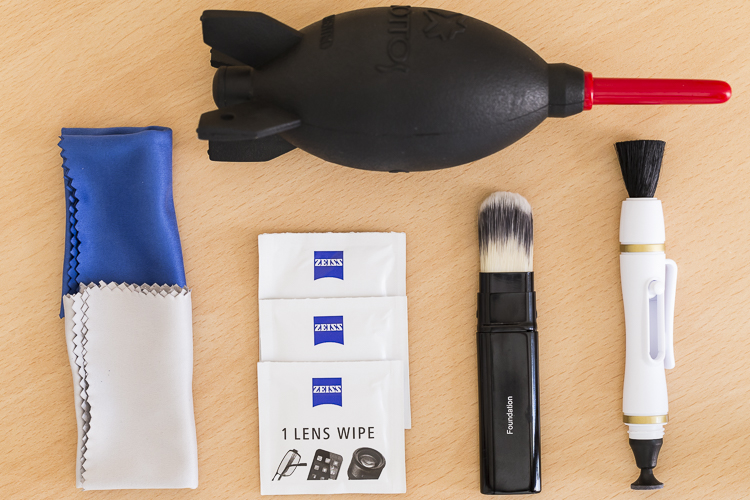
An overview of some essential cleaning items.
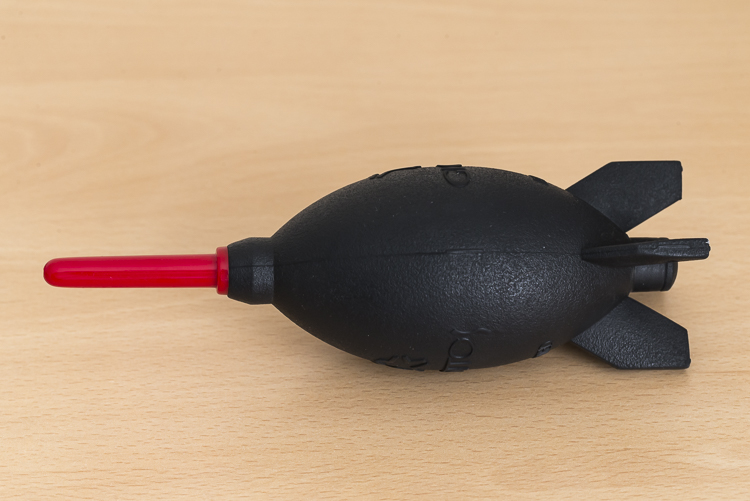
- Rocket blower: I use this a lot! Squeezing it blasts out a puff of air to blow away any dust.
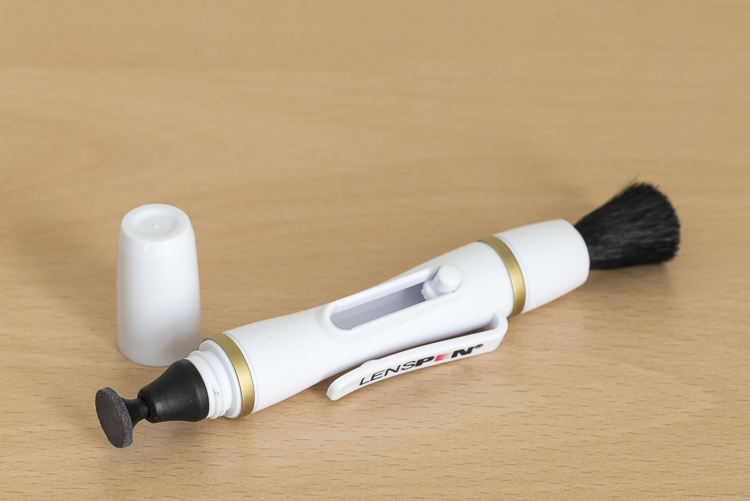
- LensPen: I have just added one of these to my kit. At one end there’s a small soft, cleaning tip. At the other, is a retractable brush. I haven’t yet used it extensively but have been impressed with it so far. However, the cleaning tip is quite small so it’s not something I use on my larger lenses, such as a 400mm f/2.8; it would take forever.
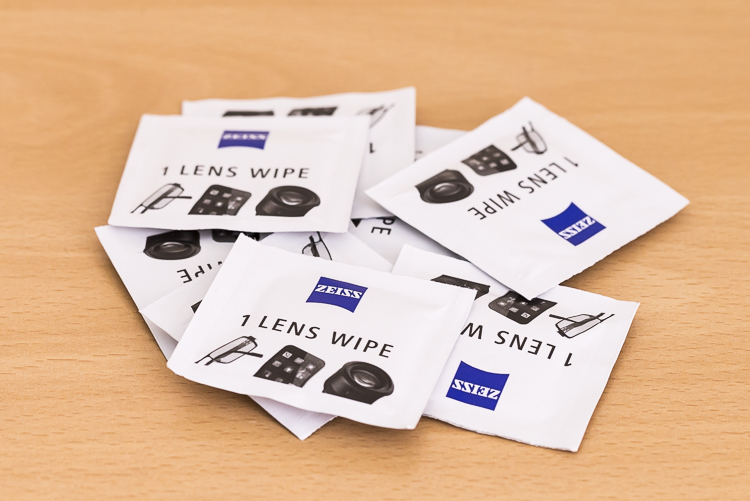
- Pre-moistened lens wipes: I love these things. These are almost like the refresher towelettes you can get at KFC, but for lenses. They’re pre-moistened with a lens cleaning solution that quickly evaporates from the lens. They’re also dirt cheap. I use the Zeiss brand ones (only ones I’m aware of) which for a pack of 200, cost about $13.90USD. (Note: also available by Hoodman especially for camera lenses)
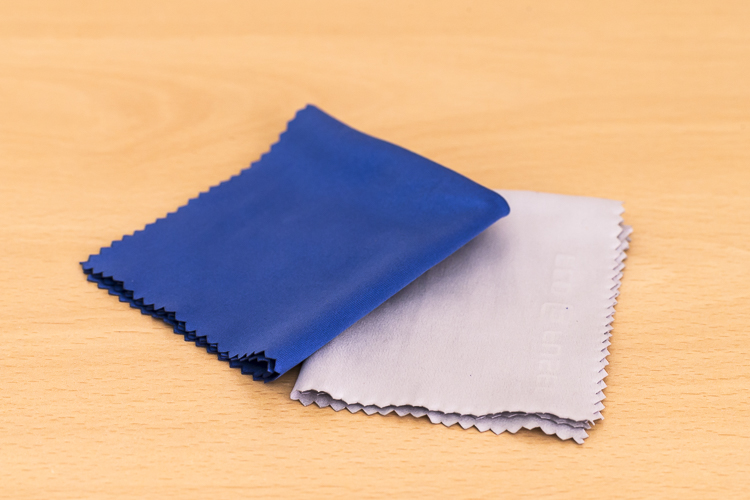
- Microfibre cleaning cloths: Another cheap must have. I like to have several of these. I reserve one just to buff lenses after using the wipes, and another just for cleaning the lenses without any product at all. I avoid using the same one across many devices, for example, using the same clothing to clean my iPhone screen, then using it to clean my lenses.
From a regular store (non-camera tools):
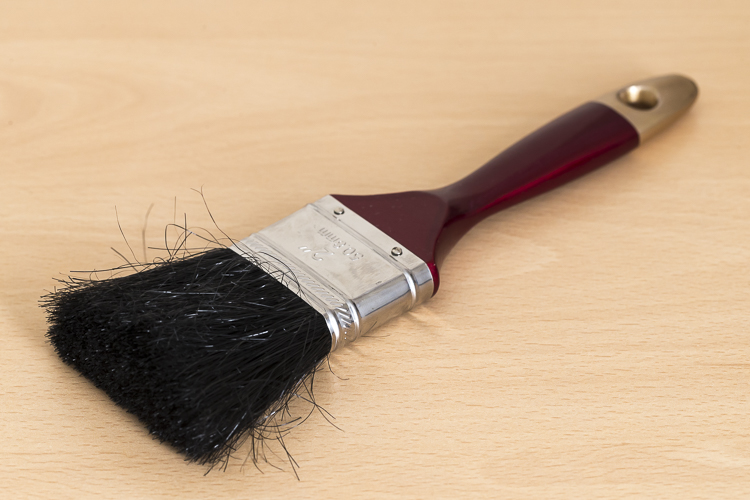
- A paint brush: These are very handy at removing dust from the surface of camera bodies and lens barrels. Again, buy this brand new. You don’t want this to be super soft either, as it’s just being used on the outside of the cameras and lenses and not on anything that needs to be protected.
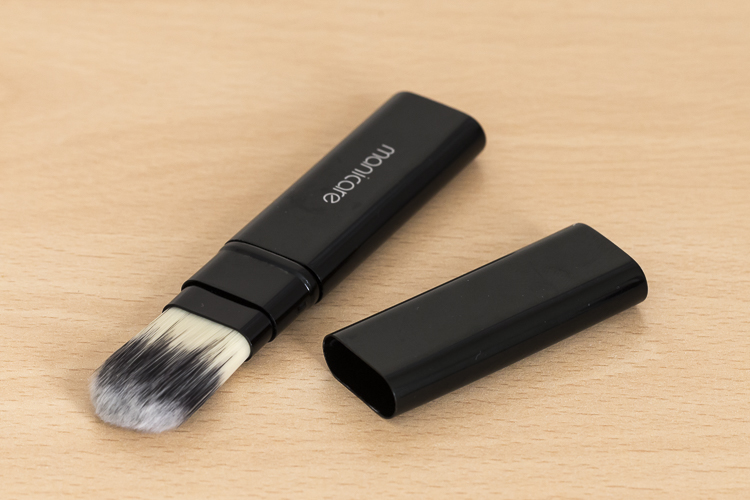
- Make-up brush: this is something that people often have a laugh at when they see it in my bag. But then think, “Hey that’s a good idea”. If you want to add one to your kit, make sure you buy one brand new. You don’t want your partner’s blush going all over your lens. Generally, the more expensive brushes are better as their bristles are much softer. The one I have is also retractable, which is ideal as it protects the brush.
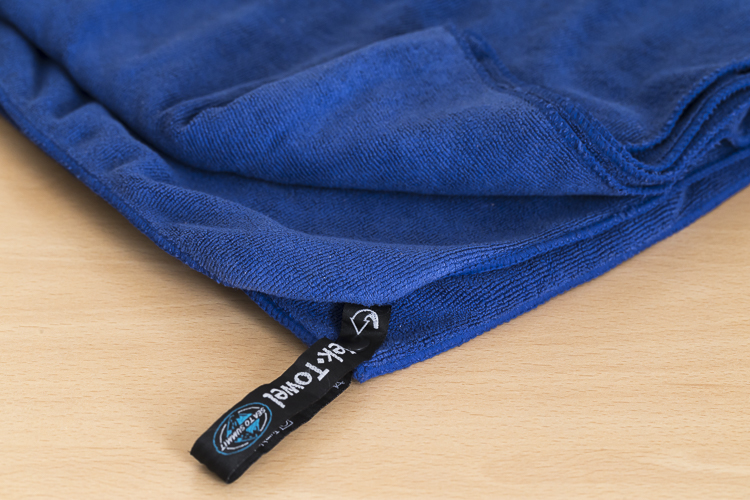
- Teck Towel: I got a Tek Towel for my birthday years ago and decided to give it a go cleaning my gear. It works brilliantly, but a clean towel will work just as well.
- Zip-Lock Bag: This is where I store my cleaning gear, to keep it clean and as dust free as possible!
With these items, I am able to keep my lenses and camera bodies looking (almost) like new. Here’s my workflow when it comes to cleaning time.
Lenses
Step 1. Use the Rocket Blower
The first step is to remove any larger bits of dust, etc., from the lens. For this, I use the rocket blower. Squeezing it blows air out of the tip and will blow away larger, loose bits of dust, etc. It’s important not to use a cloth for this step as this can drag dust over the lens and scratch it. This is why the Rocket Blower is very useful.
Step 2. Use the LensPen
Hopefully, the blower was able to remove all the dust. However, there are times when some little specs remain. To remove these, I use the brush on the end of the LensPen. Doing a quick flick of the brush around the lens should do the trick. There shouldn’t be a need to apply much if any pressure at all. This should remove all the dust from the surface of the lens. You may need to do a quick repeat with the blower, though. If you don’t have a LensPen, using a makeup brush works just as well.
If you don’t have a LensPen, using a makeup brush works just as well.
Step 3. Clean the glass
Your lens should now be free of dust and other debris. If there are some marks surface on the lens, this is when to give it a little clean. First off, use the cleaning end of the LensPen. It is very soft and doesn’t damage the glass at all so it is ideal for this. Using a circular motion, work your way around the lens until all the marks have been removed. This may take several passes to achieve. It’s important to not be tempted to push on the lens too hard. Just keep going around in a circular fashion until it’s satisfied. Give the blower another quick go over, too if necessary.If you don’t have a LensPen using a
If you don’t have a LensPen using a clean micro fibre cloth will also do the job. Just use the same circular motion and again, repeating the motion is preferred over applying more pressure.
Step 4. Get rid of stubborn marks

Using the same circular motion, I work my way around the lens until it’s been completely gone over (I normally go over it two or three times). Then I get a microfibre cloth (generally, a different one that I use just for this purpose) and give the lens a bit of a buff using the same circular motion. I’ll go over it a few times.
I favour these tissues over sprays because I don’t like the idea of having a bottle of liquid inside my camera bag. If it breaks, it can leak into my gear and cause major damage. I also quite like their single-use quality.
For me, using cleaning solutions is an absolute last resort and not something I do each and every time I clean my gear. I also don’t breathe on my lenses (you know, to fog them up to make it easier to wipe off grime) if I can avoid it. If you’re like me and quite a coffee drinker, your breath can be slightly acidic and with repeated use, it can wear down the coatings on your lens. At least that’s what Nikon mentioned a while back in an article I read (ps, I’m a Canon guy).
Step 5. Don’t forget the lens cap
The front element is now clean. But for me, the process is still not yet finished. Before placing the lens cap back on, I have a quick look at it – there could be grit and dust on it that is about to put back on my newly cleaned lens. Giving it a quick once over with the blower and a paint brush will keep it and the lens cleaner.
Step 6. Clean the rear element
Now it’s time to have a quick look at the rear element – the bit that goes inside your camera. This shouldn’t be too messy; after all, it stays inside the camera. But dust can fall on it, especially when changing lenses and this dust, while it may not show up in pictures, can definitely make its way on to the sensor. I give it a quick once over with the Rocket Blower making sure the bottom of the lens is facing down. Doing so will stop any dust from falling back on it. Some rear elements are further recessed into the lens than others. With lenses that have the rear element much closer, I also may give it a quick wipe with a micro fibre cloth or LensPen to clean it up.
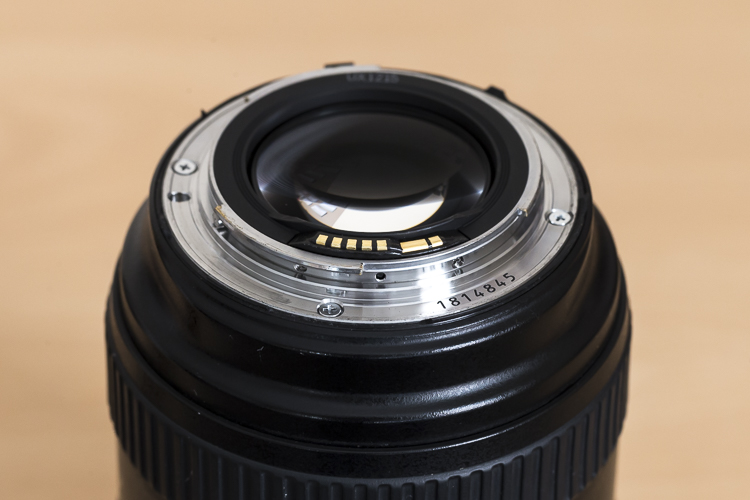
Notice with this lens, the rear element is very close to the surface. Also, those gold bars are the lens contacts.
Occasionally, I’ll also give the mount a clean up too, as well as the lens contacts. For this, I just use a Tek Towel, although any clean towel will do. Carefully wipe around the mount and go over it a couple of times. A small amount of alcohol on a cotton tip can be used to clean the contacts. Cleaning the contacts every now and then can help to prevent errors between the camera and lens caused by a build up of grime.
Now it’s time to give the rear cap a quick go over. Remove any dust with the blower and put it back on the lens.
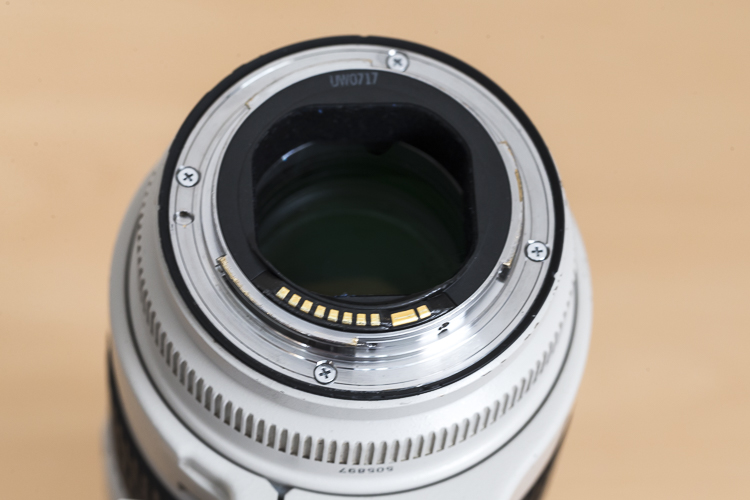
With this lens, the rear element is recessed deeper into the lens barrel.
Step 6. Clean the outside of the lens
Now that the elements (both front and rear) and the lens mount are clean, it’s time to give the outside a quick go over. For this, I whisk away any dust with the paint brush and wipe the whole surface area with the Tek Towel. If I’ve been at the beach (salt in the air), or my lens has had a shower, I’ll dampen the towel in fresh water to remove any salt or champagne, etc.
This step, while very quick and simple, has proven to be quite helpful in picking up some things that may need my attention. For example, a while back I was cleaning my 70-200mm lens and I noticed that the end of the barrel was a little loose. I took it into Canon it was fixed in 10 minutes and cost nothing. Prevention is the best remedy.
Camera
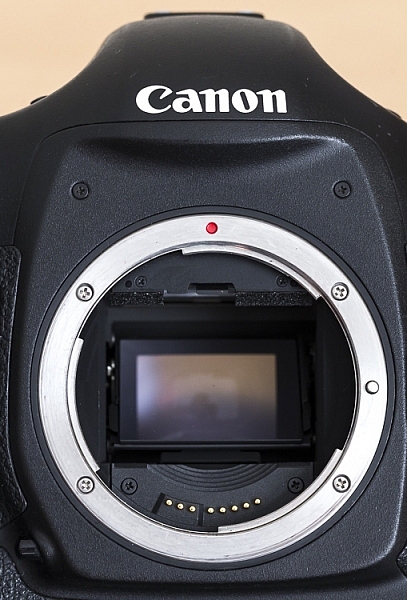
Here is a view of one of my camera bodies without its body cap. Care should be taken when cleaning around the lens mount as to avoid dust, dirt, etc., from falling inside. It’s good practice to do this with the lens mount facing down.
Cleaning the camera is MUCH easier and quicker than the lenses. First off, I start by giving the outside a once over with the paint brush, followed by a thorough wipe down with the towel. I make sure the screens and the viewfinder are all nice and clean, too. As with lenses, I make sure that the mount and the contacts on the body are clean using the same steps and dampen the towel in fresh water if I’ve been at the beach.
While I have the body cap off, I’ll also blow out any dust that may be in the camera with the blower. With this step, I am much more cautious as I don’t want to blow into the body too much. Again, I also have the camera mount facing down to prevent dust from re-entering. This step can help reduce the amount of particles inside the camera which may eventually find their way onto the sensor.
Sensor
For me, this is where the cleaning process stops. I don’t do my own sensor cleaning as I much prefer it be done by the right people. Some people like to do their own sensor cleaning, and that’s completely fine. This is just something I like to give to professionals because if anything goes wrong, I can blame them.
Filters
Conclusion
So that’s it for my gear cleaning process. This isn’t something I do after each and every shoot, but I do try to get to it at least once a month or after shoots where my gear has been a little abused by the elements. It may seem that there are a lot of steps involved, but it really doesn’t take that long to do it. It’s even quite therapeutic when you get into it.
How do you clean your gear? Do you have any other tools you use? What’s your procedure and how often do you do it? Please share in the comments below.
The post Step by Step How to Clean Camera Gear so it Stays in Good Shape by Daniel Smith appeared first on Digital Photography School.
from Digital Photography School http://digital-photography-school.com/clean-care-camera-gear/

No comments:
Post a Comment