The effect of the clouds streaking across the sky is a very popular look now, but not everyone has ND filters and can get those photos. However, there are other ways of getting similar results. Cloud stacking can give a similar look. The process is much like what you do for stacking car light trails. You have to be more careful with how you take the original images, but you can get some wonderful results if you follow these steps.
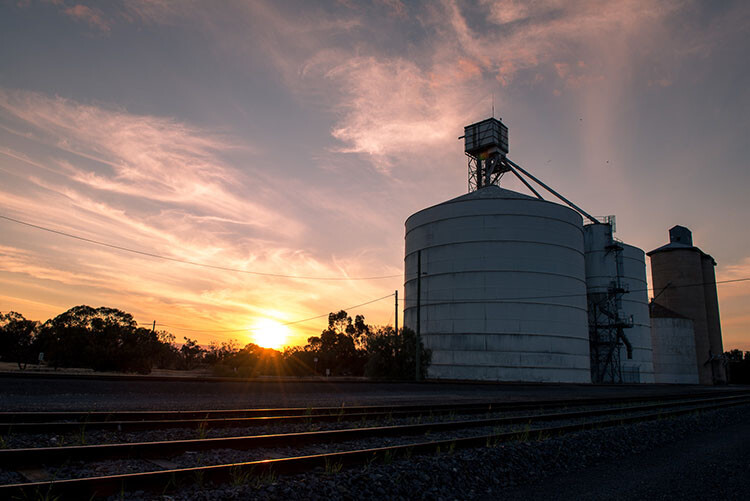
One of the original images.
You need a lot of photos for cloud stacking, and the best way to get them is by doing time lapse photography. Take a series of images over time, then try stacking them to see if they will work. Unfortunately, you don’t always get enough movement in the sky to get a good cloud stacking image, but others will be fantastic.
How to do Time Lapse Photography to get the images for stacking
Time lapse is about taking a series of images, one after another with a break in between, to capture the movement of a scene. Normally, once they are taken, you would put them on your computer and make a video from them to show that movement, however for cloud stacking you will be doing something else.
There are several ways of capturing your photos for a time lapse sequence. Many Nikon cameras come with a feature that allows you to do some, called Time Lapse Interval. You can set it up so that it will take the images at certain intervals, how many shots to take each time, and the final number of images you want. Basically, you can tell your camera to take a photo every 5 seconds, and to stop when you have 300 images.
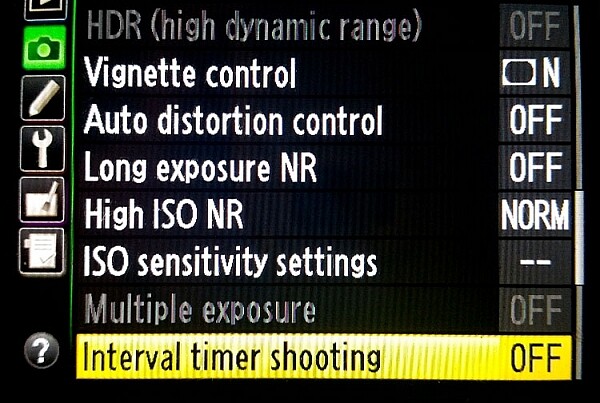
The Interval Timer Shooting on a Nikon Camera
If you have an intervalometer it will do the same sort of thing. Set what the interval will be, and how many shots to take. If you have neither of those options you can still do them, but it will mean you will have to keep an eye on the time and remember to press the shutter button at the intervals.

The Nikon Intervalometer, but you can also purchase other ones as well, get the one that works with your camera.
Usually what you do first is determine what the interval (time between shots) needs to be. Look at the sky and see how fast the clouds are moving. If they are moving fast, then the interval in between shots might need to be shorter. If the clouds are slower moving, then longer times will be needed. It does take experience, and the more you do it the better you get at figuring out the time between the shots you need.
The images for this tutorial were done at sunset, and the clouds were moving moderately fast. The camera was set to take an image every 10 seconds. A total of 122 photos were taken, but only 54 frames were used for the final image.
Direction of the Clouds
Cloud stacking seems to work best if the clouds are moving towards or away from you. Look for the clouds that appear to flow in a V shape. The base of the V is on the horizon and the arms come out over the top.
Using the photos
Once you have the photos on your computer, you need to work out which ones to use. The photos do need to be loaded into Adobe Photoshop as layers, the first consideration has to be the size of the images. If they are raw files they are likely to be too large to do this, so they will need to made smaller.
You can process the images in Lightroom first. Do a basic edit, and then sync, so that all the images have been treated the same. Resize the images when you export them from Lightroom, saving as smaller jpegs. (As this was going to be a tutorial for dPS the images were resized so the long side was 1500 pixels – if you want to print your image make sure you size appropriately, but do a test smaller first.)
Loading the images
For this tutorial I used Adobe Bridge, but you can also do it in Lightroom.
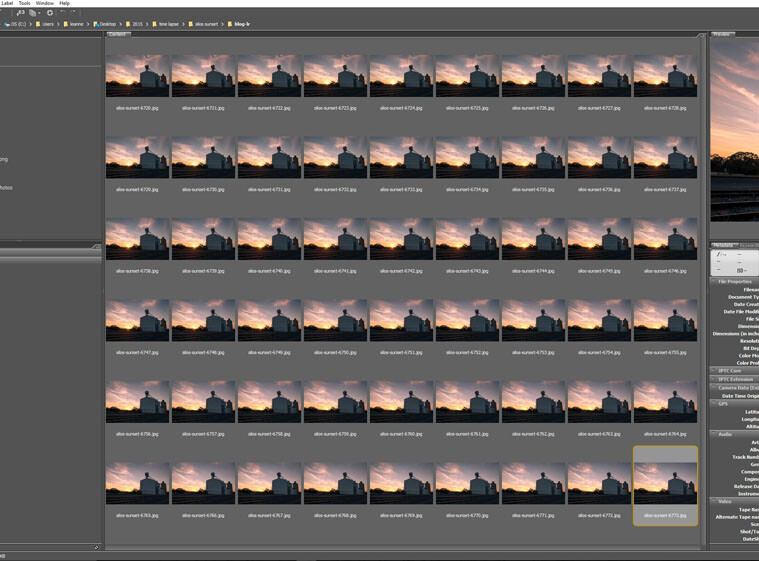
All the images to be used for the cloud stacking.
Select all the images you want to stack, using either Ctrl+A, or click on the first one, press the Shift key and hold, and click on the final image. Load all the images into Photoshop as layers. Select Tools > Photoshop > Load Files into Photoshop Layers (in Lightroom right click and select Edit in > Open as layers in Photoshop).
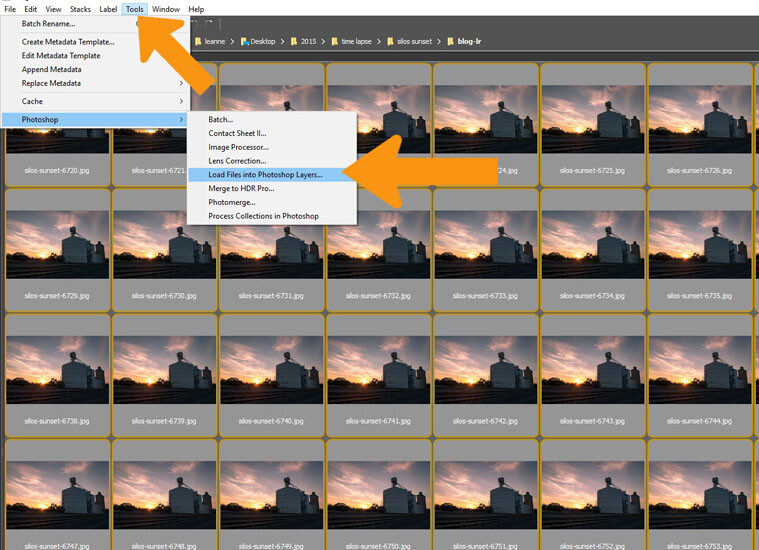
Select all the images and open them as layers in Photoshop.
This can take a while, depending on how many images you are using, and how large the files are. Once they are loaded select all again. Click on the top layer, hold the shift key down, then click on the bottom layer and it should select them all.
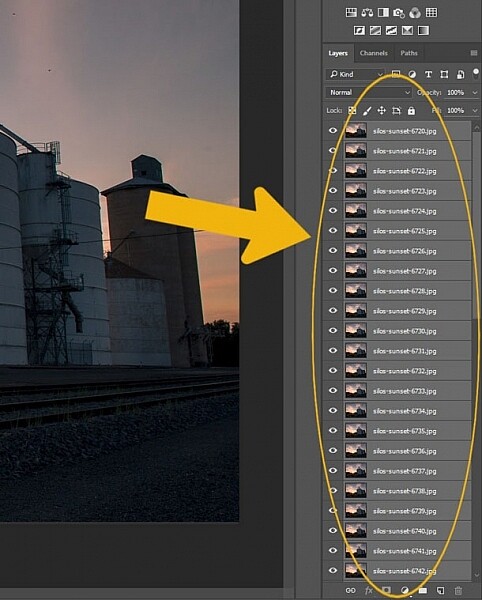
In Photoshop select all the layers.
Stacking the clouds
Go to the layer blending options, at the top of the layers panel and select Lighten.
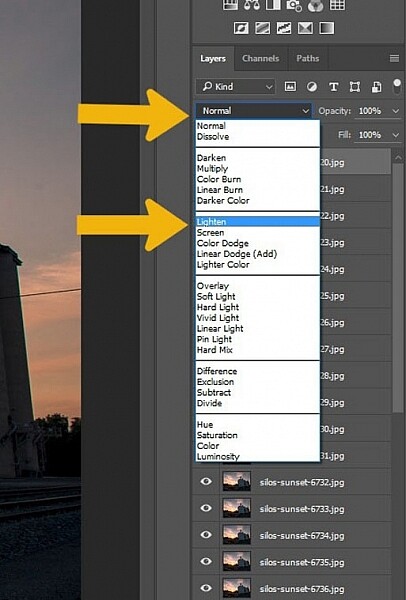
Go to the Blending options and select Lighten.
You should notice a difference straight away.
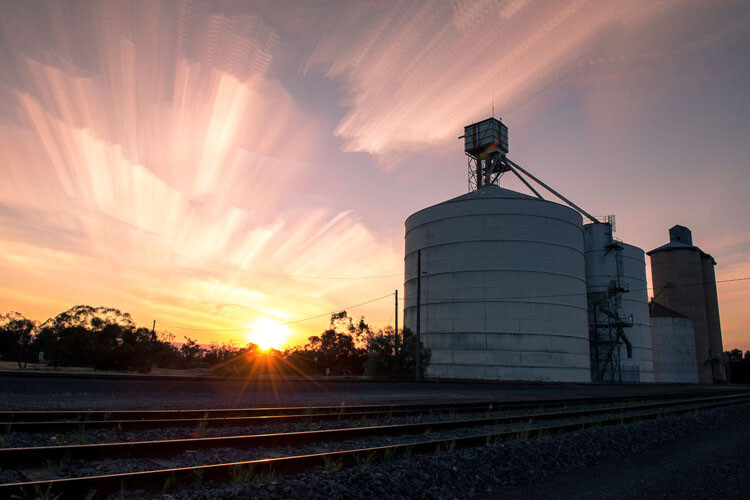
The image after the stacking process.
You could leave the image there and be happy with your stack, but for this tutorial I’ve added some extra ideas on processing . They are relevant to this image, but you can try some ,or all of these ideas for your own image.
Some Additional Processing Tips
There are no hard and fast rules with what you can do when processing an image, it is up to you how you want to go. Here are some ideas to get you started.
Select all the layers, except for the bottom one, and put them into a group. This will make it easier to process the images. In this image it was windy, and the trees moved around, so in the final image they look blurry. By adding a mask to the groups you can carefully use the brush tool, painting with black, to go over the trees so only one is seen and they appear sharper.
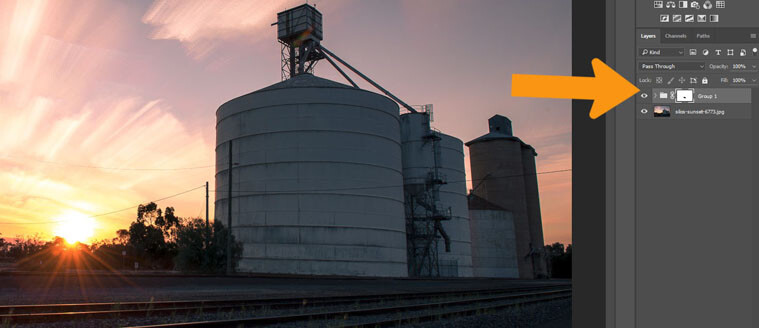
Add a mask to the Group layer and remove anything unwanted, like the trees in this image so only layer one is seen.
The silos appear a bit too dark, and lightening them up a bit would make them stand out a little more as well.
Select the Lasso Tool, and draw a line just inside the silos. Press Shift F6 to get the feather tool. For this image a small amount of feathering was chosen as it is a small image, but on larger sized ones you may prefer to use a feathering of around 200 pixels.
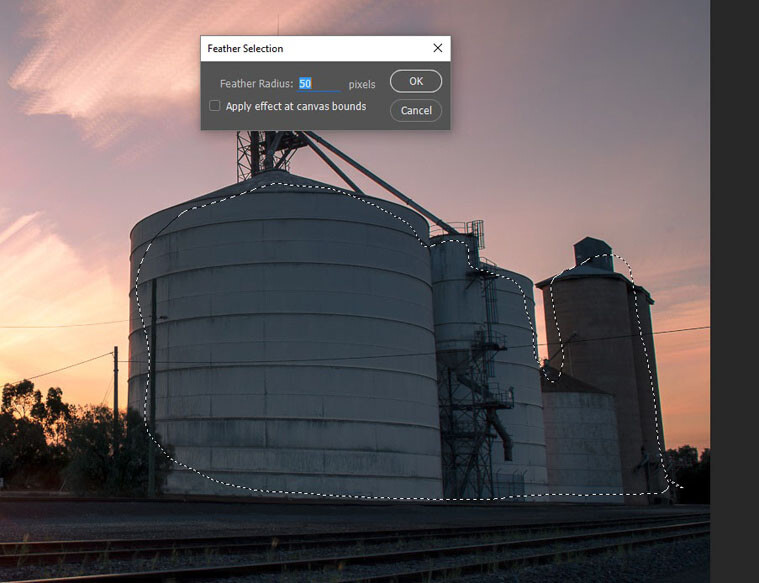
Use lasso tool to draw a selection, and then feather it.
Go to the Adjustments above the layers panel and click on Curves. Try to always use these ones as they do the adjustment as a layer, and if you decide you don’t like it later you can simply edit it, lower the opacity of the layer, or delete the layer (this is non-destructive editing).
Add some light or dark depending on what the image needs. For this one the silos were made brighter.
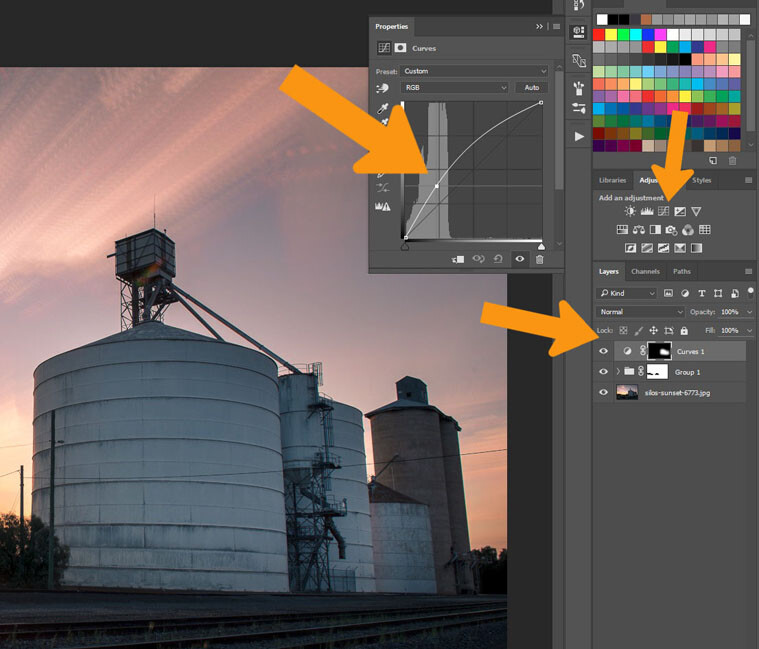
For this selection curves was used to lighten up the silos.
The final bit of processing will be to add a little vignetting or gradient. Add a blank layer to the image, click on the symbol at the bottom of the layers panel, it is the one next to the rubbish bin. Make sure it is selected, then select the gradient tool from the toolbar.
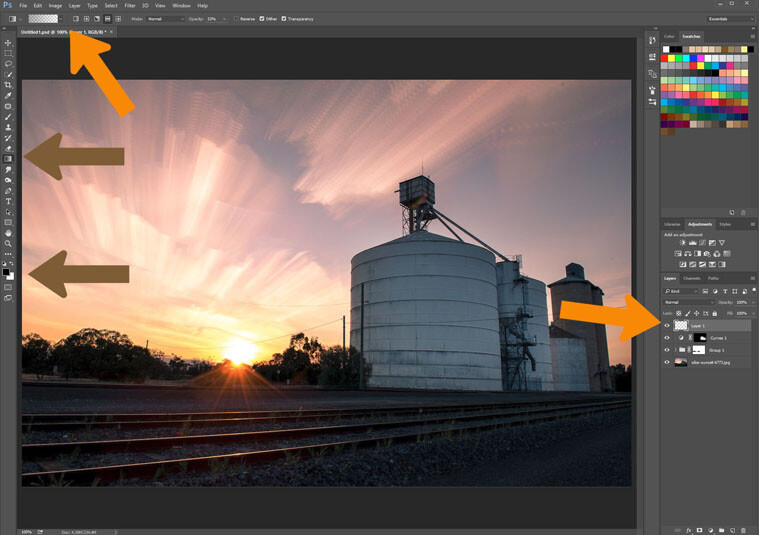
Use the gradient tool to add some darkness to the sky.
At the top under the menu bar you will see the options for the gradient tool. Make sure the tool selected is the Foreground to Transparent is the one you are using (make sure the foreground color is set to black).
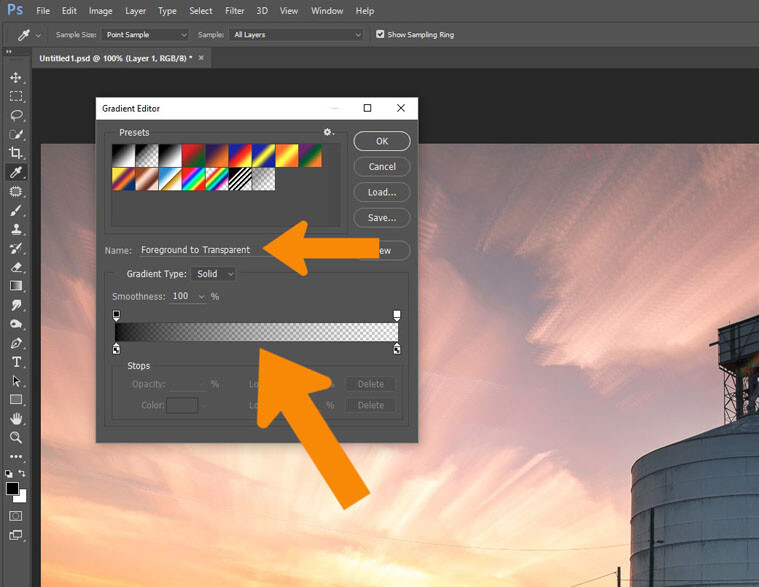
Make sure you have the right tool option for what you want to do.
You don’t want this to be 100%, it’s best to use it at around 50%. You can build it up, but start with that. You can change that by going to the tool options and changing the 100 to 50.
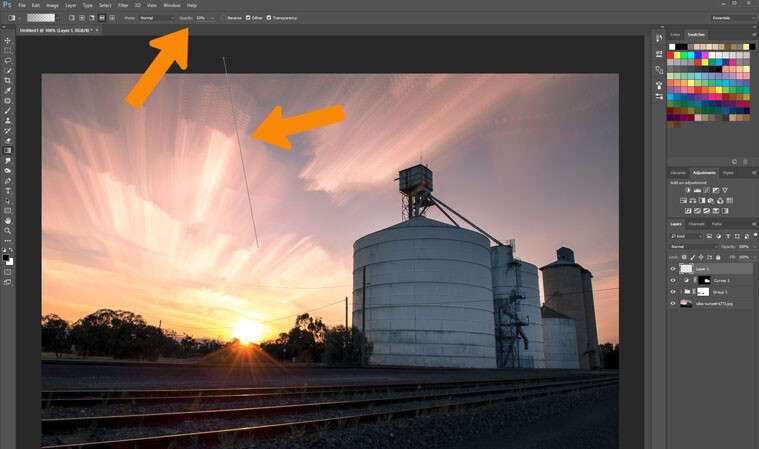
Add some gradient to the sky to darken it slightly.
To use the tool, click and hold outside the image then move inside the image and release. It will do a gradual lightening of the colour, so the darkest area is where you did the first click.
If you want it darker you can repeat until you get the desired effect. The image here it was done twice.
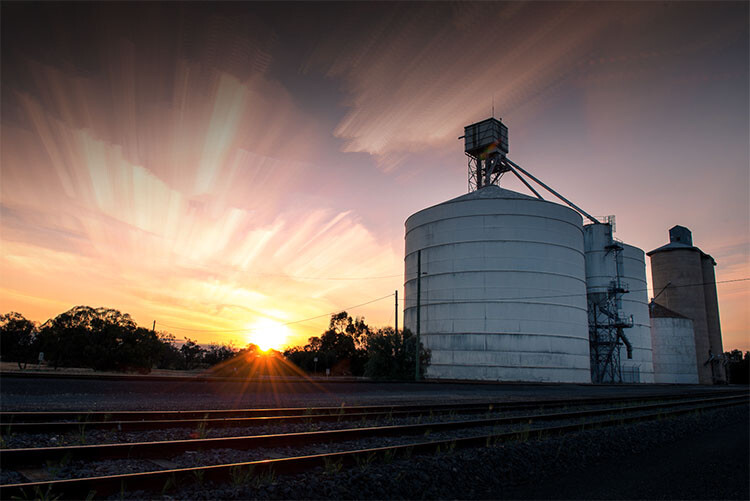
The final image
That is a very basic edit on this image, but is enough for now. The image is fine as it is, but, as with all images, the only thing stopping what you can do, is your imagination.
The post Step by Step How to do Cloud Stacking by Leanne Cole appeared first on Digital Photography School.
from Digital Photography School http://digital-photography-school.com/cloud-stacking/
First of all I want to say thank you. Your sharing tips is valuable. It is helpful for me. Good wish for you. May you live long.
ReplyDeletetransparent background photoshop