Have you ever found yourself with a batch of photos that you needed to have edited in the same way? Rather than editing each image one-by-one, Adobe Photoshop offers batch editing processes that can help you save time, while preserving consistent quality among your images.
This tutorial will show you how to use Photoshop Actions to resize and edit multiple photos, along with a quick tip on how to replicate this process in Lightroom.
What You Need
The bulk editing process is pretty easy and straightforward, requiring just a handful of things:
- A batch of images you want to bulk edit
- Adobe Bridge
- Adobe Photoshop
- Basic Photoshop working knowledge
Get Started: Record an Action in Photoshop
The very first step is to determine the process or edit that you wish to have automated, and record it as an Action in Photoshop. In this case, let’s use the example of resizing an image. Then you’ll use Bridge to select your set of images and apply the Action to all of them at once.
Step 1: Open Photoshop and have a sample image open to perform this action on. Go to the main menu bar and click Window > Actions.
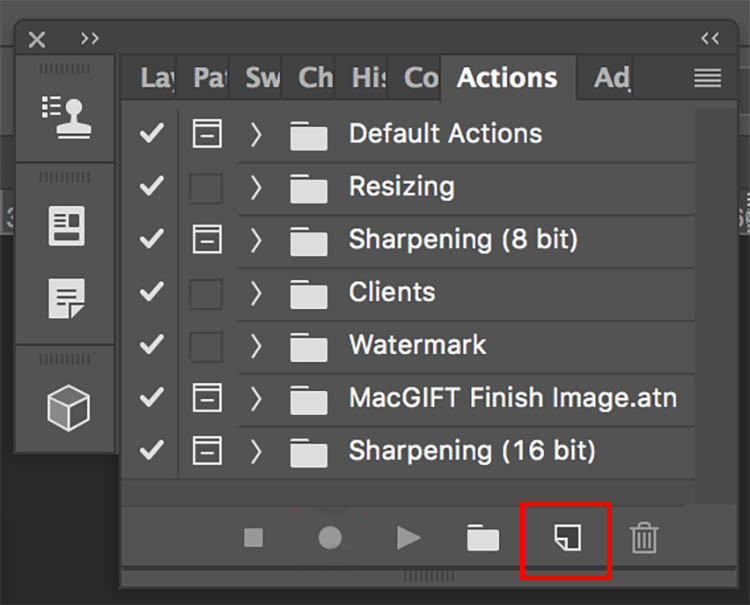
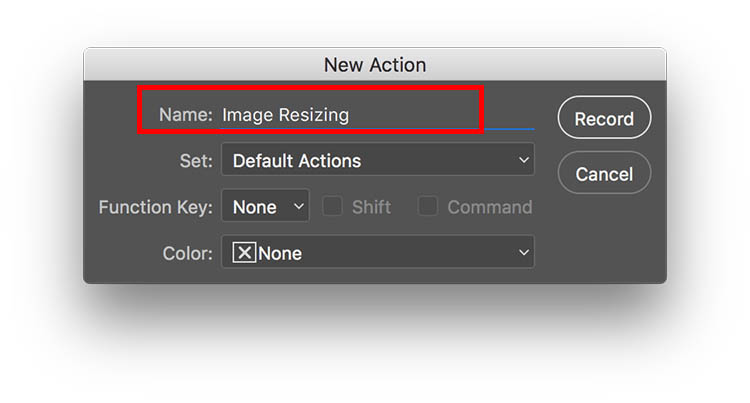
Step 2: When the Actions panel pops up, click the bottom right button next to the trash can icon that says “Create New Action.” Enter a name for your action, such as “Image Resizing.” Then start recording your new action by clicking the “Record” button.
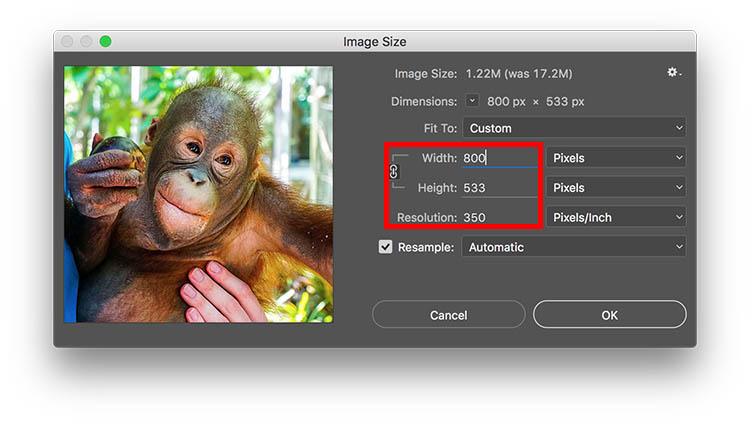
Step 3: Now begin the series of steps that you want to have recorded. For resizing, head up to the main Photoshop menu bar and go to Image > Image Size. Input your ideal photo size, such as 800 pixels wide.
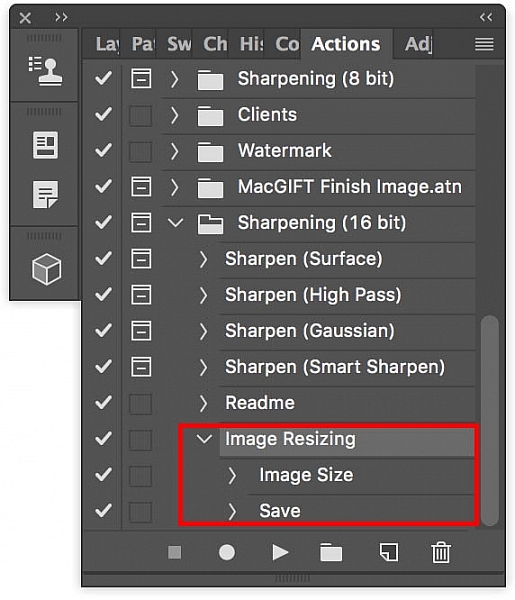
Step 4: After you’ve completed all of the steps for your action, go back to the Actions panel and click on the Stop button to end recording. You should now see your saved action within the panel.
Run A Batch of Images Through Photoshop
After you’ve created your action, it’s time to apply it to your batch of images.
Step 1: Put all of the photos you want to batch edit into one folder. Open Adobe Bridge and find your folder of images. Click on the folder and select all of the content.
Step 2: Within Bridge, go to Tools > Photoshop > Batch.
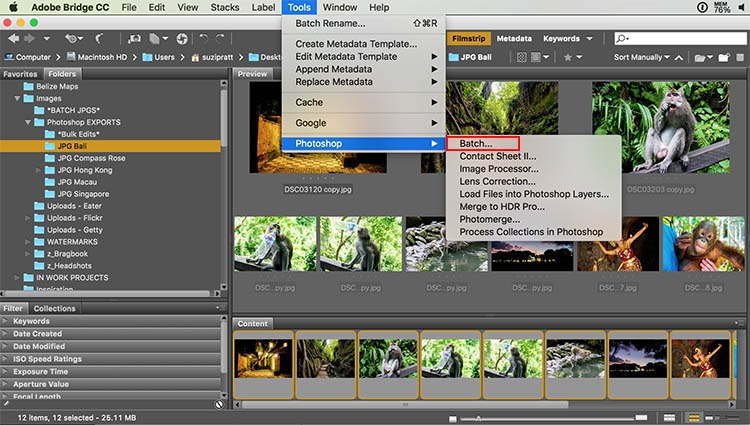
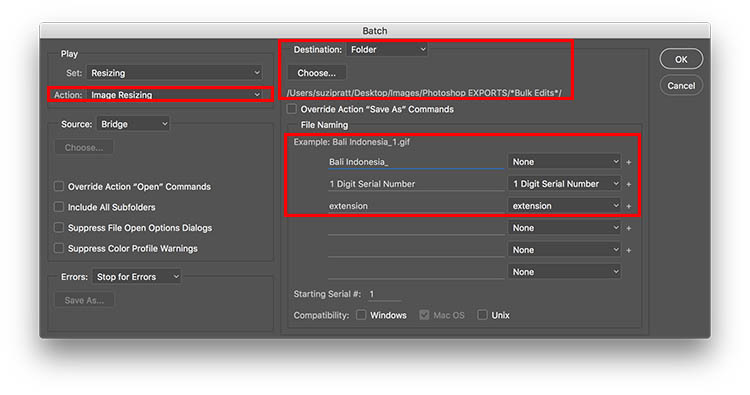
Step 3: A Batch dialogue box will appear and you’ll want to adjust these settings in particular.
- In the top left corner, select the action that you want applied to your images (in our case, “Image Resizing.”).
- In the middle of the dialogue box, specify the folder where your bulk edits should end up. I always have a folder called *Bulk Edits* where I automatically have all of my bulk edited images saved.
- Finally, you can specify a particular image name that you want to give to your batch of images, as well as assign unique identifiers, such as numeric order. Then click OK to have the action applied to your batch of photos.
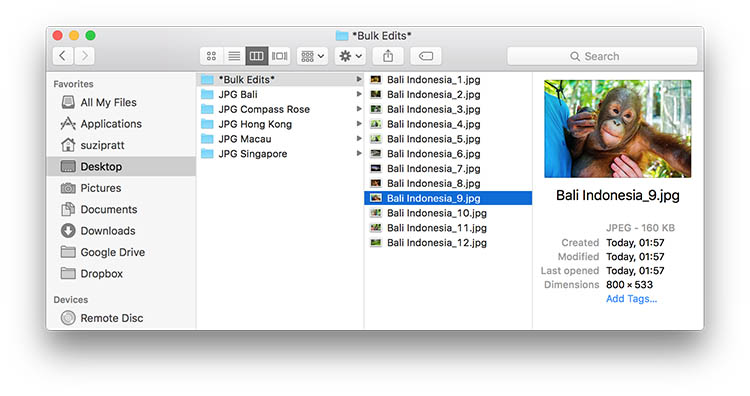
Step 4: After your batch of images are processed, go to your specified folder to check out the results.
Making bulk edits in Lightroom
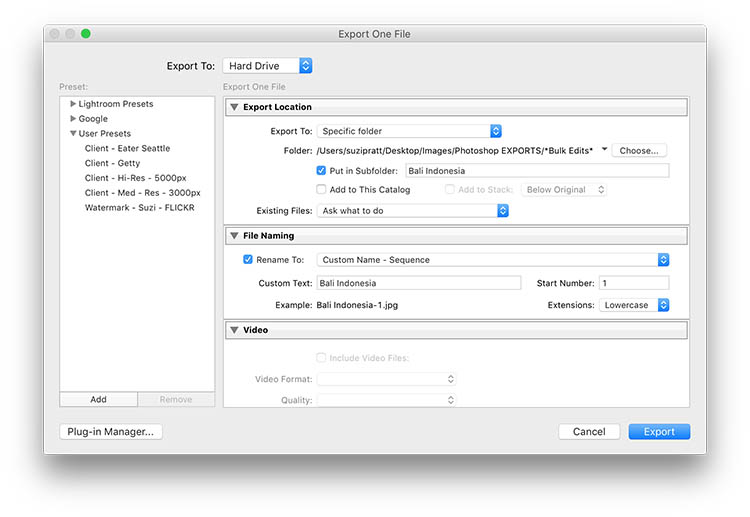
While doing bulk edits in Photoshop is relatively easy to do, it’s even quicker in Adobe Lightroom. If using Lightroom, import your images and select them all. Then go to File > Export. A pop up dialogue box will then appear with fields where you can specify where to save the images and also rename, resize, and watermark the images (you can also save that as an export preset)
Over to You
Do you perform many bulk edits in Photoshop or Lightroom? If so, what are the types of processes you tend to bulk edit? Let me know in the comments below!
The post How to do Bulk Resize and Edit in Photoshop by Suzi Pratt appeared first on Digital Photography School.
from Digital Photography School http://digital-photography-school.com/how-to-do-bulk-resize-in-photoshop/
No comments:
Post a Comment