Do you want to take razor sharp photos? One of the best methods for creating tack sharp images is what I call The 20/20 Technique. It’s a process that combines the editing power of Adobe Lightroom and Nik Efex to sharpen your images.

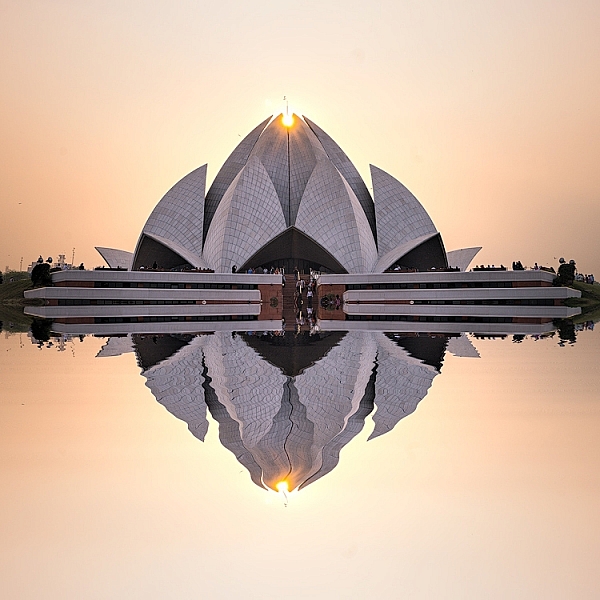
Lotus Temple, Delhi: Bringing out sharpness in architectural photos can really make them pop. © Pete DeMarco
Is sharpness overrated?
The godfather of street photography, Henri Cartier-Bresson, once quipped, “Sharpness is a bourgeois concept.” It’s true that sharpness does not turn a bad photo into a good one. In fact, some of the greatest photographs of our time aren’t that sharp. A picture that evokes emotion will always win over an image that is technically great but lacks feeling.
In the digital age, however, sharpness is another tool in the photographer’s kit that can transform an image from good to great. Have you ever seen a photo so clear that it makes you feel as if you could reach through the screen? It’s almost as if it’s not even a photograph at all but a window into another world.

Bundi, India: Be careful not to sharpen people too much. © Pete DeMarco
Popular advice about getting sharp images usually centers around buying expensive lenses or having the proper settings in camera, as is explained in this article; How to Take Sharp Images. Although those two factors have a major impact on the overall sharpness of the image, today’s top photographers take an additional step. They enhance the sharpness in post-processing.
Sharpen Using The 20/20 Technique
In the modern digital darkroom, there are a number of ways you can add a superior amount of sharpness to your images. I’m going to explain one of the most simple and effective methods you can use to get incredible results. Here is my 20/20 Technique workflow:

Burj Khalifa Reflection, Dubai: Nik Efex is a powerful photo editing suite you can download for free. © Pete DeMarco
Step 1. Open your image in LR
Import your image into Adobe Lightroom (or the editing software of your choice). Open the Develop Module and go to the Detail Panel, then to Sharpening. Increase the sliders up to somewhere between 40 – 50. This is just a general number to start. You’ll have to decide what works best for your image (make sure to view it full size or 1:1). Then finish editing your photo (correcting the white balance, exposure, etc.).
Step 2. Open the image in Nik Efex
For the next step, you will need a piece of software called NIK Efex. You can download NIK Efex for free here. Look for the blue download button in the top-right corner.
NIK Software is a company that develops image editing tools for others like Adobe and Google. In fact, Google bought the company in 2012. Then they copied the best editing algorithms from NIK Efex and created the photo editing app Snapseed. Sadly, NIK Efex has not been updated since then. Most assume it will die a slow death, especially after Google announced the software is now free.

Busan, South Korea: Adding a slight tilt-shift blur effect to the edges of your photo can accentuate the sharpened areas. © Pete DeMarco
Anyways, once you install Nik Efex, right click on your photo in the Lightroom Develop Module > Edit in Nik Output Sharpener, and choose; Edit a copy with Lightroom Adjustments. Your photo will then open in a new Nik Output Sharpener window.
Step 3. Adjust using the Nik filters
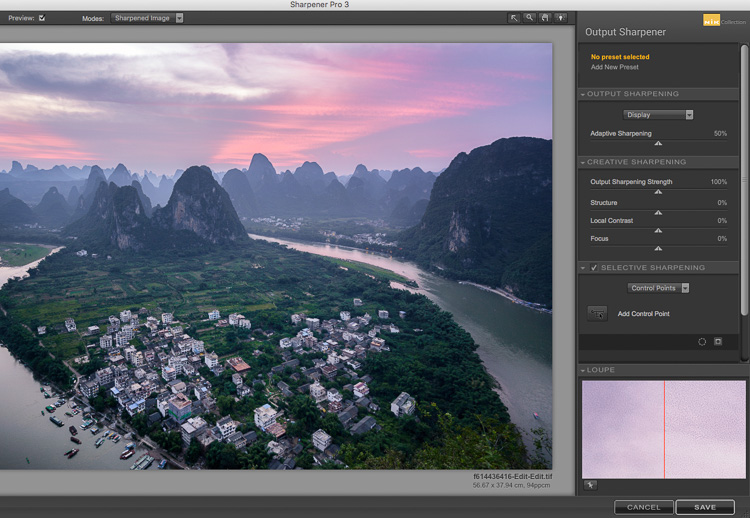
From the Nik Output Sharpener window, move the sliders until you get the look and sharpness you are after. For me, I usually leave the “Adaptive Sharpening” at 50%. Then I increase the “Local Contrast” and “Focus” sliders up to around 15-20%.

The Nik Efex Output Sharpener interface.
Step 4. Save and head back to Lightroom
Click on “Save” and the final version of your image will import as a new file back in Lightroom. That’s it!
Here is a video from Nik showing how to use this filter:
Words of warning
Don’t sharpen too much. Know when to pump it up or turn it down. For instance, clouds are soft so you usually don’t want to apply a lot of sharpening to them. Nature scenes usually call for less sharpening. With architecture, some extra sharpening really makes it pop (try adding a little “Structure” sharpening to those). Sharpening people can be hit or miss. It all depends on what you’re trying to achieve.

Xingping, China: Selectively sharpening parts of your image, like the houses in the foreground of this photo, helps to lead the viewer’s eye. © Pete DeMarco
Watch out for noise. The more digital sharpening you apply, the greater the noise in your photo. Just zoom in on your photo to see it more clearly. You can apply some Noise Reduction in Lightroom if need be. I don’t like to use it much though because it softens the image. Some noise really doesn’t matter anyways, especially if you are sharing your photo as a smaller size online.
Make sure you’re using a good monitor. If you are viewing or editing your photos on an old monitor, it’s possible that you will not see much difference in sharpness. You can get the best results on a retina display or by printing your photos.

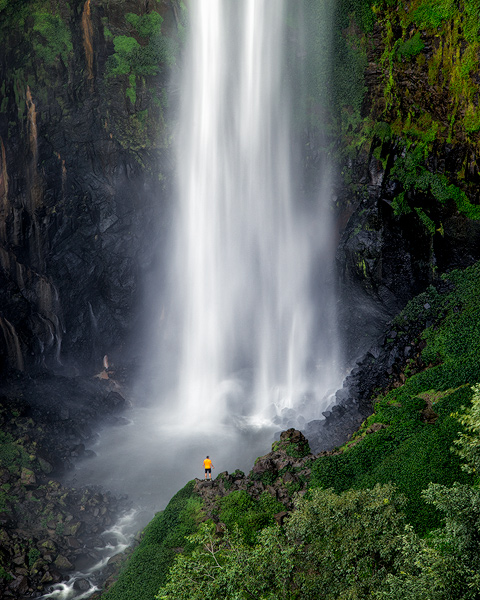
Sipisopiso Waterfall, Indonesia: Transform your images by combining the 20/20 Technique with split toning. © Pete DeMarco
Share your work
Try the 20/20 Technique and share your photo in the comments below. I’d love to see what you do with it. And if you enjoyed this article, you might also like my previous article: How To Use Split Toning to Make Your Photos Stand Out.
The post How to Sharpen Your Photos using Lightroom and Nik Efex by Pete DeMarco appeared first on Digital Photography School.
from Digital Photography School http://digital-photography-school.com/sharpen-photos-using-lightroom-nik-efex/
No comments:
Post a Comment