Lighting can be a complicated subject. From light sources, to modifiers, and color temperature, there are so many things to take into consideration. You probably know of many ways to alter your light with reflectors and diffusers.
However, what do you do when you have too much light, or the light isn’t behaving the way you need to produce your final image? You could start from scratch and choose a different light source and modifier, or you could opt for a different setup altogether. There is another way – flags.
Like diffusers and reflectors, flags are a tool that are used to control light. While diffusers control the shape and softness of light, and reflectors control the shape, intensity and direction (often acting as an additional light source), flags give you the ability to remove, or block light from your scene.
Another use of flags is to alter the size and shape of your modifier. For example you can block off a portion of a softbox to turn it into a striplight. They are also useful when working with reflective surfaces to control or block unwanted reflections.
This article will break down the basic use of flags to control where light falls in a scene. To do this, we’ll go through the step by step process of creating an image which employs the careful manipulation of a single light source.
The purpose of using a small, tabletop subject is so you can repeat the exact steps at home, in your own time.
What are flags?
At the most basic, flags are anything that can used to block or cut light from anywhere it isn’t wanted. Have you ever closed a blind or a curtain to block glare from a television screen? That blind is acting as a flag. Another example would be the sun visor in your car. What other examples can you think of? These instances from day to day life can help you figure out the use of flags much quicker.
Although you can use almost anything dark as a flag, the most common items are black paper and foamcore. Also, most 5-in-1 reflectors come with a black side that’s intended as a flag (see links above for some options).
Foamcore is one of the more useful things you can use, as it comes in a variety of thicknesses making it rigid, and it’s easy to cut to any shape and size you might need. It is also easily obtainable (visit any art supply store) and quite cheap.
Helpful things to have
As you will see in this demonstration, it can be very precarious to get your bits of foamcore to stay in place. An easy solution is to get a bunch of clamps to hold your flags. I cannot recommend this enough.
Other things that will help you position your flags include Blue-Tac, toothpicks, Popsicle sticks and tape.
Building an image
When you are working on an image that has many steps as part of the setup process, it’s important to take your time and build up your image one step at a time. Start with putting your subject in place and choosing your composition. From there, you can pick how you want to light it. Once those three things are in place, you can add or take away from the scene one step at a time, ensuring things are perfect before you move on to the next step.
Fun with flags
Step 1 – Set-up
As mentioned, this process will start with a wide crop to better illustrate how the light changes. The first task is to arrange the subject and light in the desired position, and calculate the exposure. For this shot, I intend to push the highlights of the subject to just below their limit, so the flags can be used to darken the background and achieve a very high contrast look in the final image.
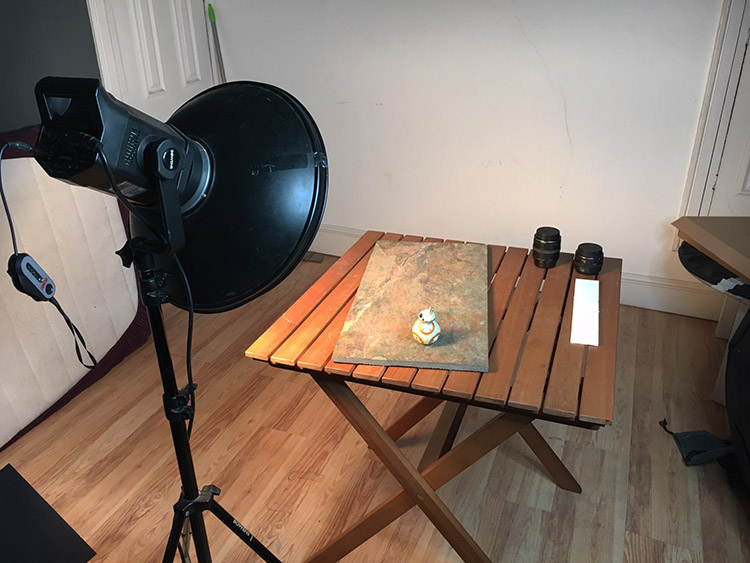
Original setup, no flags used.
Step 2 – first flag for background control
Even though that is a good start, there are some things that can be done to improve this image. The first thing that needs to be tackled is the large negative space in the left hand side of the image. The background matches the subject in tone and color, so bringing down the exposure on the background will help to separate the two.
This is achieved by bringing in a large piece of black foamcore and holding it in front of the light. By watching where the shadows fall, you can figure out exactly where your flag needs to be to reduce the exposure on the background, without affecting your subject. Once that place is found, the flag can be mounted in place and another test shot taken.
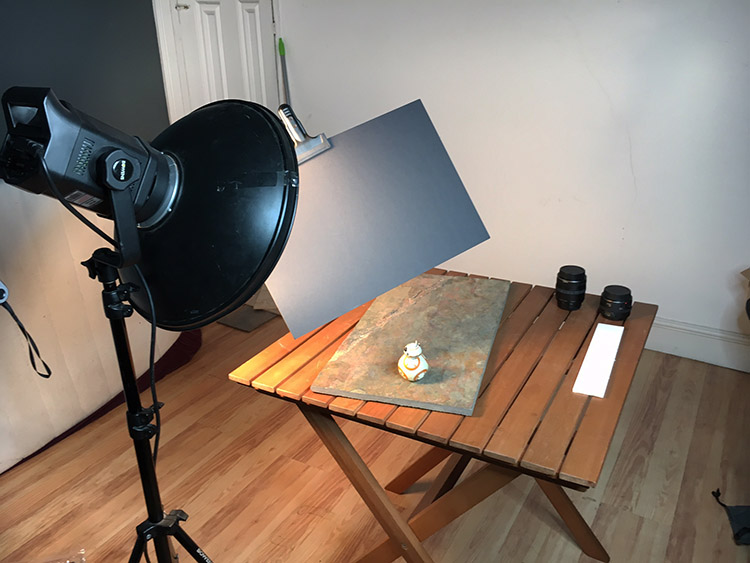
First flag placed to strategically block light from falling on the background.

Notice how much darker the left side of the image is, but the exposure on the subject has not changed.
Step 3 – place second flag for further light control
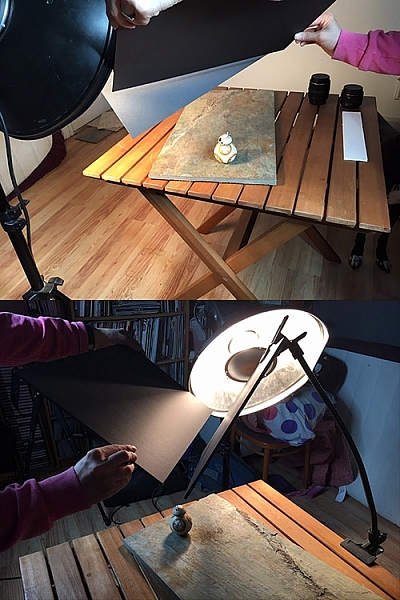
With the left side darkened, the next bit of concern is the area of background to the right of and behind, the subject. Again, it’s a matter of bringing in a piece of foam core and moving it around while watching the shadows and making sure the subject is still lit. Once that’s achieved, clamp or hold the flag in place and take another test shot.
Step 4
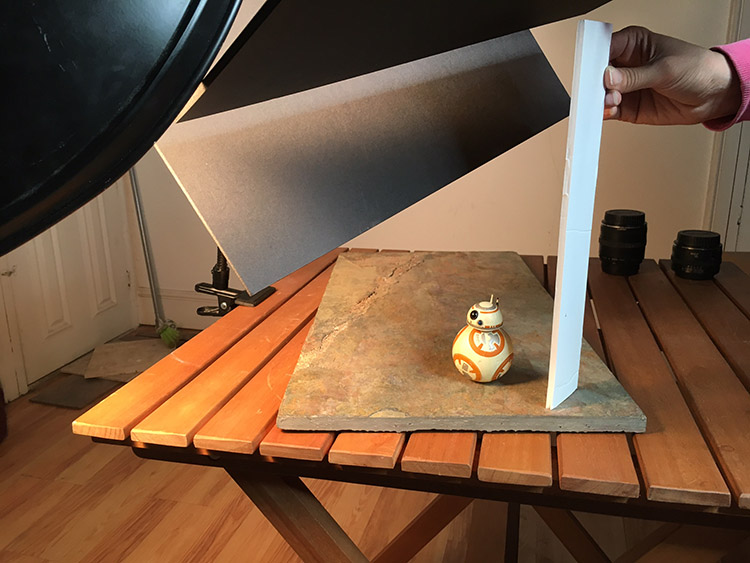
With all the flags in place, this image isn’t quite finished. Because the background has been darkened so much, the shadow side of the subject now doesn’t stand out as much as it did in the initial setup. You can fix this with a reflector. In this case, I used a strip of white foamcore, just out of the frame to camera right. This fills in the shadows, creating an extra amount of separation between the subject and the background.
Final image
With these techniques, you are taking your time to build up a scene, and controlling every bit of light that your camera records. This control, when done right, should result in well crafted images that need very little attention in post-production. In this example, this image needed a small crop, a couple small local contrast adjustments, and a high pass filter. That took all of a minute to achieve, thanks to the amount of time spent working in camera.

Before flags and lighting control

Final image with the use of flags and a reflector to control the light, and minimal post-processing.
Moving on
Once you try this for yourself, you should quickly see how flags can be a huge help when trying to control lighting in your photography. Although this tutorial focuses on a small subject, flags can be used to great effect in all manner of genres where you have the opportunity to control light. This is especially true with portraiture. So, when you have the hang of it with a small subject, don’t be afraid to think bigger.
Please feel free to have a go at this technique yourself and share your questions and your results below.
The post How to Control and Modify Your Lighting With Flags by John McIntire appeared first on Digital Photography School.
from Digital Photography School http://digital-photography-school.com/how-to-control-and-modify-your-lighting-with-flags/


No comments:
Post a Comment