Thursday, 1 November 2018

Understanding Tonal Range in Photography

Understanding tonal range in photography can be the last thing on a photographers mind.

As we progress on our particular paths, there can be times when even the most mindful of us take some things for granted. The simple elements are sometimes overlooked first – such as a sloppy tripod setup or assuming our cameras settings are where we last left them.

In the same vein, the steadfast technical concepts of our photo work are misunderstood, misinterpreted or worse – completely forgotten. This malady spans every level of skill and afflicts both pros and hobbyists alike.

Understanding Tonal Range in Photography 1

Take as an example the most basic building block of any photograph; light. In our weirdly flexible digital age of post-processing, we can sometimes forget what is happening with the luminance values of our images.

Our photographs are displays of contrast between light and dark, but the distance between the two are virtually limitless.

A Brief Word on Tonal Range

All that we’re talking about here today is the measure of brightness from complete dark to complete light. The range between the different brightness levels within our photos determines its degree of contrast. Take a look at this tonal scale:

Understanding Tonal Range in Photography 2

We move from complete darkness on the left (black) to complete light (whites) on the right. This scale applies for both color and black and white photographs. Now, let’s talk about each of these values and how they relate to your photography.

Highlights

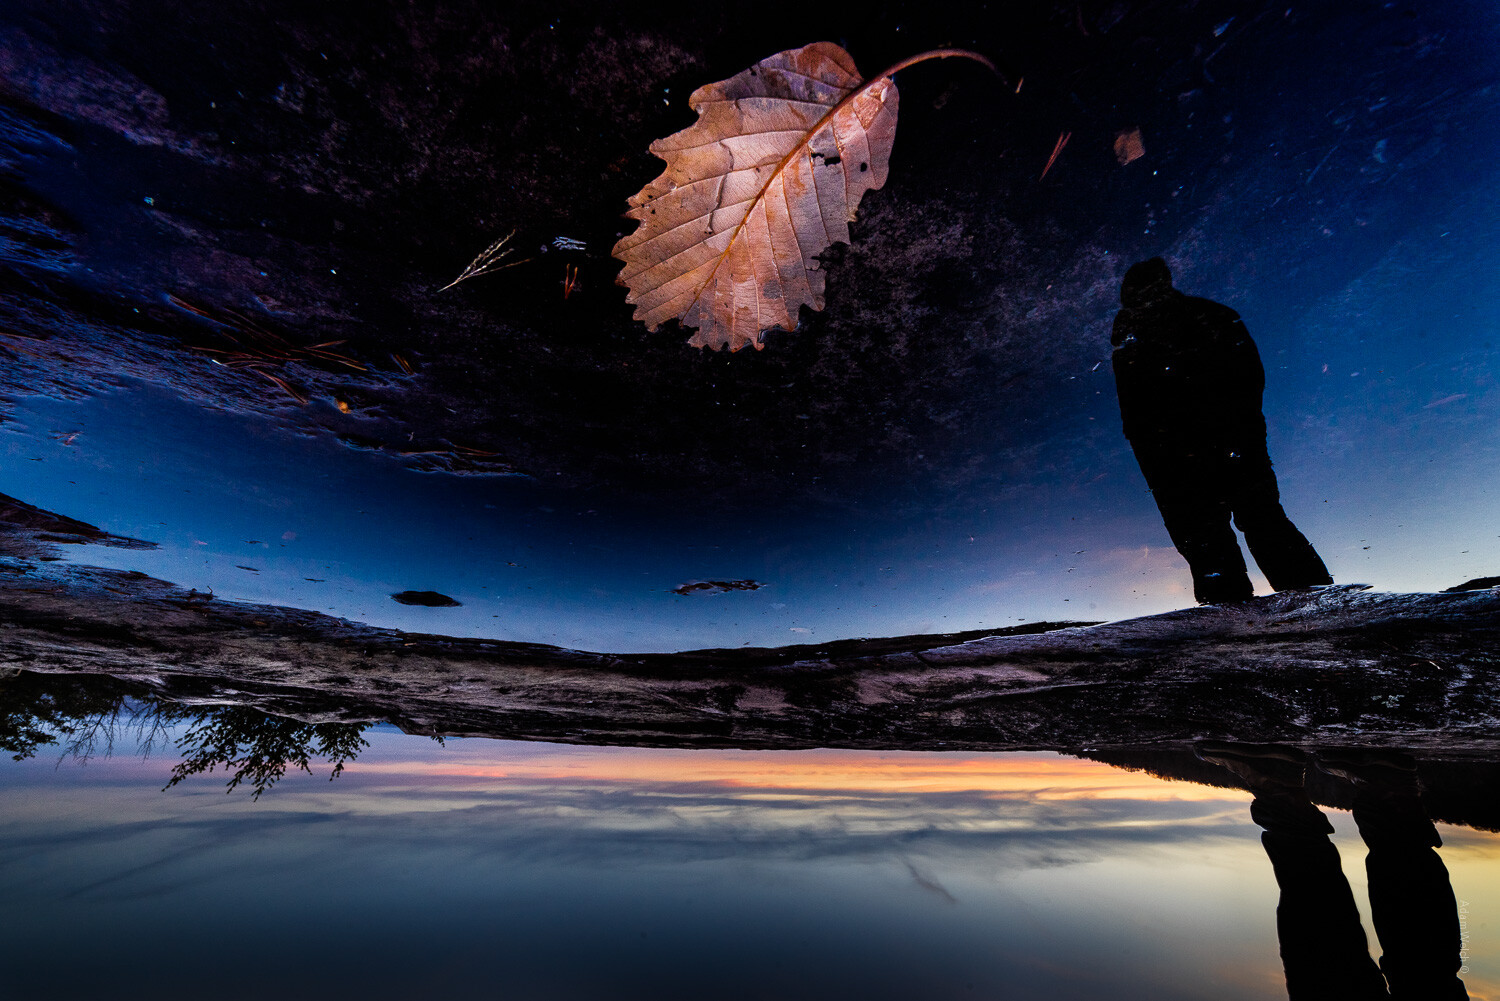
Traditionally, I’ve always thought of highlights as the brightest portions of an image, which is not the case. At least not the case to the utmost extent. In truth, highlights can be considered the areas of a photograph which consist of high luminance values yet still contain discernible detail. Here’s an example of highlight luminance values:

Understanding Tonal Range in Photography 3

Notice that even though these areas are bright, there is still some discernible texture and detail to be made out within the bright spots. If we were to increase the exposure, in camera or with post-processing, it would become so bright that it would lose detail entirely, which brings us to our next point.

Whites

If we increase the brightness to the extent that our highlights become ‘blown out’ (where details are invisible), we have complete white.

Even if the white area doesn’t appear white, it may be considered a total ‘white area’ due to the lack of detail. The following is an example of luminance considered total white:

Understanding Tonal Range in Photography 4

Depending on your photograph, it may or may not be desirable to push the exposure to the point of white-out. We’ll talk more about this as we discuss the relevance of tonal range in regards to constructing your images.

Midtones

A mid-tone is precisely that – all luminance values that are not dark or light are considered to be mid-tones. Most of the time our camera meter will attempt to expose for this average brightness when in ‘Automatic Mode.’

Understanding Tonal Range in Photography 5

While mid-tones help to ensure much information is contained in an image, a photograph consisting of only mid-tones lacks dynamics.

Shadows

Areas that appear as shadows are closely related to highlights albeit in the opposite direction. Shadows are the areas of a photo that are dark but still retain a level of detail.

The above photo is a perfect example of more information in the shadow areas, so let’s use it one more time:

Understanding Tonal Range in Photography 6

These darker areas still possess information seen by the viewer. However, if we darken them to the point where that detail gets lost or ‘burnt out,’ then…you guessed it, they become a completely black luminance value.

Blacks

Any portion a photograph that has zero luminance is considered to be black. Much like the complete white areas earlier, these points within our images don’t have to be utterly devoid of color to be regarded as pure black.

Let’s look at some shadows that are completely burnt out and retain no detail whatsoever:

Understanding Tonal Range in Photography 7

Completely black areas are so dark that you can see nothing. Consider them the ‘dark abyss’ within a photograph. Having these areas within your image isn’t necessarily a bad thing, so let’s talk about that now.

Luminance Values and You

If you ever open a conversation among a group of photographers about the suitability of brightness levels within a photograph, you’d see that the schism is split. Some photographers feel that images should contain no areas of complete black or complete white – that all portions of the photograph should present some level of detail for the viewer.

Understanding Tonal Range in Photography 8

Still, others contend that it’s perfectly fine to either burn or blow out some luminance values for the sake of contrast. Doing this means that there is an area of complete black and complete white so that all the other luminance values fall somewhere between those two absolutes.

While it’s true that it is often desirable to deliver the maximum amount of visual information to your audience, this is not always the case. There are times when a crushed and burnt out shadow or a super-bright highlight are just what you need to bring a photograph home.

Understanding Tonal Range in Photography 9

Final Thoughts

I’m happy to profess my opinion that there is no such thing as a set technique for each photograph you make. It might seem like a simple thing to remember, but it’s easy to overlook the importance of how different levels of brightness affect an image. Let’s take a quick run back through what we’ve learned about luminance values:

  • Highlights – Bright areas within a photo that still maintain detail
  • Whites – Areas of extreme brightness where there is absolutely no information(detail) remaining
  • Midtones – These are neither shadows or highlights but rather a middle value of luminance
  • Shadows – Darker areas of the image that still maintain detail
  • Blacks – Completely ‘burnt out’ portions of a photo that contains absolutely no detail

Like most concepts in photography, it’s essential to have a full understanding of the tonal range falling within your photos. You should use this knowledge to strive for technical excellence and also so you know when to break the rules in favor of fulfilling your creative vision.

How do you make use of tonal range in your images? Share with us your thoughts and images in the comments below.

The post Understanding Tonal Range in Photography appeared first on Digital Photography School.


from Digital Photography School https://digital-photography-school.com/understanding-tonal-range-photography/

How to Build a DIY Long-Term Weatherproof Timelapse Rig

Photo Sparks Accusations of Cloning, Photographer Denies, Denies, Denies

An Australian photographer has sparked a bit of a controversy after one of his photos featured by a major media outlet drew accusations of Photoshop manipulation. The photographer responded by denying that he cloned the main subject of his photo, but his untouched photo seems to tell a different story.

It all started on October 22st after ABC Brisbane shared this stormy landscape photo by photographer David Pyle on its Facebook page to 124,000+ followers:

“Can anyone else see the horse riders in the clouds?” ABC Brisbane wrote alongside the image. “This was taken in Bundaberg on Sunday night.”

The photo quickly attracted thousands of Likes and Shares, but some commenters immediately began pointing out that the “horse riders” and the area around them show signs of Photoshop manipulation.

“It’s actually ridiculous how many people are sharing this photo under the belief that it’s real,” one commenter writes. “How can’t you see how heavily manipulated this image is.”

“Definitely looks photoshopped!” another person chimed in. “The lightening strike on the right and the one under the far right horse look identical. The ear shape of the far right horse and far left horse are identical as well….”

In response to the stream of accusations, ABC Brisbane posted an update the next day stating: “A few people have raised the point that this photo has been digitally altered. We’re chatting with the photographer and will get back to you all.”

The following day, on October 24th, ABC Brisbane posted the following update with the results of its investigation:

Regarding the concerns of digital alteration, we sent David Pyle’s photo to social media intelligence agency Storyful, who “superzoomed the image on InVid and can’t see anything that looks overly unusual (ie evidence of photoshopping) – it’s not appearing as pixellated or glitchy, as a photoshopped image would likely be.”

They said the formation of the “riders” is not identical like one could imagine a photoshopped one would be.

We’ve also spoken with Mr Pyne about this photo. He told ABC the only change made to the image was the removal of a palm tree “because it was blurry”. He said he also fixed the colour because “it was too dull”.

Our colleagues at ABC Wide Bay asked Mr Pyle about his photo on Wednesday morning. My Pyle said he did not use cloning in his image. He said:

“One of the shots I had was just one horse, and then I had a camera in the middle and it had like four horses. One on the side had half.

“Everyone’s going, ‘it’s cloned, it’s cloned, it’s cloned’ … well it’s on my camera, it’s on my SD card so … if they say it’s been cloned they can have their own sort of thing.”

Pyle also stated that the photo was shot on his Canon 5D — one of three cameras he was using that night — at ISO 1200, f/2.8, and 30s.

Strangely enough, Pyle seems to have published a number of different versions of this photo on his own Facebook page that appears to contradict his assertion that he didn’t use cloning.

Here’s the version he published at 11:07pm on October 21st, the day before ABC Brisbane’s feature:

35 minutes later, at 11:42 pm, Pyle published the version featured by ABC Brisbane with the caption: “This shot got last night out off bundaberg qld it looks like horse riders in the clouds has a lightning hits down.”

We can see that the two base photos are the same due to the identical lightning strikes, except now there are two additional “horse riders” in the clouds and the trunk of the tree has been removed.

On October 25th, the day after ABC Brisbane reported that Pyle denied cloning the photo, Pyle posted this straight-out-of-camera version of the photo:

“Ok my followers this is a raw shot this only got watermark on it so you love it or some of you will hate it now there is no Photoshop on this at all enjoy and 1 1/2 horses,” Pyle writes.

We reached out to Pyle for comment, and he’s still sticking to his story:

“The picture I took with the 4 horse the only thing is missing is the tree I took out because it was blurry,” the photographer tells PetaPixel.

Perhaps Pyle didn’t technically use Photoshop’s Clone Stamp tool in editing out the tree in his photo, but from his admission that his original photo only had “1 1/2 horses,” it seems clear that the “horse riders” in the feature photo were “cloned” one way or another.

ABC Brisbane is apparently satisfied with Pyle’s original explanation and hasn’t posted any further updates to its Facebook post.


from PetaPixel https://petapixel.com/2018/11/01/photo-sparks-accusations-of-cloning-photographer-denies-denies-denies/

3 Tips for Choosing Between B&W and Color

Something I’ve always found difficult was knowing when an image should be converted to black and white and when it should be left in color. It’s one of the more contested discussions in photography and there really isn’t a “black and white” or cut and dry answer to it. After much trial and error, I’ve come up with three questions that I consistently ask myself when trying to determine if a color image is a good candidate for B&W.

Question 1: Does the image NEED color?

Some images need color in order to be effective and to accurately represent a moment in time. Color is fantastic at catching the viewers attention and depicting seasonality or setting from a time of day perspective. In the example below, if you remove the color from the scene, the entire story changes and you can no longer lean on the autumnal colors as the main subject of the photo. On the other hand, images that have a subdued color palette and don’t rely on color to portray the story could be good candidates for a B&W treatment.

Question 2: Are there interesting light or shadows?

B&W is great at showing off the tonal range in the light and shadow areas of your scene. Many times in situations similar to the image below, color can actually become a distracting element that takes the viewers attention away from the interesting light and/or shadows.

Question 3: Are there any interesting textures?

Now this is my favorite question! If you have an image that has interesting texture then it could most definitely be a great candidate for B&W. Images that are captured when the sun is low on the horizon, providing side light that rakes across your subject creating incredible textures – well this is where B&W shines the most in my opinion. When people think of B&W they think of a raw and gritty image that has a certain level of toughness associated with it and this is emphasized even more when B&W is applied to an image with interesting textures.

Although this isn’t an exact science and these questions are by no means the end all be all solution to identifying good B&W photos, they will certainly jump-start the creative thinking to help you identify what works best for a particular image, B&W or color.


P.S. If you enjoyed this video and article, you can find more by subscribing to my YouTube channel.


About the author: Mark Denney is a landscape photographer based in North Carolina. The opinions expressed in this article are solely those of the author. You can find more of his work on his website, Facebook, Twitter, and Instagram.


from PetaPixel https://petapixel.com/2018/11/01/3-tips-for-choosing-between-bw-and-color/

Flickr Limits Free Plan to 1,000 Photos, Upgrades Pro Members

After Verizon-owned Yahoo sold Flickr to SmugMug in April of this year, it seemed likely that changes would be coming to the service due to new ownership. Today the first major changes just took place: Flickr has downgraded its free plan and upgraded its pro plan.

The Downgrade of Free

Flickr’s free accounts will now be limited to storing a combined total of 1,000 photos and videos. Photos aren’t limited by resolution and are stored in their original quality.

Prior to this change, Flickr users on the free plan were given 1 terabyte, or 1,000 gigabytes, of free storage space at full resolution. Since 1 terabyte can hold 20,000 files weighing 50MB each (which is way more than most photos), this new limit of 1,000 files is clearly a downgrade for photo-happy Flickr photographers.

“Unfortunately, ‘free’ services are seldom actually free for users,” SmugMug says. “Users pay with their data or with their time. We would rather the arrangement be transparent.”

Flickr users who were around long ago may remember that prior to 1TB of free storage being announced in 2013, free users were limited to uploading 2 videos and 300MB worth of photos per month.


If you’re a Flickr free member who already has over 1,000 photos in your account, you have until January 8th, 2019, to download photos over the 1,000 limit. After that date, you will no longer be able to upload new photos to Flickr. And after February 5th, 2019, Flickr will begin deleting files that are over your 1,000 photo/video limit, starting from oldest to newest, until your account contains only 1,000 files.

The Upgrade of Pro

SmugMug is turning its attention to better serving paying customers, which makes sense because SmugMug’s own photo hosting service doesn’t have a free plan at all.

The Yahoo! sign-in that was introduced after Yahoo acquired Flickr will be phased out in January 2019, and Yahoo! accounts will no longer be required for access.

Pro users will continue to enjoy unlimited storage of photos and videos at full resolution and an ad-free experience for both themselves and their visitors. New “OG Pro” badges will be displayed to recognize long-time members.

Photos are now displayed at 5K resolution for any screen, “from smartphone to jumbotron,” SmugMug says. Videos can now be 10 minutes long, up from 3 minutes.

Advanced Stats now provide new analytics for photographers to peruse — you’ll be able to see which of your photos are trending and which have performed the best. All stats can be found in the Flickr mobile app.

There’s also new Premier Customer Service — Pro users will now receive priority assistance from a new dedicated support team.

Finally, Flickr is partnering with other companies to offer discounts to Pro members — companies like Adobe software, SmugMug portfolios, Peak Design bags and gear, and more.

Flickr Pro costs $50 per year, “hands down the best deal in photography,” SmugMug says.


from PetaPixel https://petapixel.com/2018/11/01/flickr-limits-free-plan-to-1000-photos-upgrades-pro-members/

6 Tips For Photographing Better City Scenes

6 Tips For Photographing Better City Scenes 1

Towns and cities can be noisy, busy, stressful and congested but provide excellent subjects for photography. Taking great photographs of cities is not easy so here are six ideas to help you capture city scenes:

1) City Skyscrapers

Urban photography offers a great opportunity to document a cities environment.

On a sunny day, most photographers choose to head out into nature, where the coast or a rolling landscape is usually only a short drive away.

However, if you opt for urban landscapes, there are a whole manner of worthwhile subjects where you can point your lens. Skylines, architecture, famous landmarks and bridges are all beautiful examples of city elements worth capturing.

Cities dominated by skyscrapers are visually exciting and provide a wealth of interesting buildings to view and photograph. You could find strong patterns, symmetry, dramatic lighting and different textures amongst high-rise buildings.

Look for architectural or urban features that create interest and use a wide angle of view to convey a grander sense of the scene.

6 Tips For Photographing Better City Scenes 2

Shanghai, China

2) A Nocturnal Cityscape

Cities are becoming more popular as destinations for short breaks. Overnight stays in cities provide an opportunity to photograph a nocturnal cityscape.

One key advantage of shooting a city at night is you can work in all kinds of weather such as rain, snow or light fog.

It is possible to do this because you are mainly focusing on elements that are characterized by darker tones with a few spots of color and light.

When capturing cities in the dark, you don’t need to concentrate on the usual shadows and tonal gradations that are relevant in the daytime. You work purely with light.

I suggest that you set yourself up before it gets dark so you can see what you’re doing and experiment with the changing light as it shifts from light to dark.

6 Tips For Photographing Better City Scenes 3

MILLENIUM BRIDGE, London

3) Reflected City

Many buildings and city landmarks are so photogenic that they can be too familiar a subject to photograph.

Instead of shooting the usual perspective of just buildings, concentrate on reflective surfaces that mirror back the surrounding architecture.

You can find reflections in a pool of water, a polished surface or shiny glass (reflecting abstract patterns) and the bonnet of a car parked on a rooftop.

6 Tips For Photographing Better City Scenes 4

Photographs of reflections are visually pleasing when executed correctly. To be most effective, select the maximum depth of field and aim to achieve an image that’s as sharp as possible.

4) City Scenes by Night

City centers become great light shows at night.

They give an array of color from buildings to lights of passing cars. One tip I recommend is you capture the energy and excitement of a nighttime scene by including a human element.

Doing so will make your images more dynamic and dramatic.

6 Tips For Photographing Better City Scenes 5

Radcliffe Camera

If you are shooting at night, you will need a slower shutter speed to capture the scene. Use this to your advantage by recording flowing traffic such as buses and taxis or colorful clouds.

These can add motion to your city scenes or a splash of color to supplement the buildings in the background.

6 Tips For Photographing Better City Scenes 6

Piran, Slovenia

5) An Urban Landscape – Day Shots of the City

Another way you can capture striking images of cities is to photograph the urban landscape.

Perspectives can be obtained from ground level or by capturing the city from above. Overlook a city from a tower or a rooftop. Find interesting patterns, contrasting buildings or views of street life to photograph.

6 Tips For Photographing Better City Scenes 7

University Church of Saint Mary the Virgin viewpoint

When shooting from high elevations, if you have to lean out for your shot, make sure it is safe to do so. Secure your camera strap around your hand or neck to keep it safe.

6) City Streets or Cityscapes From Afar

6 Tips For Photographing Better City Scenes 8

City streets provide intriguing and picturesque subjects such as human interest and variable light.

You may find yourself walking past a location every day and not realize its potential. Until striking shadows from the sun transform it into a great composition that brings it to life.

You don’t have to take pictures of city scenes only from close range. Take a step back and capture a wide shot of the urban landscape from afar. Seek out a viewpoint that allows you to obtain more context from an unusual angle.

Conclusion

Use these tips to go out and capture your best shots of city scenes and share your images in the comments below.

The post 6 Tips For Photographing Better City Scenes appeared first on Digital Photography School.


from Digital Photography School https://digital-photography-school.com/photographing-better-city-scenes/