When Photoshop was first introduced to the world in 1990 it could only do the most basic of image editing tasks such as clone a selection, crop a picture, and work with some filters such as Blur, High Pass, and Sharpen. However, for its time it was incredibly advanced and the ability to work with digital pictures in this manner was practically unheard of for desktop computers, most of which were still using black and white screens. It wasn’t until late in 1994 when version 3 hit store shelves that the program included a key feature which continues to be the foundation for nearly all image editing programs to this day – layers.
Understanding how layers work is essential for anyone who wants to upgrade from a program like Apple Photos or Microsoft Pain. But learning how to use them with all the hundreds of icons, buttons, and menu options competing for your attention in Photoshop, can seem completely overwhelming. Getting the hang of a few basic concepts will set you on your way to image editing success, and help you figure out many of the other options Photoshop has to offer as well.

Basic concept of layers
To wrap your head around the concept of layers, think back to when you were in grade school and your teacher worked out math problems on an overhead projector. She probably started with a sheet of transparent plastic that had equations printed on it and then used a washable marker to perform the required multiplication, division, or other operations to solve it. The bottom layer, the transparency itself, never changed but the teacher was free to alter what students saw on the projector screen by writing on top of the acetate layer.
You could even stack transparencies on top of one another and end up with a background layer and a few plastic sheets stacked on top of it. Each layer could be drawn or written on which would alter the final image shown to the students on the projector screen. But the layers existed separately from one another and could be edited individually without affecting the actual content of the underlying or overlying layers. Layers in Photoshop function in much the same way.
First layer – Background

When you open a picture in Photoshop the first thing you will see in the Layers panel is a background layer with a small thumbnail of your image on it. It’s always given the label “Background” and on the right-hand side of the panel is an image of a padlock. Photoshop uses this icon this to indicate that the image is to be the foundation on which all future edits are built but the picture itself is not to be altered.
It is the transparency sheet that your math teacher would write on; the edits and other operations you can perform on it are stacked one on top of the next, but the bottom layer is sacrosanct and never to be changed. Icons that let you adjust opacity, fill, blending mode, etc., are grayed out so you might be wondering just how to actually edit the picture. One place to start is by right-clicking on the background layer and choosing the “Duplicate Layer” option.

Duplicate layers
As soon as you create a copy of the Background layer a whole new world of creative possibility opens up. You now have access to tools like Opacity and Fill, you can change the Blend Mode, add Layer Masks, and hundreds of other options as well. The choices are staggering, and it’s important to remember that there is no one correct way of using layers in Photoshop. Each photographer has his or her own approach, and what works well for you may not be good for someone else. So don’t get caught up thinking you have to use a certain process when working with layers or anything else in Photoshop. The important thing is to find a solution that works for you.
How layers work
To dive a little deeper into the concept of layers and illustrate how they work, I’m going to start with the image of the husband and wife above. I’ll remove them from the garden in which they were photographed, and insert them into another location (new background). The first issue when doing any type of edit like this is that your computer doesn’t know that the people are separate from the background. It treats everything as one cohesive image but you can use layers in Photoshop to separate, remove, add, and otherwise edit the various parts of the picture.
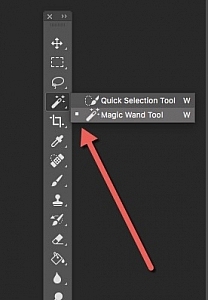 In the image above, the subjects are clearly distinct from the background with highly contrasting colors so an operation like this is pretty straightforward. But if your subjects blend in a little more with the foreground or background it can get a little tricky. Press the “W” key to access the Magic Wand tool. Then click [shift]+w until you end up with the Quick Selection tool (or you can access it on the toolbar see the screenshot to locate it). Now click and drag the Quick Selection tool around your subjects until they are outlined with a cycling dotted line that looks like black and white ants marching in a loop.
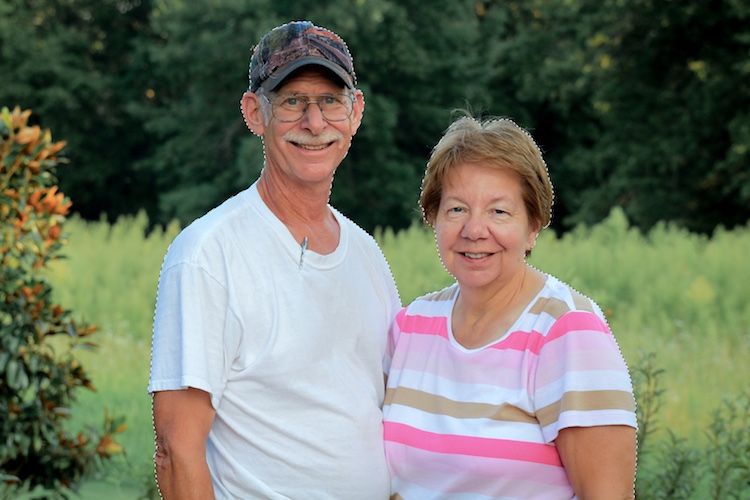
Refine the selection
If you try this operation and you aren’t quite getting your subjects selected how you want, you can use the Refine Edge (Select > Refine Edge in older versions, Select > Select and Mask in the newest Photoshop CC 2015.5) option to get your selection precisely how you need it. Once you are satisfied with your selection, choose Layer > New > Layer via Copy (you can also use the keyboard shortcut Cmd/Cntrl+J) and you will now see a third layer on the layer panel consisting of just the subjects and nothing else.

Now the real fun begins! Click the eyeball icon to the left of all the layers except the new one with just your subjects and you will see everything else disappear.
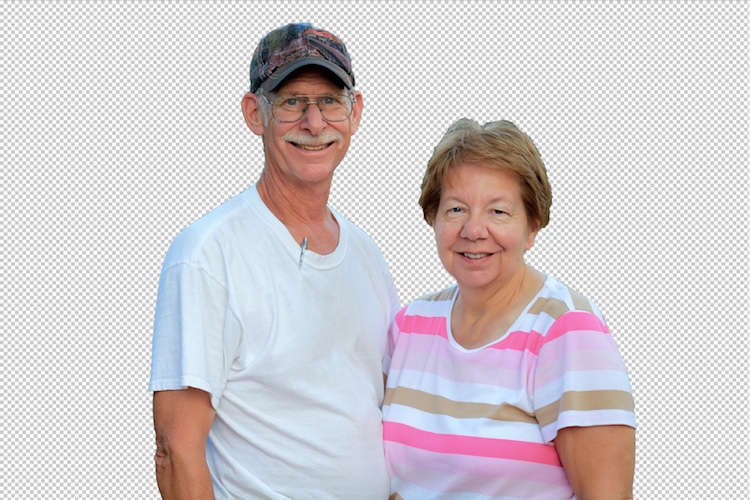
How Photoshop sees layers
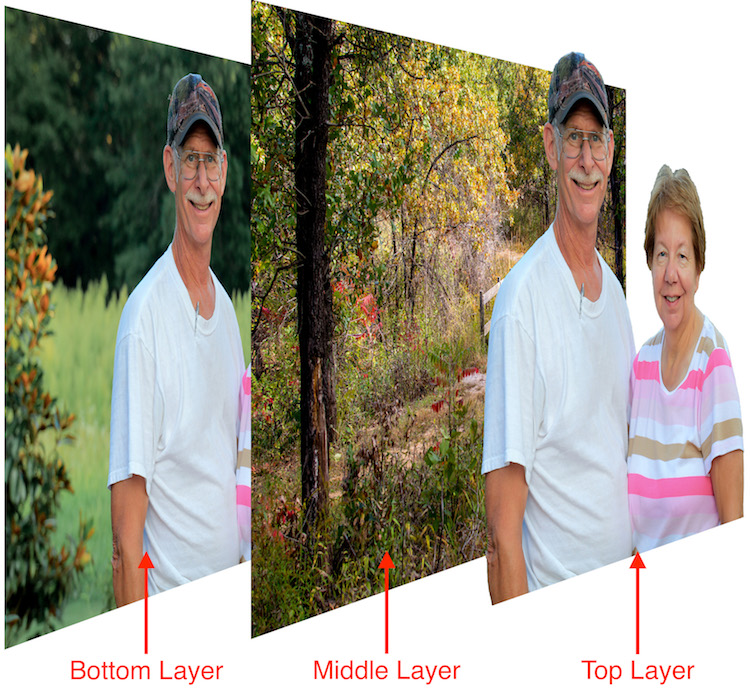
Pause for a moment and consider what is happening here. Your computer now sees the image not as one cohesive whole, with two people in front of a meadow, but as two distinct layers. One is a layer with just the people and the other layer below that is the background (the meadow). Technically there is a third layer, the locked background layer, but we’re ignoring that since we don’t do anything with it.
Add a new image as a new layer
To move the people to a different location all you have to do is insert an image as a new layer and place it below the layer with just the people. For this example, I’m going to put the couple in front of a photo I took with some trees and a bridge crossing a stream.
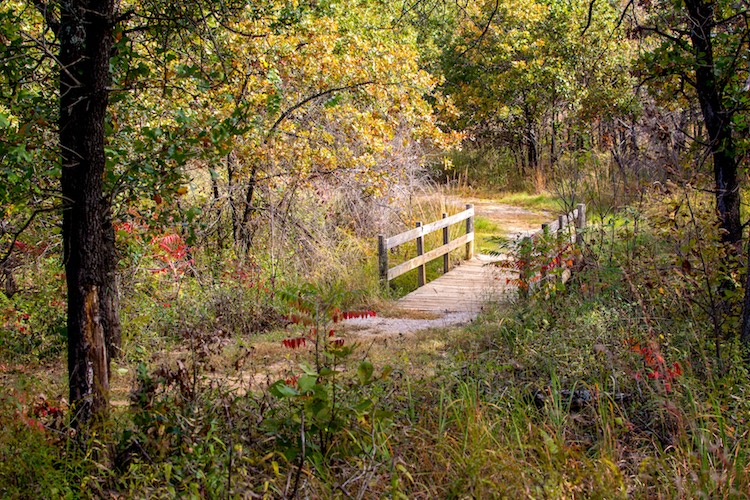
In Photoshop you can drag and drop images directly into your composition or use the “File > Place” command. When I insert the image of the bridge into the document with the couple I now have a new layer that I can manipulate like all the rest. You can also start to see the vertical structure of layers and how they are mixed together.
The Layers panel functions from a top-down perspective in that whatever layer is at the top of the panel is literally the top-most layer in the entire composition. Layers below it are arranged in descending order. In this example, it’s essential that the layer with the two people appears as the top-most layer in the Layer panel itself, followed immediately by the new background.
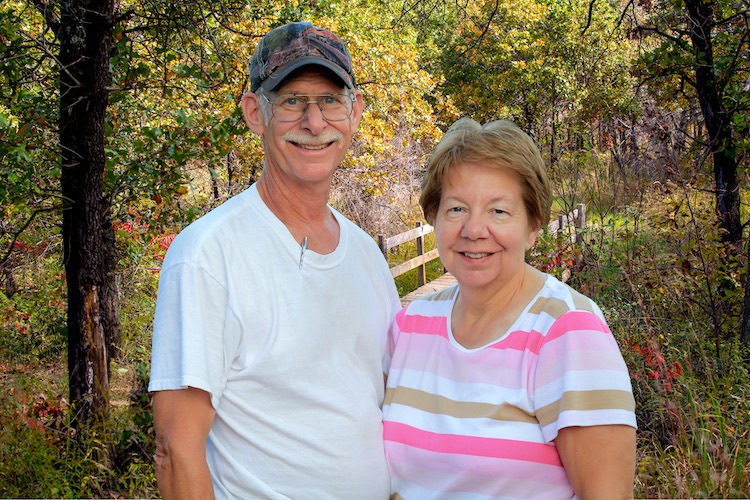
Voila! The couple now appears in an entirely different location, all with just a few mouse clicks in Photoshop. If you are still trying to wrap your head around the concept of layers, here’s an extruded view of what you are seeing in the above image.
Cover your bases, keep all layers
I could remove the bottom layer entirely but I left it in place because I don’t like to delete any layers when making a composite image like this. You never know when you might need to go fetch an errant strand of hair that you overlooked from the original layer, or use it for a bit of color correction later on down the line. If I want I can add more pieces to this image just by using layers and stacking things on top of each other, and using layer masks to refine and edit things even more.
You can also edit the new background separately from the people such as adding a blur effect or desaturating it slightly. If you convert to a Smart Object any editing you do on that layer can be altered or changed later. But if you apply it directly to the layer it cannot. Make sure to match color balance when combining images for a more realistic look.
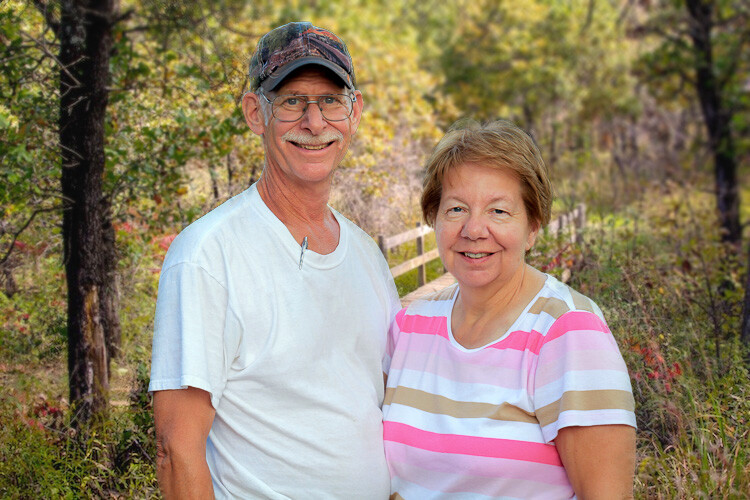
Additional adjustment layers have been applied to the background to shift the color, blur it in some areas, and darken the edges.
Conclusion
This type of switch-out-the-background edit is just a small taste of what you can do when using layers in Photoshop. Add empty layers by going to “Layer > New > Layer” and then using the Brush or other tools to start creating in them. You can re-order layers by clicking and dragging them up and down in the Layers panel. You can show and hide layers, adjust the opacity of a given layer, choose how one blends with the layers below it, and even create special Adjustment Layers that you can use to edit colors and add effects to other layers.
I have only scratched the surface of what layers are capable of doing. Hopefully this gives you a basic understanding of what this powerful feature is all about. Do you have any tips or tricks for using layers that I missed? Please share them in the comments section below.
The post An Introduction to Photoshop Layers Possibilities and Properties by Simon Ringsmuth appeared first on Digital Photography School.
from Digital Photography School http://digital-photography-school.com/introduction-photoshop-layers/
No comments:
Post a Comment