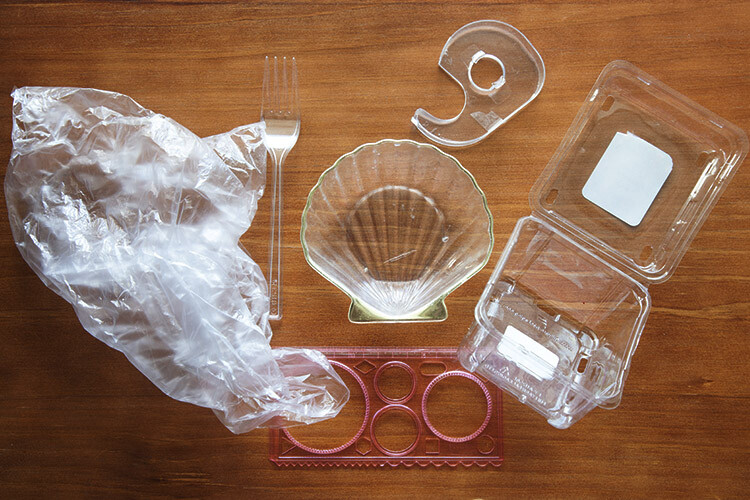
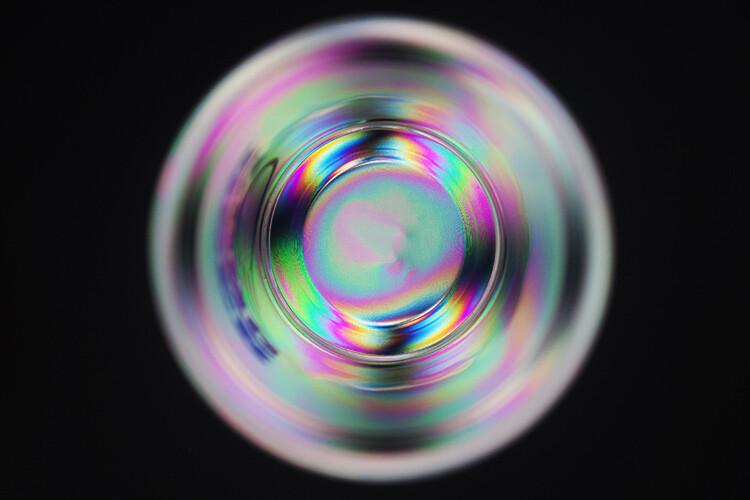
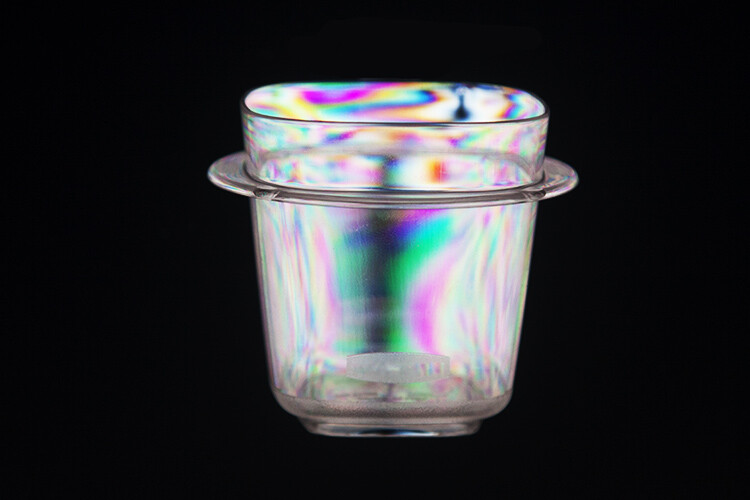
A cornerstone in modern manufacturing, plastic is an amazing thing. Look around and you’ll see an abundance of plastic materials used in an endless variety of products. From pens to planes – yep, even modern commercial aircraft are cutting down on weight by introducing plastic composite components – plastic has revolutionized the way we live. And while much of the plastic we encounter is discarded after the first use – this photography tutorial will give you a good reason to hang onto those plastic knives and forks. By using a polarizing filter, some plastic materials and a computer screen, we can reveal a surprisingly beautiful side to the internal stresses of hard plastic material.

Supplies you will need:
- Polarizing filter or polarized sunglasses
- Computer screen
- Camera
- Clear sticky tape
- Sheet of glass
- Tripod (optional)
- Transparent plastic objects
Setting up
In basic terms, what we’ll be doing is sandwiching a plastic object between a polarized light source and an on-camera polarizing filter. Polarizing filters that screw into the front of a camera are used by photographers to add contrast and reduce glare.

Don’t have a polarizing filter? Use your polarized sunglasses in a pinch.
If you don’t have a polarizing filter, a pair of polarized sunglasses will do the trick. Simply position the sunglasses so that one eye sits over the front of the camera lens like a filter. Keep in mind that the shape of the eyepiece will probably prevent complete coverage of the front lens element. If this is the case, some cropping may be required in Photoshop later. You may also need to do some sticky-taping to ensure the glasses sit correctly.
Now gather some clear plastic materials to photograph. Objects like plastic bags, sticky tape dispensers, plastic food containers, clear plastic cutlery and packaging all turn out well. Basically, any cheap, transparent plastic will work to some degree, so have a good scavenge around!

Finding good backlighting
Next, you’ll need a polarized light source to shine through the transparent plastic material. Conveniently, modern desktop and laptop computer screens emit linearly polarized light. First, you need to maximize the white light emitting from our computer screen. To do this, download a plain white background from Google Images. Once downloaded, open the file in a default image viewer and set the image to Full-Screen Mode. This will spread the white backdrop over the entirety of the functional computer screen, providing the backdrop for our polarized objects.
Once downloaded, open the file in a default image viewer and set the image to full-screen mode. This will spread the white backdrop over the entirety of the functional computer screen, providing the backdrop for your polarized objects.

Set the viewing mode of a clean white image to full-screen so that it completely covers the screen.
Arrange the subjects
Once the white background is set, you can start arranging your plastic items on the computer screen. If you have a choice between using a desktop or laptop computer, I recommend going with the laptop. Unlike a desktop computer, you can turn an open laptop upside down, so the screen lays flat on a surface. This turns your laptop into a home-made light box of sorts, perfect for sitting your plastic objects on.
Keep in mind however that laptops with touchscreen capabilities may not work as effectively. From my own experience, these laptop screens deliver far less pronounced results. Note: A large tablet or iPad may work as well.

Viewed through a polarizing filter, this transparent stencil is placed on the top of a touchscreen laptop. While the polarizing effect can still be seen, the finished image falls flat.
Workaround for desktop screens
Because the screen is upright, using a desktop computer for this project can seem a little trickier. Rather than tipping a full sized computer screen on it’s back, I’ve been fixing my plastic materials to a sheet of glass with tiny pieces of clear sticky tape. Easily recovered from old photo frames, the glass sheet means you can avoid sticking tape directly to your computer screen, without blocking out any light. For best coverage, a larger sheet of glass is preferable, just make sure that it’s dust free. Once you are finished taking your photographs, you can remove any evidence of the sticky tape with the “Clone Stamp” in Photoshop.
For best coverage, a larger sheet of glass is preferable, just make sure that it’s dust free. Once you are finished taking your photographs, you can remove any evidence of the sticky tape with the “Clone Stamp” in Photoshop.

I’ve affixed this transparent stencil to a pane of glass to keep it upright against the computer screen. The small amount of tape can be removed easily in Photoshop later.

In this image, a small piece of the clear sticky tape can be seen.

Taking advantage of the solid black background, any trace of the sticky tape can be removed by using the paintbrush tool with a black swatch selected
Getting the shot
Once you have assembled your objects against the computer screen, it’s time to see some results! Grab the camera you outfitted earlier with either the polarizing filter or the polarized sunglasses. While looking through the viewfinder (or LiveView Mode) point the camera at your plastic assemblage. Like magic, the boring clear plastic materials are filled with a beautiful array of colors.
Change the angle – change the background
Depending on the angle of the polarizing filter, you’ll notice that the backdrop of your image ranges from the white computer screen to jet black. The degree of polarization you see through the lens is dictated by the angle of the filter in relation to the wavelengths emitted by the computer screen. This means that by changing the angle of the polarizing medium, you can adjust the brightness of the computer screen without impacting the color of the plastic objects.
Simply hold the camera in one hand (or use a tripod) and use the other to slowly rotate the filter around. The same effect can be achieved by manually tilting the polarized sunglasses from side-to-side.

An image of a pretty shell shaped container I had on my dresser. The polarization effect highlights the stresses in a plastic material, rendering them as beautiful arrays of color.

The same shell container, this time with the filter angled so that the white light passes through to the camera sensor, rendering a white background
Your turn!
Now that you’ve got the basics, it’s time to raid the recycling bin! Post your results below and have fun.


The polarizing effect caused this plastic bag to take on a rugged, mountainous appearance.


The post How to Make Funky Colorful Images of Ordinary Plastic Objects Using a Polarizing Filter by Megan Kennedy appeared first on Digital Photography School.
from Digital Photography School https://digital-photography-school.com/make-funky-images-plastic-objects-polarizing-filter/
No comments:
Post a Comment