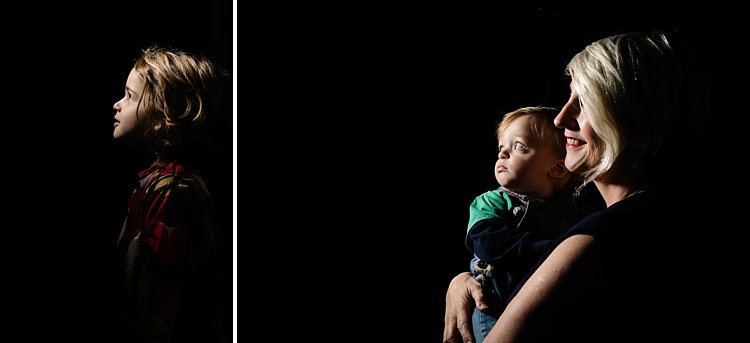
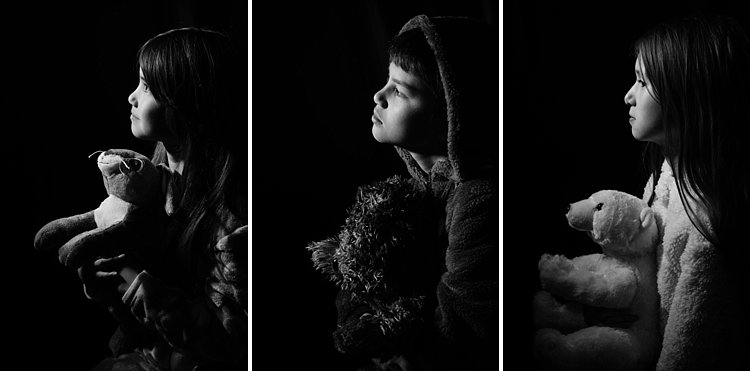
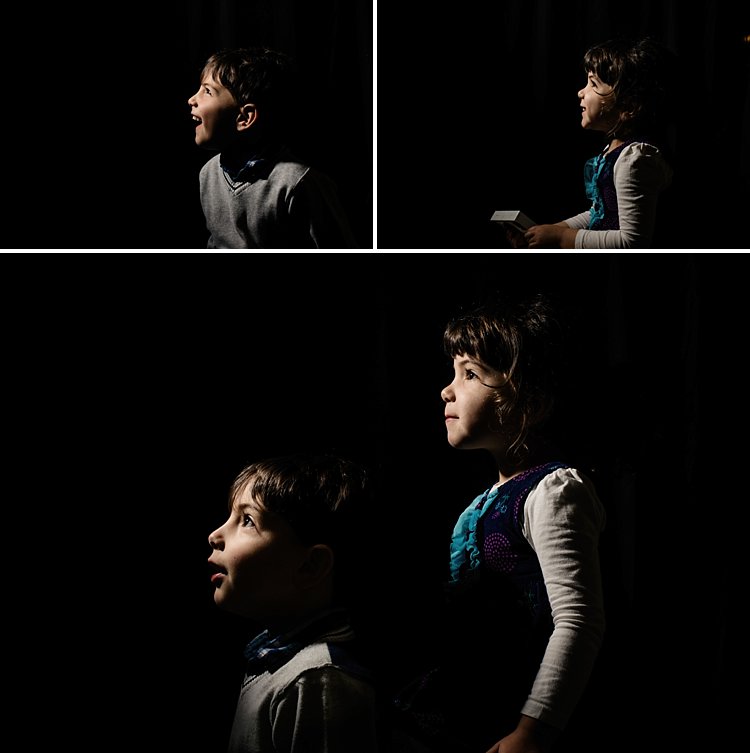
In this article, I will explain how you can use a transmitter/receiver, or transceiver system to achieve simple dramatic portraits using only one flash. Below is a step-by-step guide on how to get you started.
Background
I used to fear using anything other than natural light. One of the reasons was that I had a notion that using artificial lights such as off-camera flash and strobes is too difficult and requires deep technical knowledge. Well, yes and no. To master it, you have to understand lighting ratios and learn to make mental calculations of light from various sources and suchlike. But to start using it, not really.
My first experience of off-camera flash was using the Creative Lighting System (Nikon) capability between my speedlight and my camera. Most of my early attempts were unsuccessful especially with the limitations of the line of sight infrared system. It was unreliable too, especially when shooting under pressure or caught on the hoof. I also used overexposed my light with my very untrained and inexperienced eye when I was just starting out.

Wireless triggers
Enter wireless radio transmitters and receivers (or transceivers) such as the Pocket Wizard, CyberSyncs, brand’s own (Nikon and Canon) and the super affordable Yongnous. A transmitter which is connected to your camera sends the message to the receiver which is attached to the flash unit. Transceiver units, on the other hand, can act as both receiver and transmitter so that you can use them on either the camera or the speedlight but you would still need one unit to attach to each piece of equipment.
These wireless transceivers are a game changer without a doubt. They are simple to use and are reliable most of the time as well. I use Cybersyncs for my studio strobes and Yongnous for my speedlights and find the Yongnous are incredibly reliable and user-friendly with hardly any misses. However, the Yongnous cannot be used for strobes.
#1 Choose the look and mood for your portrait
Do you want super dramatic low key portraits or the other end of the spectrum – high key, bright and airy? The mood of your picture will dictate your background and of course the camera and flash settings. I have chosen a black background for these portraits to achieve a high contrast between the brightest parts of the image and the shadows. This will keep the overall mood dramatic and the lighting low key with plenty of black areas.
#2 Set up your equipment
If you have transmitter and receiver units, attach the transmitter to the hotshoe of your camera while the receiver needs to be attached to the flash (speedlight or strobe). If you have a transceiver, this can go on either camera or flash but you still need two units, one on each piece of equipment.
It’s also a good idea to put your flash unit on a light stand. I used a studio strobe mounted on a light stand but attached it to a boom arm for more flexibility in angling the light. Note: A boom arm is not necessary at all for a simple beginner setup. Without a light stand, you can always mount your flash on a cabinet or steady surface, making sure it doesn’t topple over. Most speedlights come with little plastic feet that are handy for this purpose.

#3 Modify your light
One of my rules is to always modify the light. The only time I shoot with a bare flash is when I use it as a kicker light at wedding receptions or to light a backdrop. At all other times, I will always modify it somehow or bounce it to maximize the softness of the light or to minimize the harshness depending on the situation.
For this look, I wanted the flash to point directly at the subject, in a narrow beam and not have any spill onto the background. A gridded snoot would do the job controlling the light direction, but I didn’t have one. Plus I probably would have found that the light was still a bit harsh without further modification. I ended up McGyvering my own modified snoot using a black card and the diffuser panel of a 5-in-1 reflector. I twisted the reflector (like you would when putting it away) so that it was only a fraction of its size and I then had a 3-layer diffusion panel. This was taped to the strobe and with black card wrapped around it to direct the light onto my subject like a beam.
There are two factors that are crucial for getting soft light; the distance between your subject and the light and the size of the light. The closer the light is to the subject, the softer it is. The larger your light source is, the softer it will be. My light source was not very big at all, so to leverage maximum softness I decreased the distance to the subject. The light was positioned about an arm’s length away from the subject, quite high up at a 45-degree angle. This was to mimic natural light coming from a high window.
#4 Try various settings
I wanted to shoot at f/8 so I metered the flash. You don’t require a handheld light meter to do this, by the way, you can just start with a few trial and error test shots to find the correct setting. I started off with the lowest power on my strobe but ended up cranking it up as the 3-layer diffusion cut out quite a lot of the light. My settings for these were: f/8, 1/60th, ISO 400 and my strobe power high at 7. The strobe settings will vary depending on the brand you are using.

This is just one of the many ways you can create portraits with one flash. Try it and experiment with other angles, moods, and light settings and you may be amazed at what one light can do!
Share your portraits here too in the comments below.
The post 4 Beginner Tips for Creating Dramatic Portraits with One Flash by Lily Sawyer appeared first on Digital Photography School.
from Digital Photography School http://digital-photography-school.com/4-beginner-tips-dramatic-portraits-one-flash/
No comments:
Post a Comment