
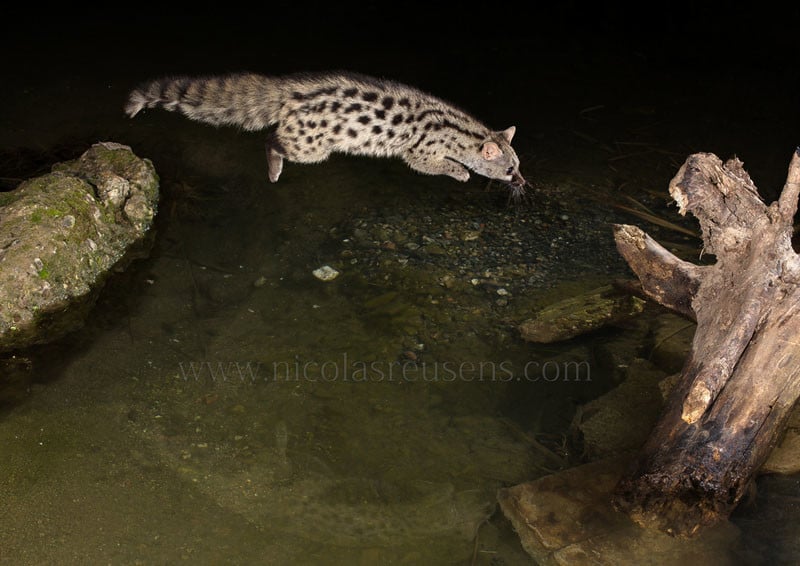
The photo above of a wild genet is a single 73-second exposure that took many hours, tons of patience, and a bit of technology to capture. In this post, I’ll share how I combined wildlife photography with light painting.
I have been working with the wild genet for almost 3 months now. After dealing with photo permits, I was allowed to mount my gear in the wild very close to Barcelona city (about 40 minutes by car).
First came the field work, mounting trail cameras to get an exact idea of where the specimens liked to move around and their favorite time in the night. Then I had to mount my gear for about two weeks in order to get them used to tripods and flashes (without turning anything on).
After that, I started to shoot flashes with my infrared barrier just to get them used to that kind and quantity of light (always at minimum power — I wouldn’t need more for my high speed photography).

Rain, storm, and dust were my enemies, but everything could be sorted out with plastic bags covering it all and a few stones here and there to get the gear solidly attached to the ground.
Then finally, I started getting the pictures I wanted, and when the results came I wanted more and more, so I tried to keep raising the bar and try out new stuff, like jumps.
Once jumps were achieved, I had some more ideas I wanted to express. I wanted to get a picture of a wild genet jumping through a light circle. And a light path. Or frozen in mid-air surrounded by soap bubbles. Or maybe crossing a cloud of smoke while jumping?
The most difficult part was trying all that with one single exposure. After some head scratching, I came up with a solution.
Using a special infrared barrier made for me by a friend, I would get the picture of the animal perfectly frozen in mid air. And with the help of this technology I would be able to add the required amount of time to the exposure in order to get out of my hide, take the LED torch, the smoke, or the correct tool and get the job done.

My infrared trigger has two sensors. The first sensor, when activated, triggers the camera in bulb mode. Then the genet jumps and crosses the second sensor that fires my 6 flashes while the bulb is still working. The infrared trigger has a knob to choose the preferred amount of time.
Say I used 90 seconds. After this second sensor activates the flashes, I would have 90 seconds to leave my hide (around 10 meters away from the scene), get to the spot and paint with light or whatever other crazy tool I used. Then the barrier finishes the bulb and closes the shutter.
Sounds easy, but I can assure you it’s not!
Also, when you get out of the tent where you are hiding the animal runs away from the scene. But the most difficult task was painting in the air without knowing exactly what the genet’s path was through the air. Here are some photos I created using this technique:


About the author: Nicolas Reusens is a nature, wildlife, social, and landscape photographer who lives in Barcelona, Spain. He teaches photography workshops in Costa Rica. You can find more of his work on his website.
from PetaPixel http://petapixel.com/2016/06/14/combining-wildlife-photography-light-painting/
No comments:
Post a Comment