I love Lightroom, and use it for the vast majority of my portrait editing. You can achieve a wide variety of portrait effects in Lightroom, from harsh and grungy, to soft and dreamy. My technique varies depending on the kind of portrait I’m editing, although the workflow remains consistent.
The photo I’ve selected for this exercise, is one you can easily replicate at home. It was shot indoors, with a large window as the only light source, and is one of a series shot in the same location.
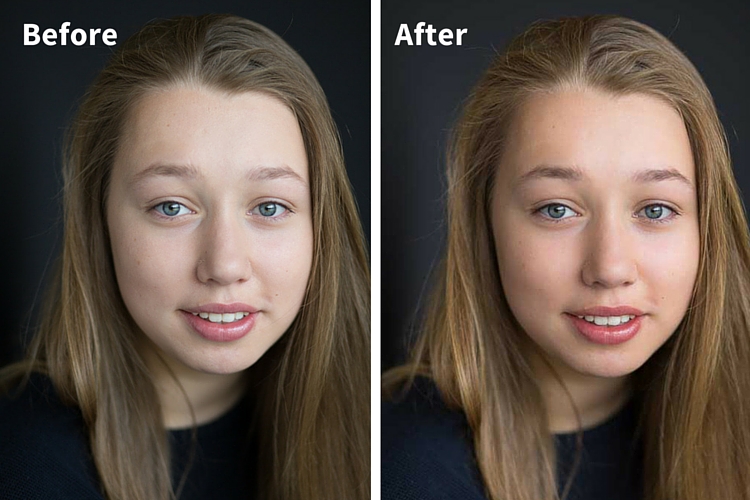
One of the great features of Lightroom is the ability to sync settings. It’s a huge time-saver when you have a series of images, all shot in similar conditions. Once you are happy with the general settings (white balance, shadow-highlight ratio, etc.) of one image, you can sync the rest of the images in the series, with the same settings. After that, you’ll only need to fine-tune the others.
This before image is too cool for my liking, and there is not enough separation between the model’s hair and the background. I am also going to smooth out her skin tone, and bring a bit more sparkle to her eyes.
As you work through each step on your own image, play around with the sliders to see what effect each one of them has.
Step #1: Import your file
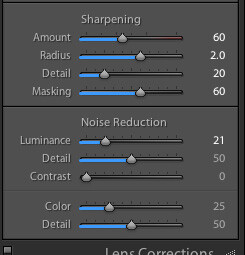
Sharpening preset
In the LIBRARY module, import your image into Lightroom. I have created a custom sharpening preset (shown here), which I find works with the majority of my portraits. I apply this preset upon import – a handy shortcut, especially when you’re importing a large number of images at once. It’s easy to create your own presets in Lightroom, read this tutorial How to Create Your Own Lightroom Presets on dPS, that shows you how.
To apply a preset on import, go to the righthand panel in LR, to the tab labelled “Apply during import”. Go to Develop settings > user presets, then click on the preset you wish to apply.
Once you have imported your file, go to the DEVELOP module.
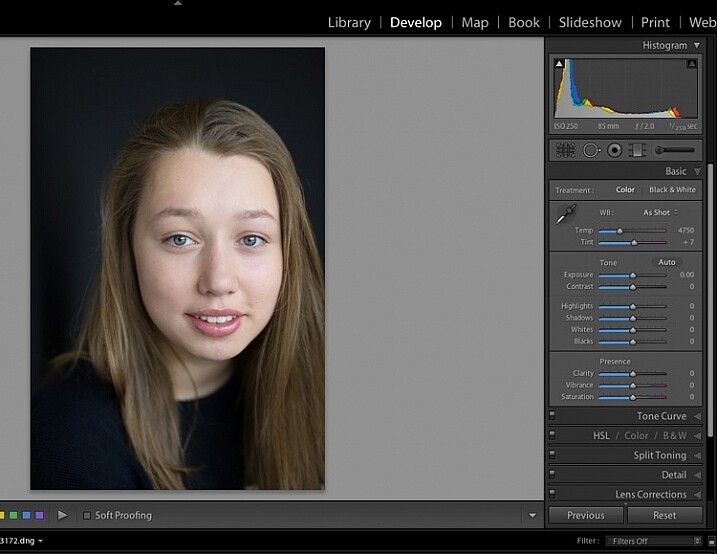
Import your file.
Step #2: Adjust the white balance
The colour tint in this photo is a bit cold. There are a number of ways to adjust the white balance. If there was a neutral wall or surface in this photo, you could use the eyedropper tool. In this case, there isn’t a neutral reference, so I have moved the sliders under the white balance section to give the image more warmth.
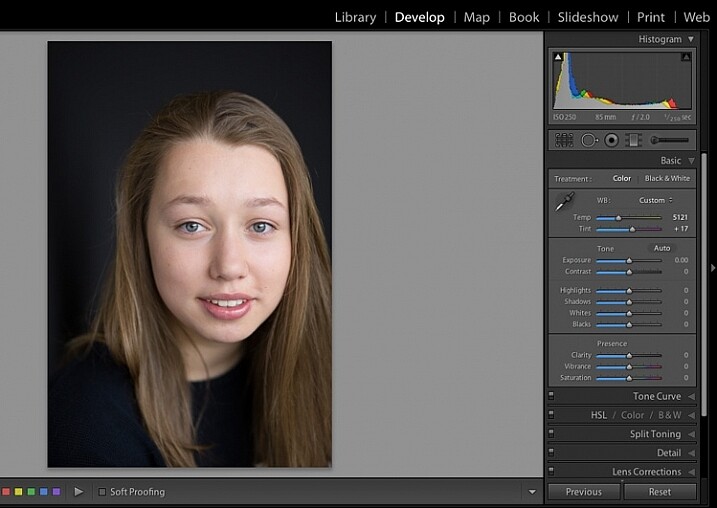
Correct the white balance.
Step #3: Adjust highlights and shadows
The model’s skin tone is a little too light, and her hair and the background are too dark. To redress the imbalance, pull back the highlights and lighten the shadows. You can fine-tune this later if necessary.
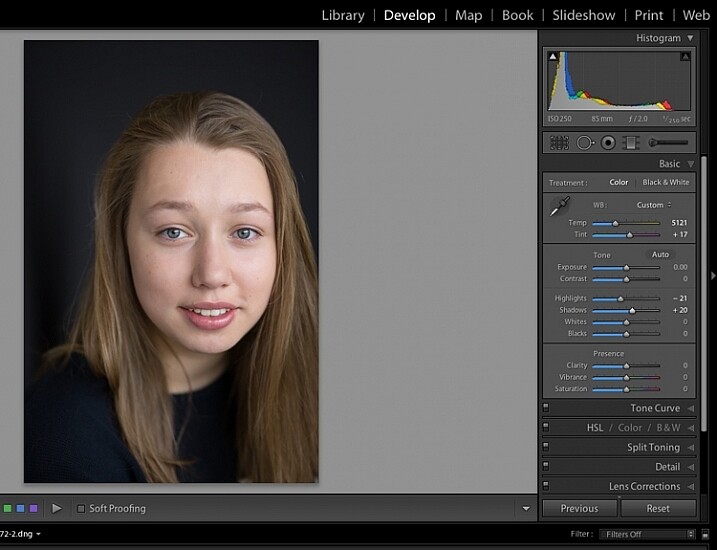
Adjust highlights and shadows.
Step #4: Increase vibrance and saturation
The image still looks a little dull. Use the sliders under the presence tab to increase the vibrance and saturation, and move the whites slider up to give your portrait a nice clean look. Now it’s starting to look like my model’s real-life skin tone.

Increase vibrance and saturation.
tep #5: Crop your image
You can crop at any stage. I’ve cropped this image for a tighter, better-balanced headshot.
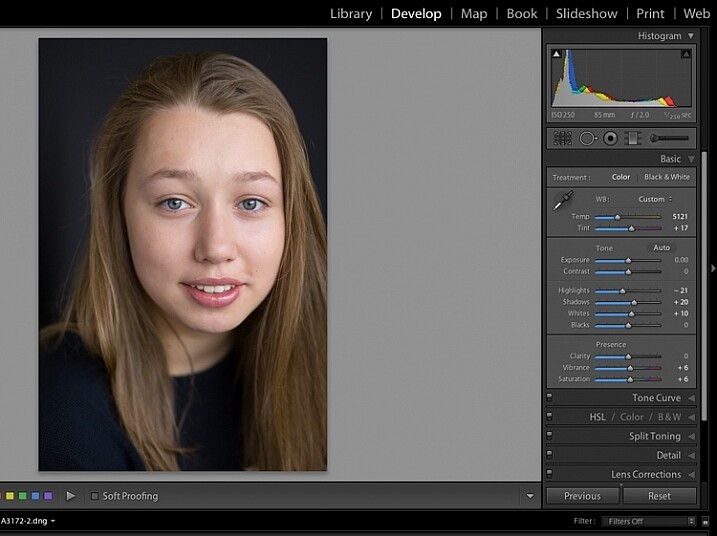
Crop your image.
Step #6: Soften the skin
Zoom in to take a closer look at the skin. This model is very young with almost flawless skin. Usually I wouldn’t do much, if any, softening with such great skin. However, for the purpose of this exercise, I will.
Select the brush tool. You can load your brush with any adjustments you want to apply. Although there are brush presets you can use for skin softening, teeth whitening, etc., I find them too heavy-handed.
Set the clarity slider down to around -35 to -40, and the (contrast to +35, and the Highlights to +15 or so – this will help maintain contrast and keep the face from looking flat) sharpness up to +20. This will vary according to your subject’s skin, and the kind of effect you want to achieve. In this example it will just even out the skin tone and give it a soft, glowing appearance. A mature person photographed in stronger light, will require a different treatment. The lower the clarity slider, the softer the skin will appear. For a grungy look, increase the clarity slider.
Reducing the clarity tends to flatten out the image, so you can increase the contrast, deepen the shadows and increase the highlights to balance this out. Keep the feather and flow at 100%, and brush all over the face with a large brush.
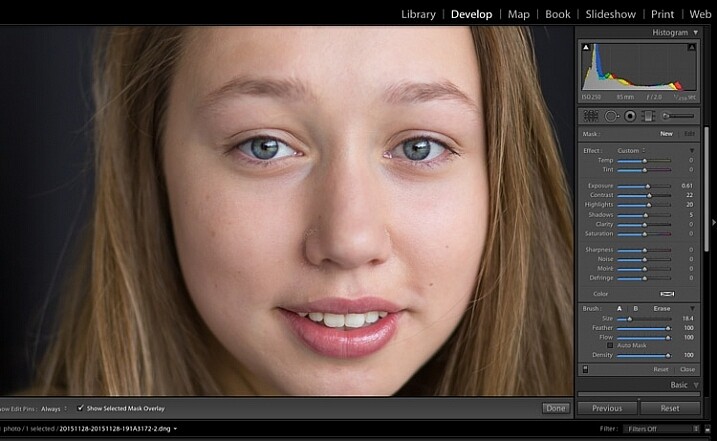
Zoom in close to look at the skin.
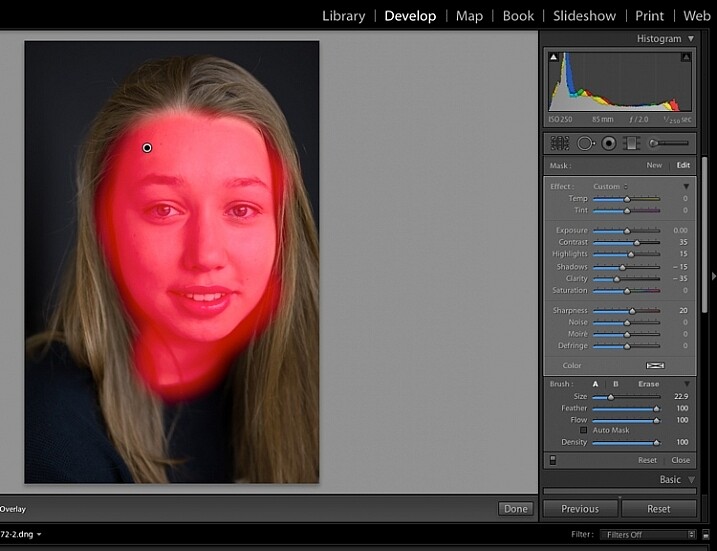
Brush all over the area with your adjustment brush.
Step #7: Fine-tune your adjustments
Underneath the image, check the box “Show selected mask overlay” (or use the keyboard shortcut, O) to see exactly what parts of the image your brush adjustments have touched. Often you’ll find it has covered the eyes and mouth, which is not desirable. Still using the adjustment brush, click on the erase brush tool, and remove the brushed-on effect from around the eyes, mouth, and hair.
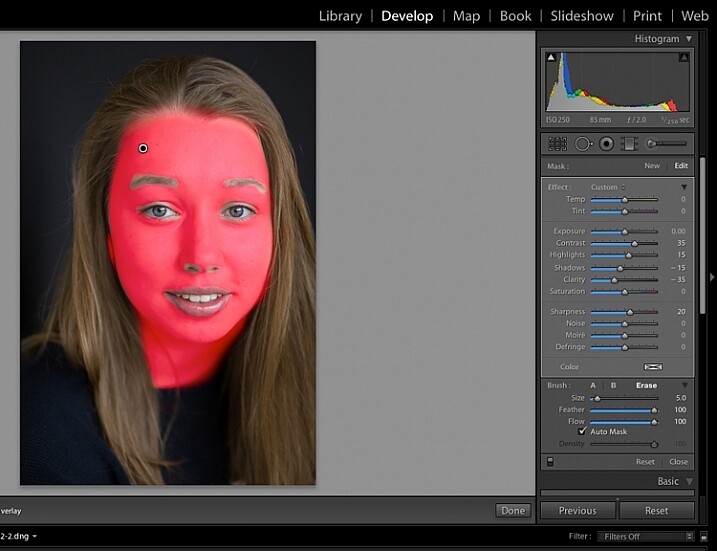
Brush off the adjustments from unwanted areas.
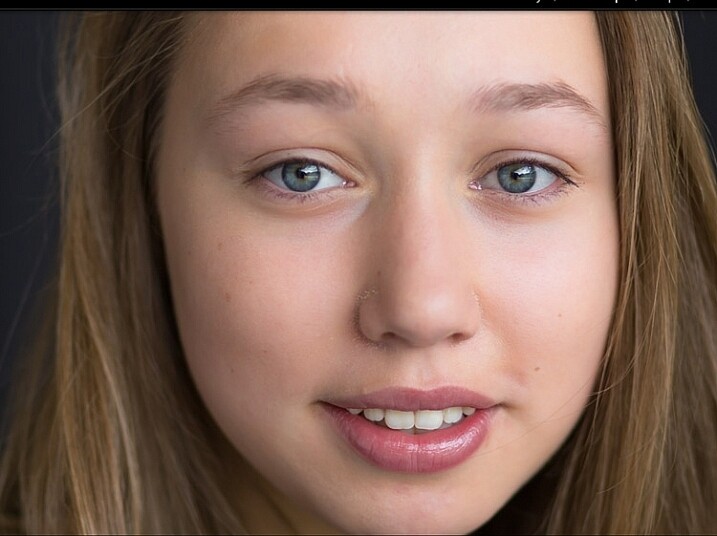
Here are the adjustments so far. Looking good.
Step #8: Brighten the eyes
Zooming in even closer, then use the Adjustment Brush to add clarity and sparkle to the eyes. Note that by increasing the clarity, you also make the affected part of the image darker. Compensate with your exposure slider.
In this photo, I also increased the saturation of the iris a little to enhance the blue of the model’s eyes. Be sparing with this technique to avoid an unnatural look.
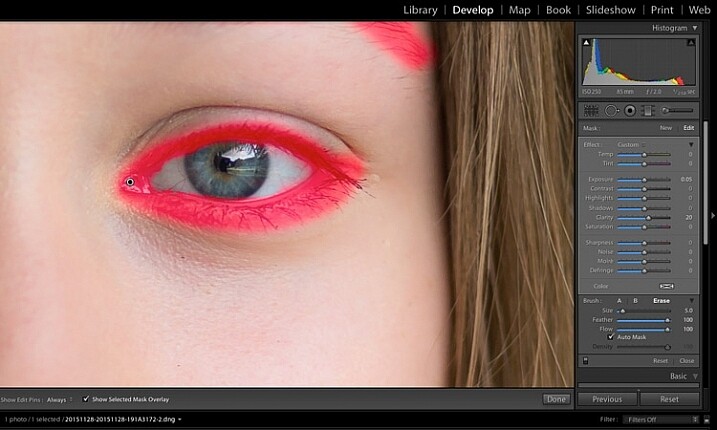
Use the brush tool to sharpen the outline of the eyes.
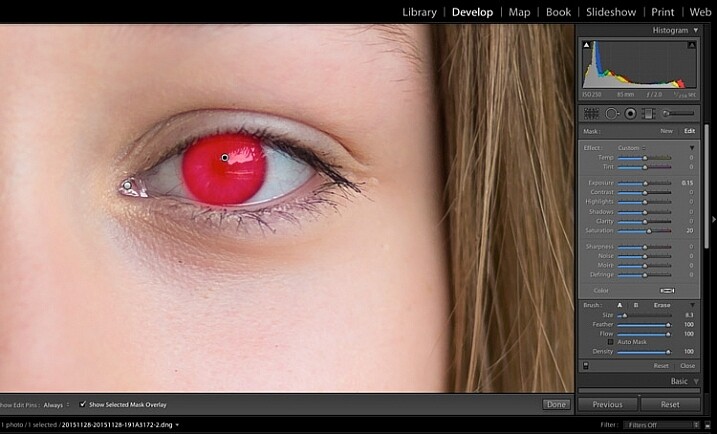
Treat the iris separately.
Step #9: Add colour to the mouth
Moving on to the mouth area now. Again, this model doesn’t need any work on her lips or teeth; this is for the purpose of demonstration. Using the same technique as with the eyes, brush on clarity and increase saturation. I have also moved the temp and tint sliders up to alter the hue of her lips.
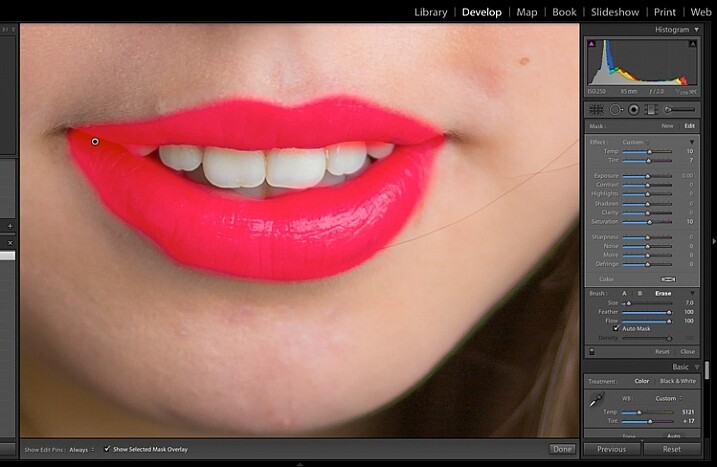
Brush over the lips to add colour and clarity.
Step #10: Whiten the teeth
To lighten teeth, use the brush tool with the saturation slider decreased, and the exposure slider increased just a little. As with the eyes, be sparing with this step.
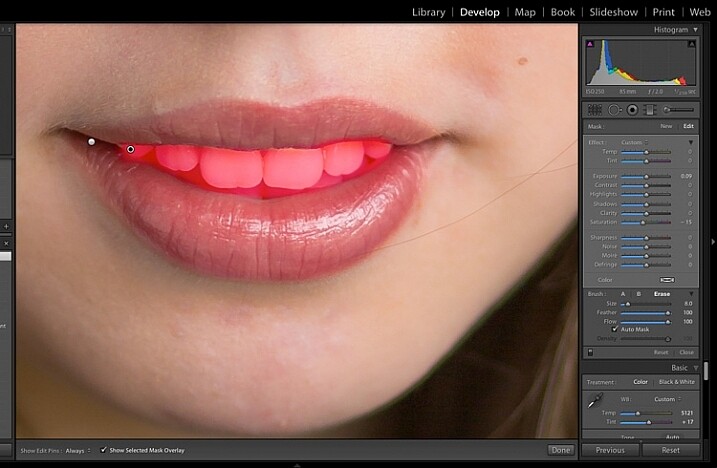
Lighten or whiten the teeth.
Step #11: Lighten the hair and background
Finally for this image I have lightened the hair and background to reduce contrast between her face and the background, and to give separation between hair and background.
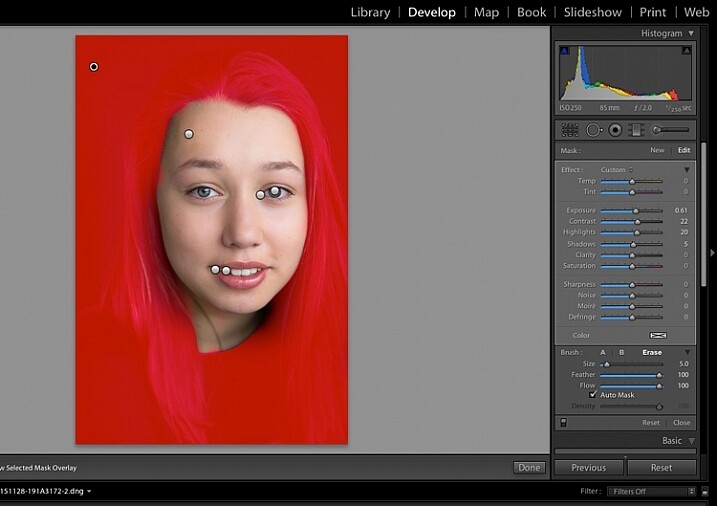
Finally, lighten the hair and background to give separation.
The final image is a vast improvement on the SOOC (straight out of camera) image.
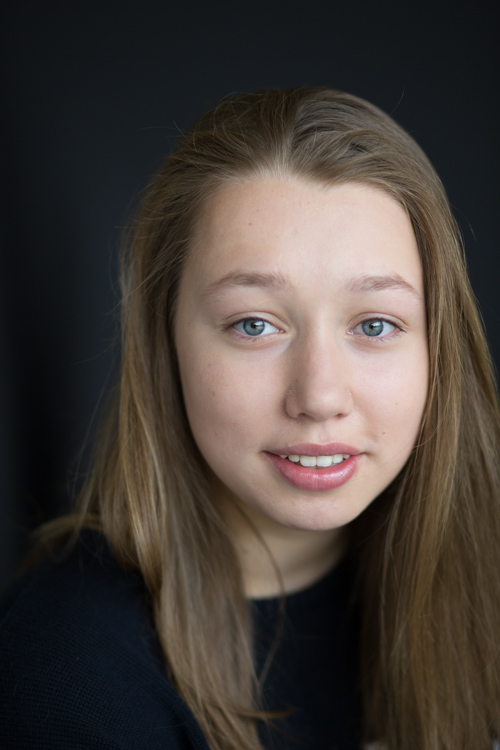
Before Lightroom adjustments. |
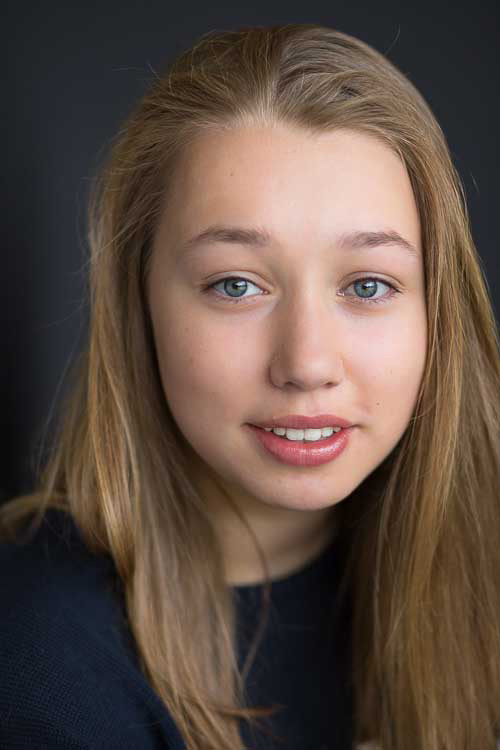
After all Lightroom adjustments. |
Over to you!
Lightroom editing is as much about personal preference as your shooting style, and my workflow and style represents just one approach of many. Share your tips and tricks (and, of course, questions) in the comments section below.
The post 11 Steps for Basic Portrait Editing in Lightroom – A Beginner’s Guide by Karen Quist appeared first on Digital Photography School.
from Digital Photography School http://digital-photography-school.com/11-steps-basic-portrait-editing-lightroom-beginners-guide/
No comments:
Post a Comment